- Made by AppCoda
- Contact us / Support
- Tweet this book
- Preface
- 1. The Development Tools, the Learning Approach, and the App Idea
- 2. Your First Taste of Swift with Playgrounds
- 3. Hello World! Build Your First App in Swift
- 4. Hello World App Explained
- 5. Introduction to Auto Layout
- 6. Designing UI Using Stack Views
- 7. Introduction to Prototyping
- 8. Creating a Simple Table-based App
- 9. Customize Table Views Using Prototype Cell, Diffable Data Source and Dark Mode
- 10. Displaying Alerts with UIAlertController and Handling Table View Selection
- 11. Object Oriented Programming, Project Organization and Code Documentation
- 12. Table Row Deletion, Custom Action Button and MVC
- 13. Introduction to Navigation Controller and Segue
- 14. Detail View Enhancement and Navigation Bar Customization
- 15. Navigation Bar Customization, Extensions and Dynamic Type
- 16. Working with Maps
- 17. Basic Animations, Visual Effects and Unwind Segues
- 18. Working with Static Table Views, Camera and NSLayoutConstraint
- 19. Working with Core Data
- 20. Search Bar and UISearchController
- 21. Building Walkthrough Screens with UIPageViewController and Container Views
- 22. Exploring Tab Bar Controller and Storyboard References
- 23. Getting Started with WKWebView and SFSafariViewController
- 24. Exploring CloudKit
- 25. Localizing Your App to Reach More Users
- 26. Deploying and Testing Your App on a Real iOS Device
- 27. Beta Testing with TestFlight and CloudKit Production Deployment
- 28. Submit Your App to App Store
- 29. Adopting 3D Touch, Haptic Touch and Context Menus
- 30. Developing User Notifications in iOS
- 31. Appendix - Swift Basics
- Published with GitBook
Chapter 23
Getting Started with WKWebView and SFSafariViewController

I've got a theory that if you give 100% all of the time, somehow things will work out in the end.
- Larry Bird
It is very common you need to display web content in your apps. From iOS 9 and onward, it provides three options for developers to show web content:
- Mobile Safari - the iOS SDK provides APIs for you to open a specific URL in the built-in Mobile Safari browser. In this case, your users temporarily leave the application and switch to Safari.
- WKWebView - Before the release of iOS 9, this is the most convenient way to embed web content in your app. You can think of
UIWebViewas a stripped-down version of Safari. It is responsible to load a URL request and display the web content.WKWebView, introduced in iOS 8, is an improved version ofUIWebView. It has the benefit of the Nitro JavaScript engine and offers more features. If you just need to display a specific web page,WKWebViewis the best option for this scenario. - SFSafariViewController - this is a new controller introduced in iOS 9. While
WKWebViewallows you to embed web content in your apps, you have to build a custom web view to offer a complete web browsing experience. For example,WKWebViewdoesn't come with the Back/Forward button that lets users navigate back and forth the browsing history. In order to provide the feature, you have to develop a custom web browser usingWKWebView. In iOS 9, Apple introducedSFSafariViewControllerto save developers from creating our own web browser. By usingSFSafariViewController, your users can enjoy all the features of Mobile Safari without leaving your apps.
In this chapter, I will walk you through all the options and show you how to use them to display web content. We will not talk about UIWebView as it is deprecated and no longer available from iOS 13.
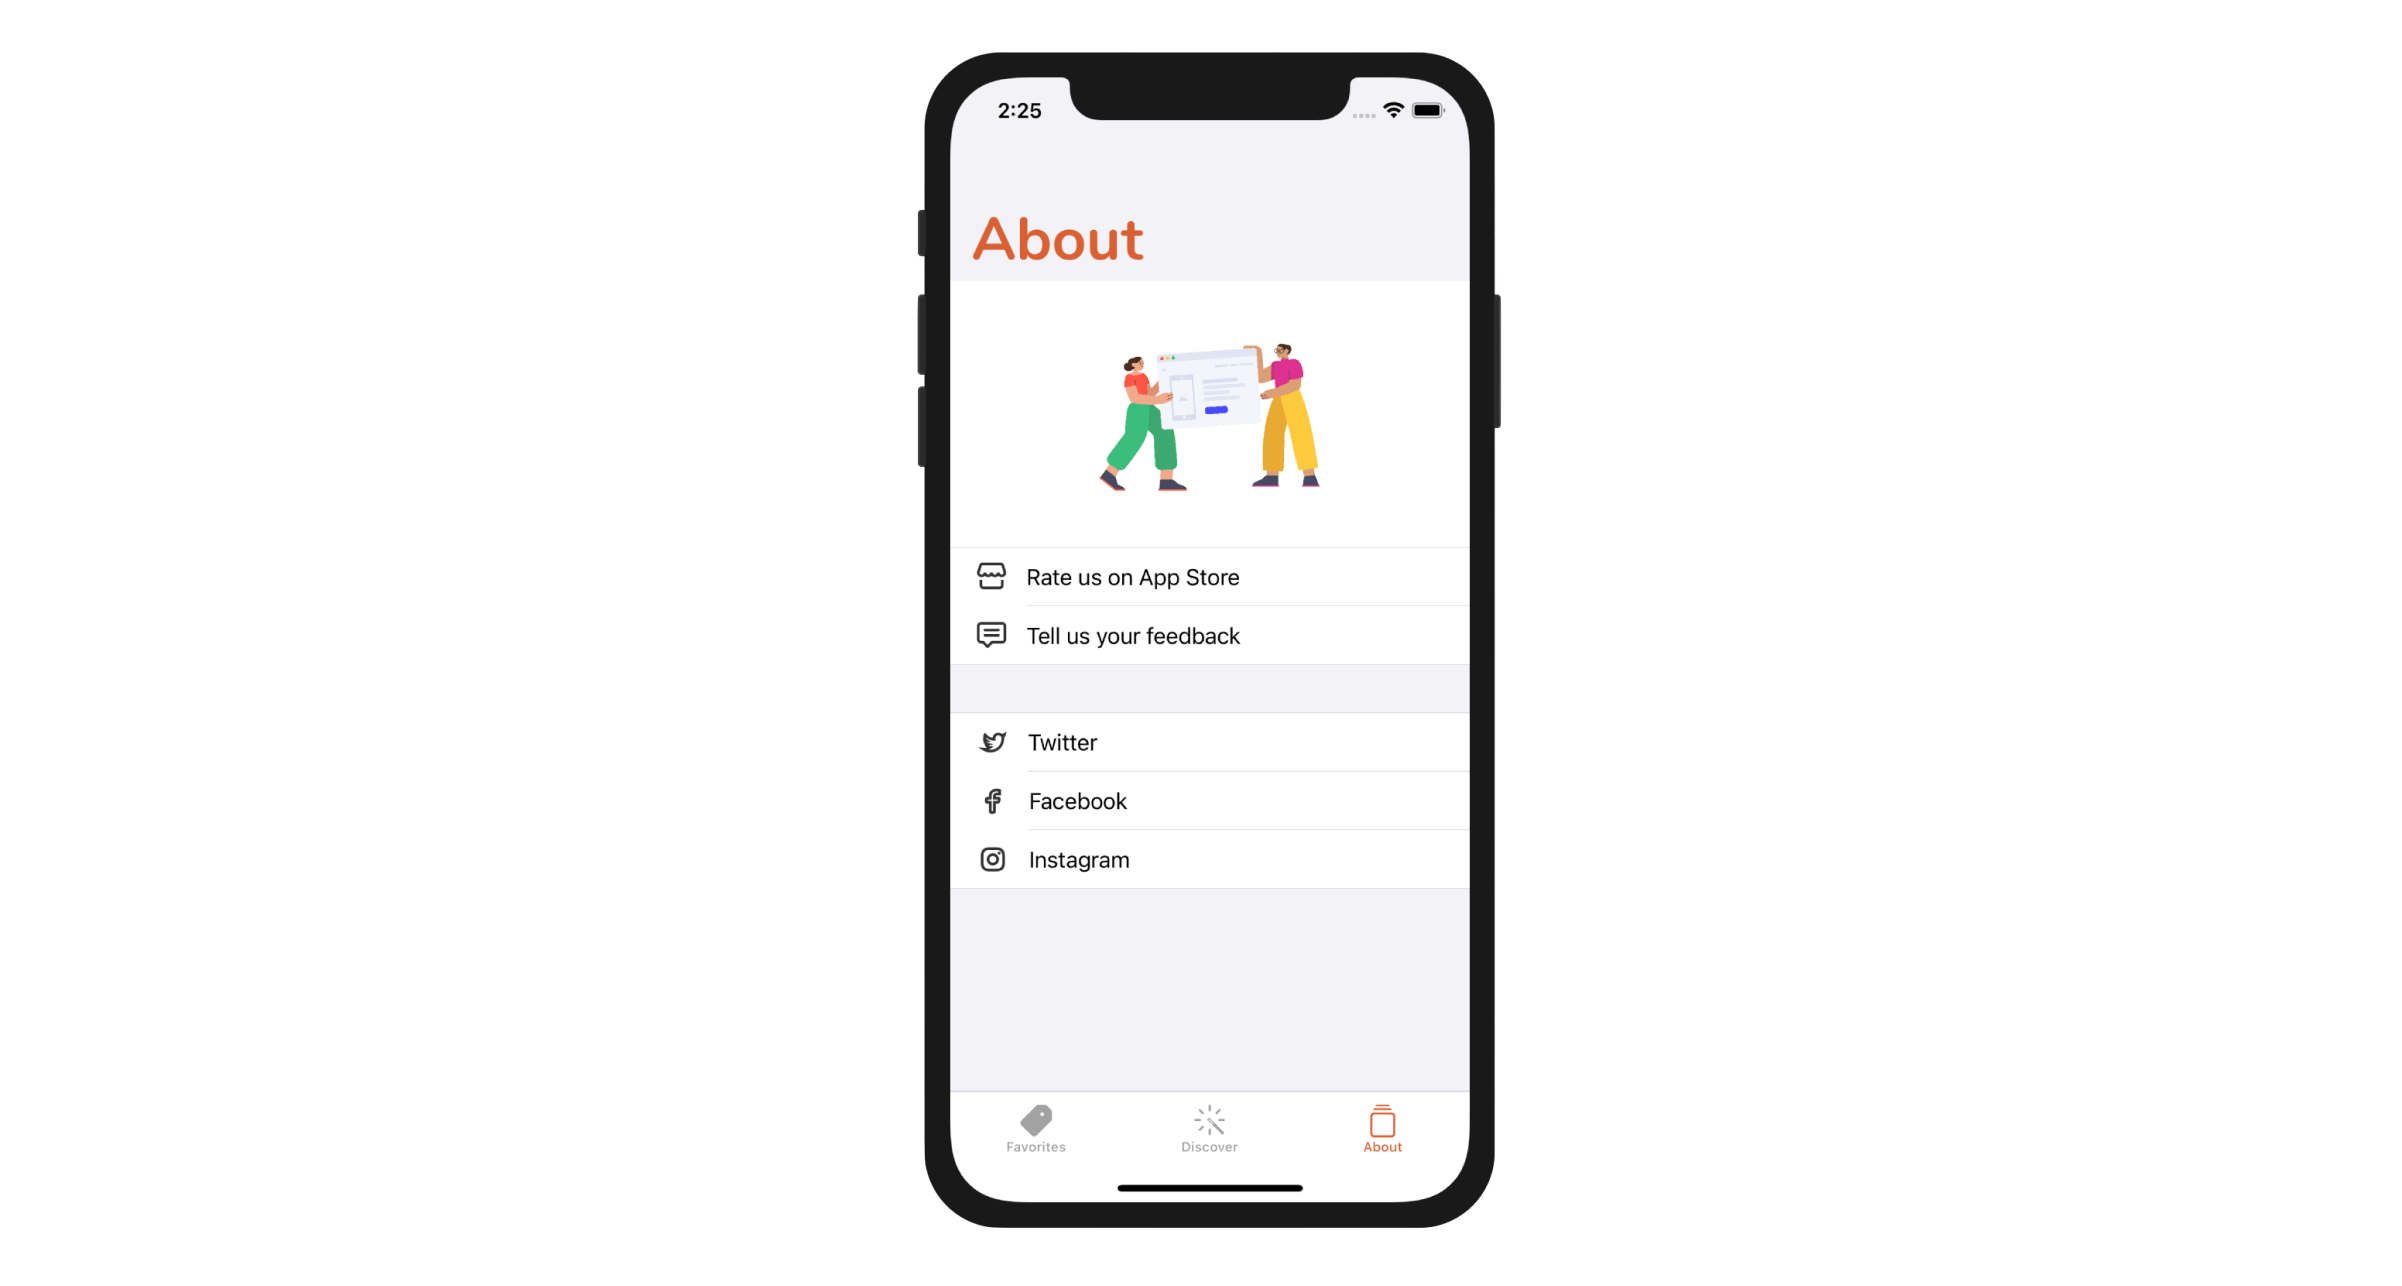
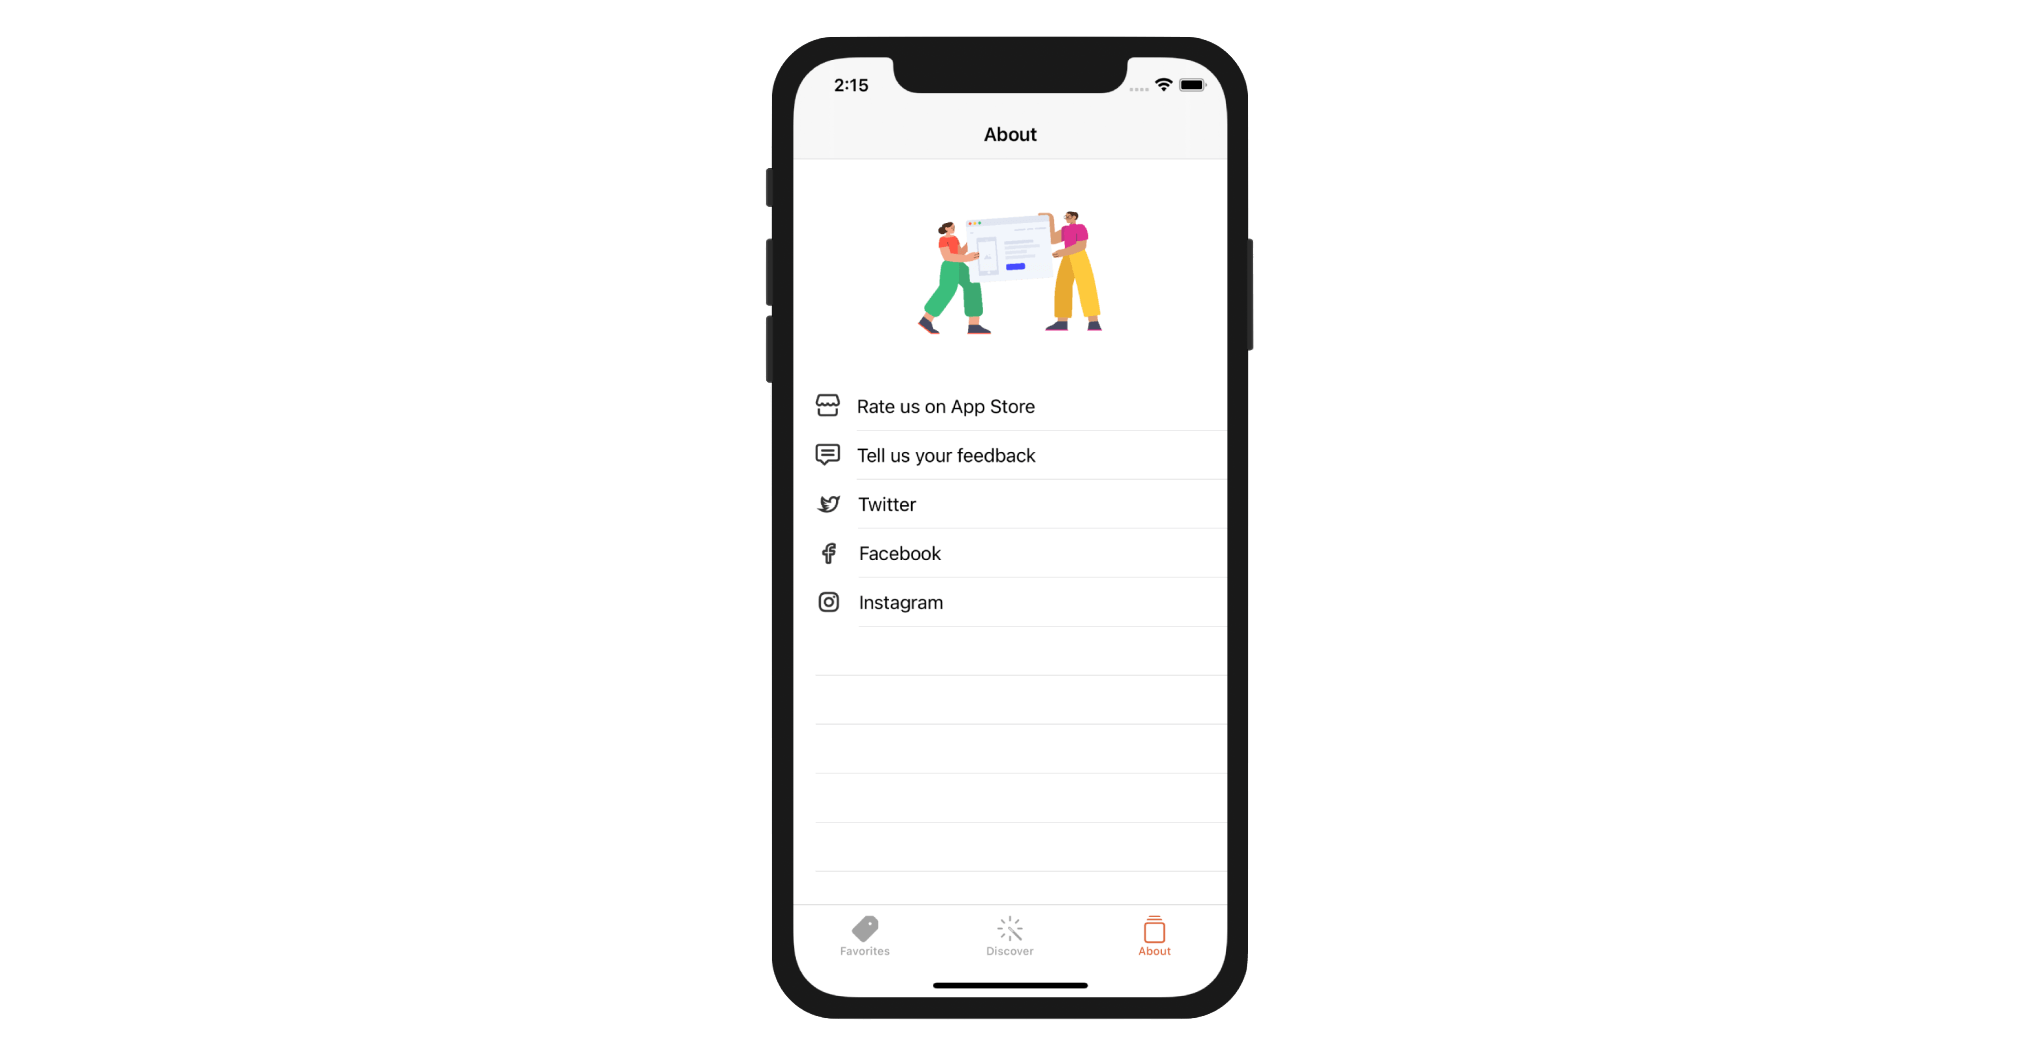
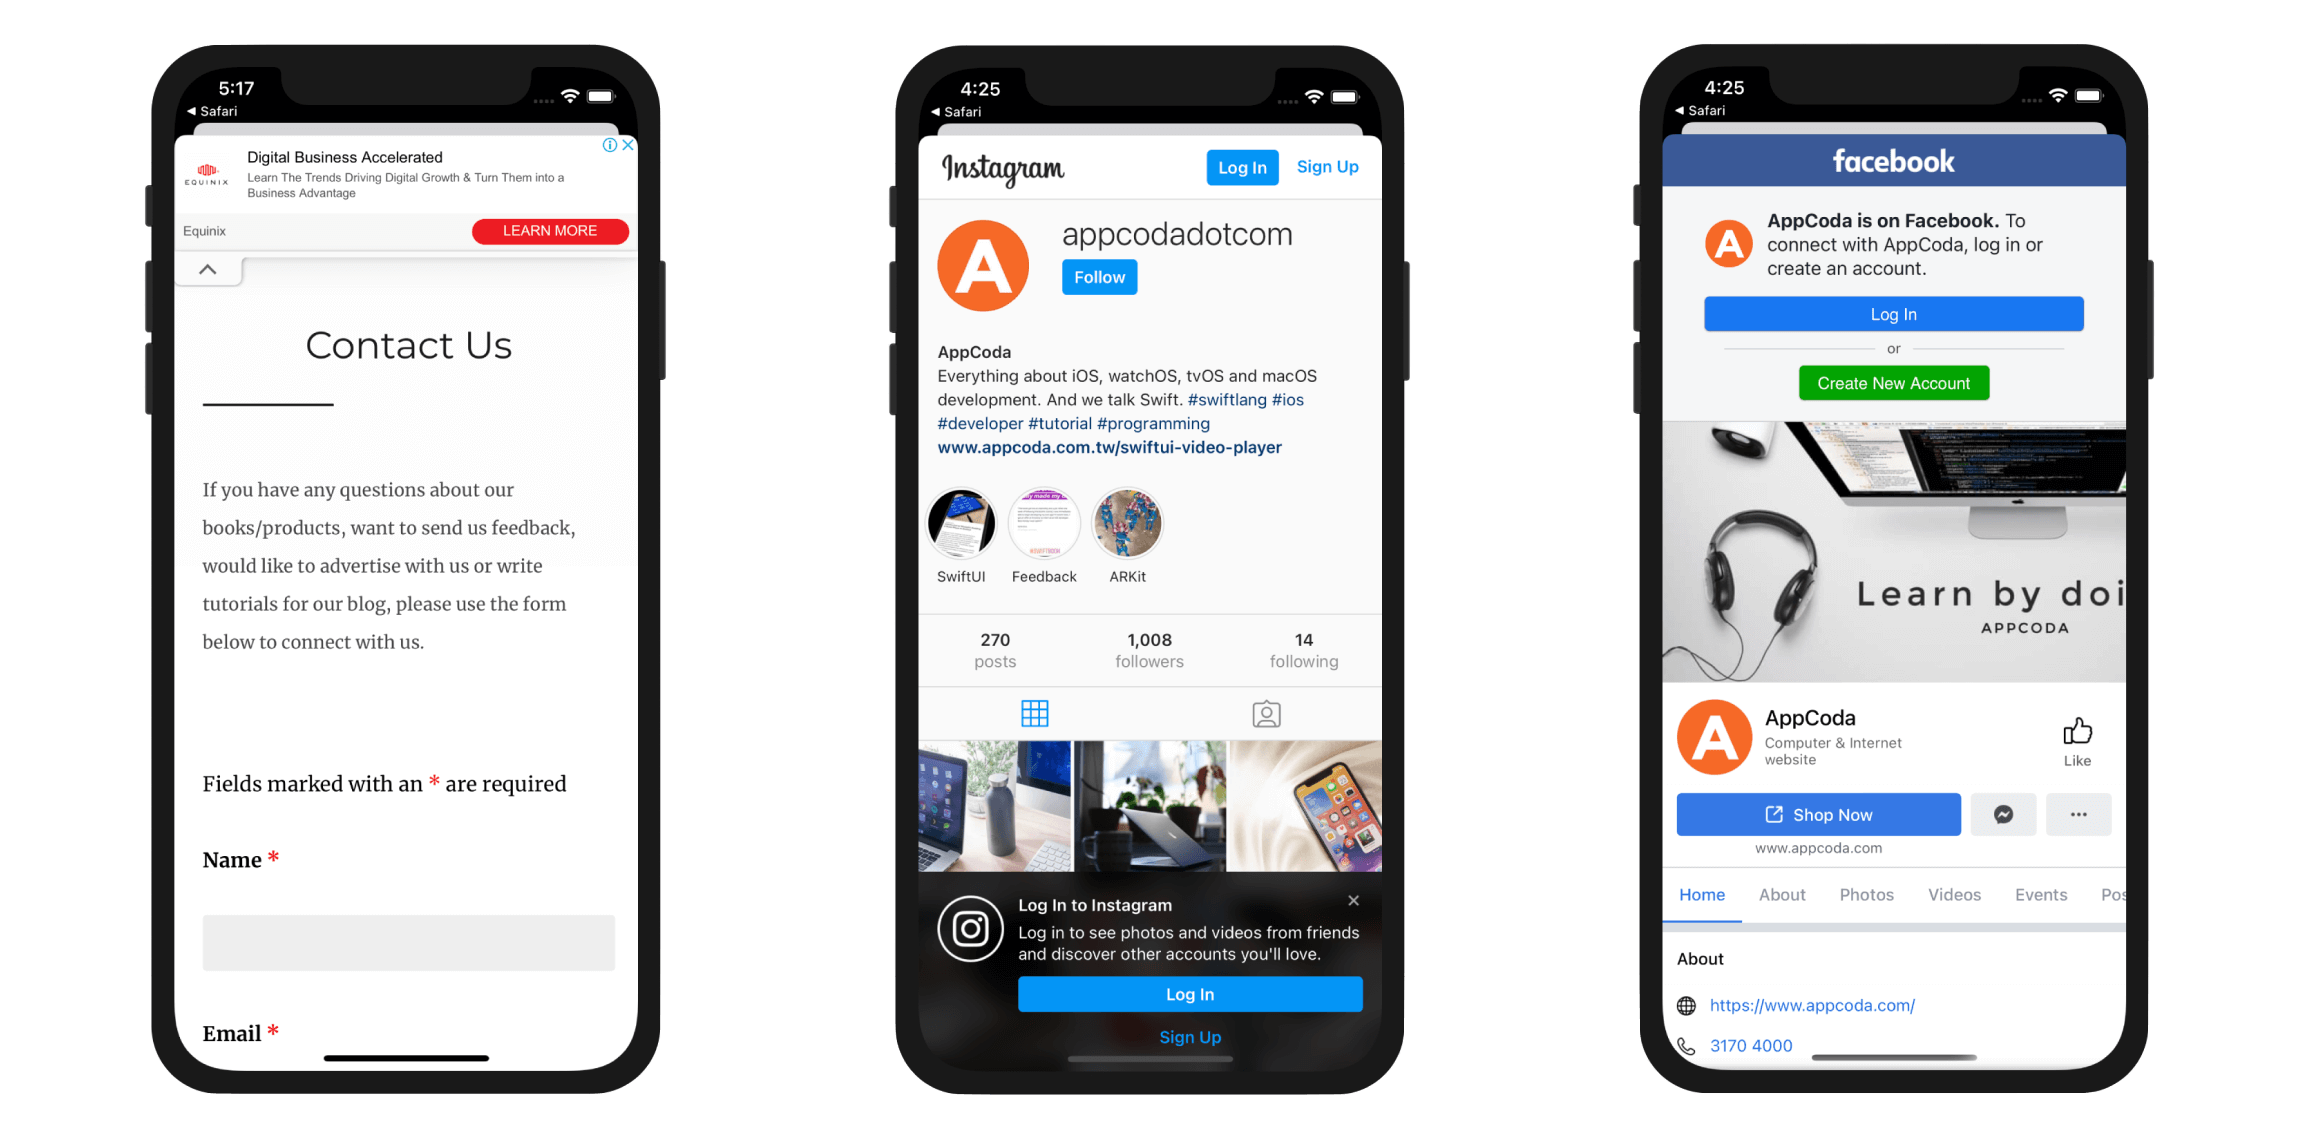
We have created About.storyboard in the previous chapter. However, we didn't provide any implementation yet. Take a look at figure 23-1. That is the About screen we're going to create, and here are how each of the rows works:
- Rate us on App Store - when selected, we will load a specific iTunes link in Mobile Safari. Users will leave the current app and switch to the App Store.
- Tell us your feedback - when selected, we will load a Contact Us web page using
WKWebView. - Twitter / Facebook / Pinterest - Each of these items has its own link for the corresponding social profile. We will use
SFSafariViewControllerto load these links.
Sounds interesting, right? Let's get started.
Designing the About View
First, download the image pack from http://www.appcoda.com/resources/swift53/abouticons.zip and import the images into Assets.xcasset.
Open the About storyboard to switch to Interface Builder. Let's start to design the table view controller. Drag a View object from the object library to the header view of the table view (just like what we have done before). The View object should be placed right above the table view cell. You can reveal it in document outline. In the Size inspector, set the height to 200 points.
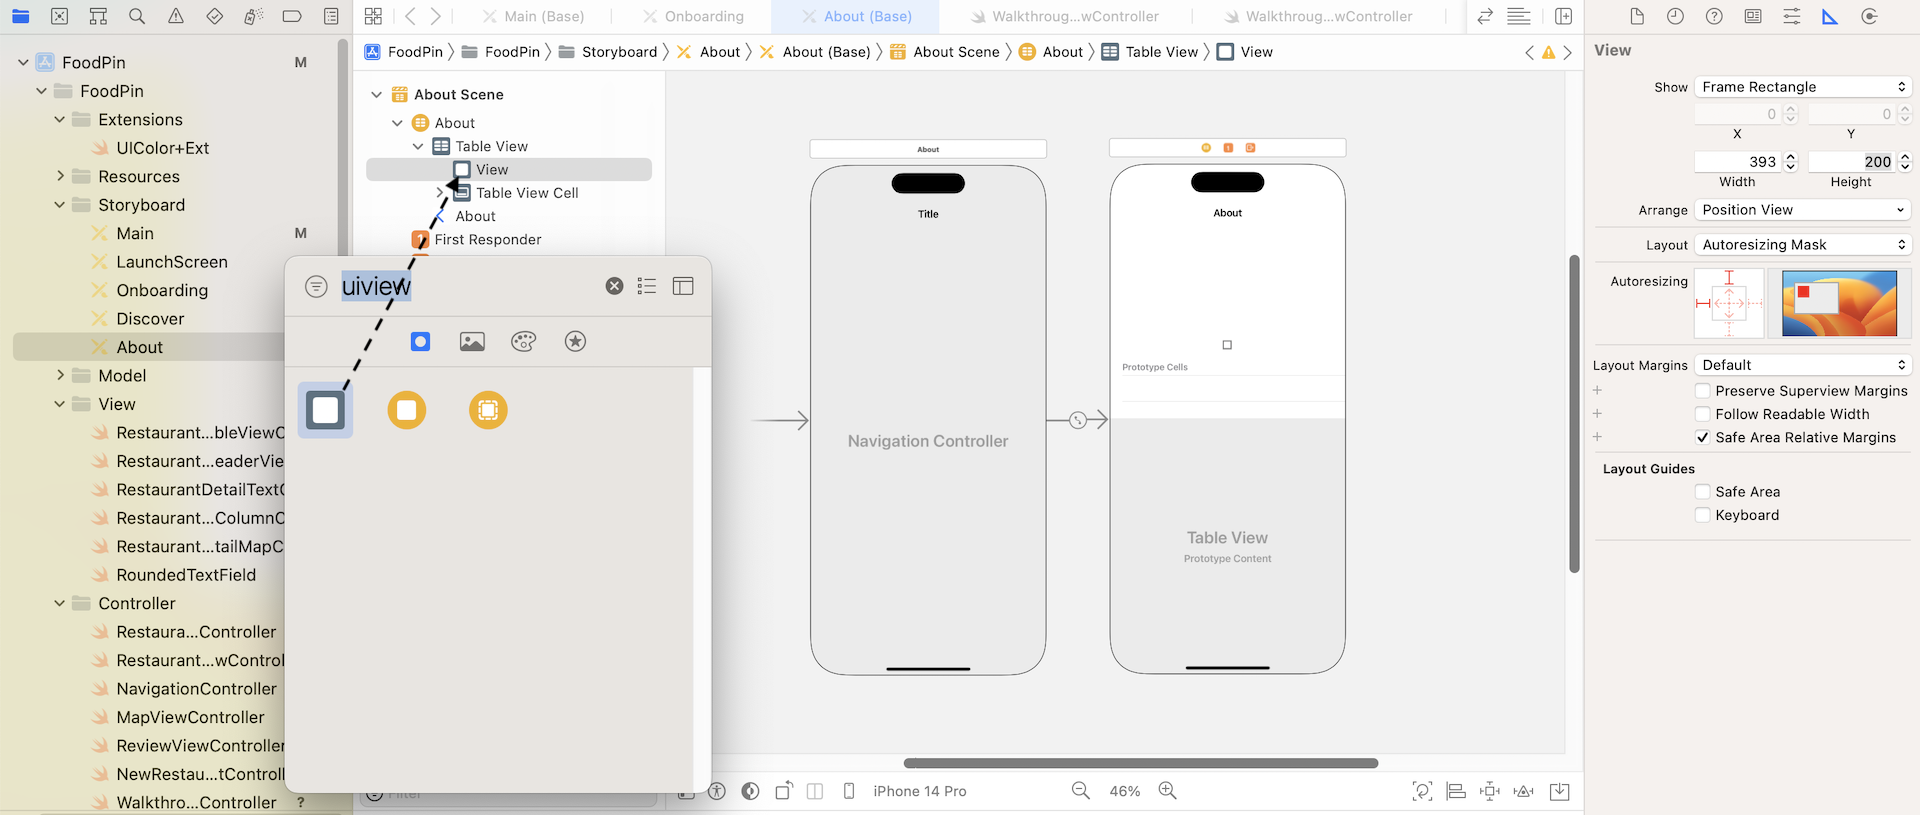
Next, drag an image view and place it in the view. In the Attribute inspector, set the image to about. As always, we need to add a few layout constraints. Click the Add New Constraints button of the auto layout bar. Set the values of all sides to 0 and make sure you check the Constrain to margins option. Then click Add 4 constraints to confirm.
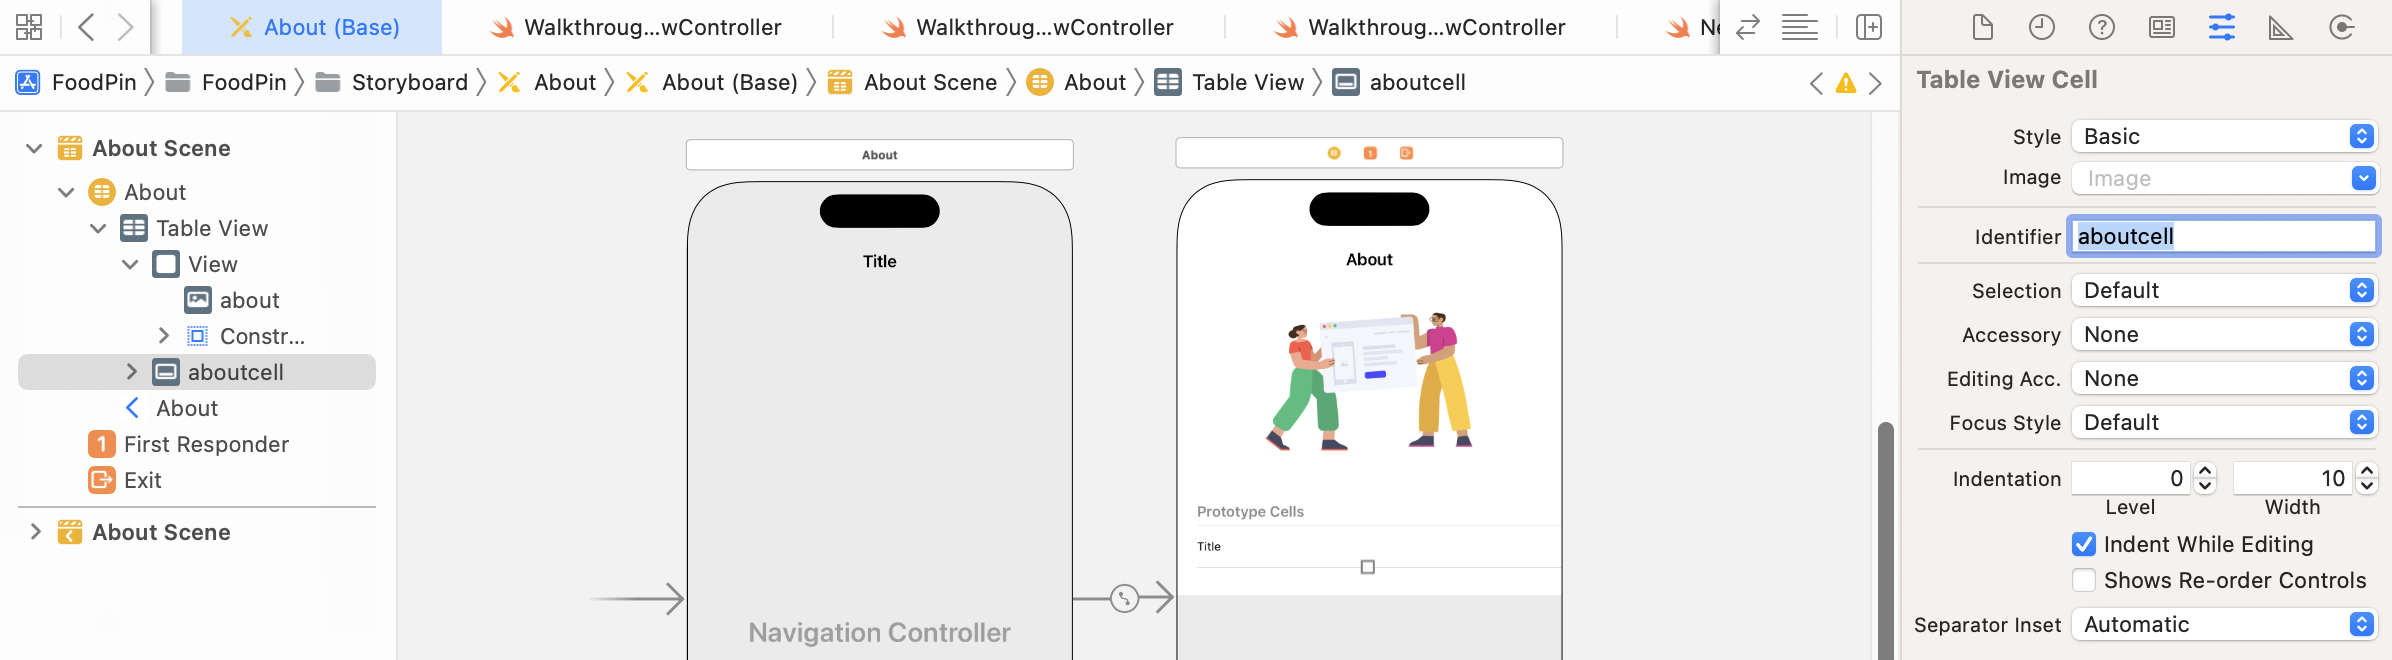
Now, select the table view cell. In the Attributes inspector, set the cell's identifier to aboutcell and style to Basic. Your design should look like figure 23-3.
Creating a Custom Class for the About View Controller
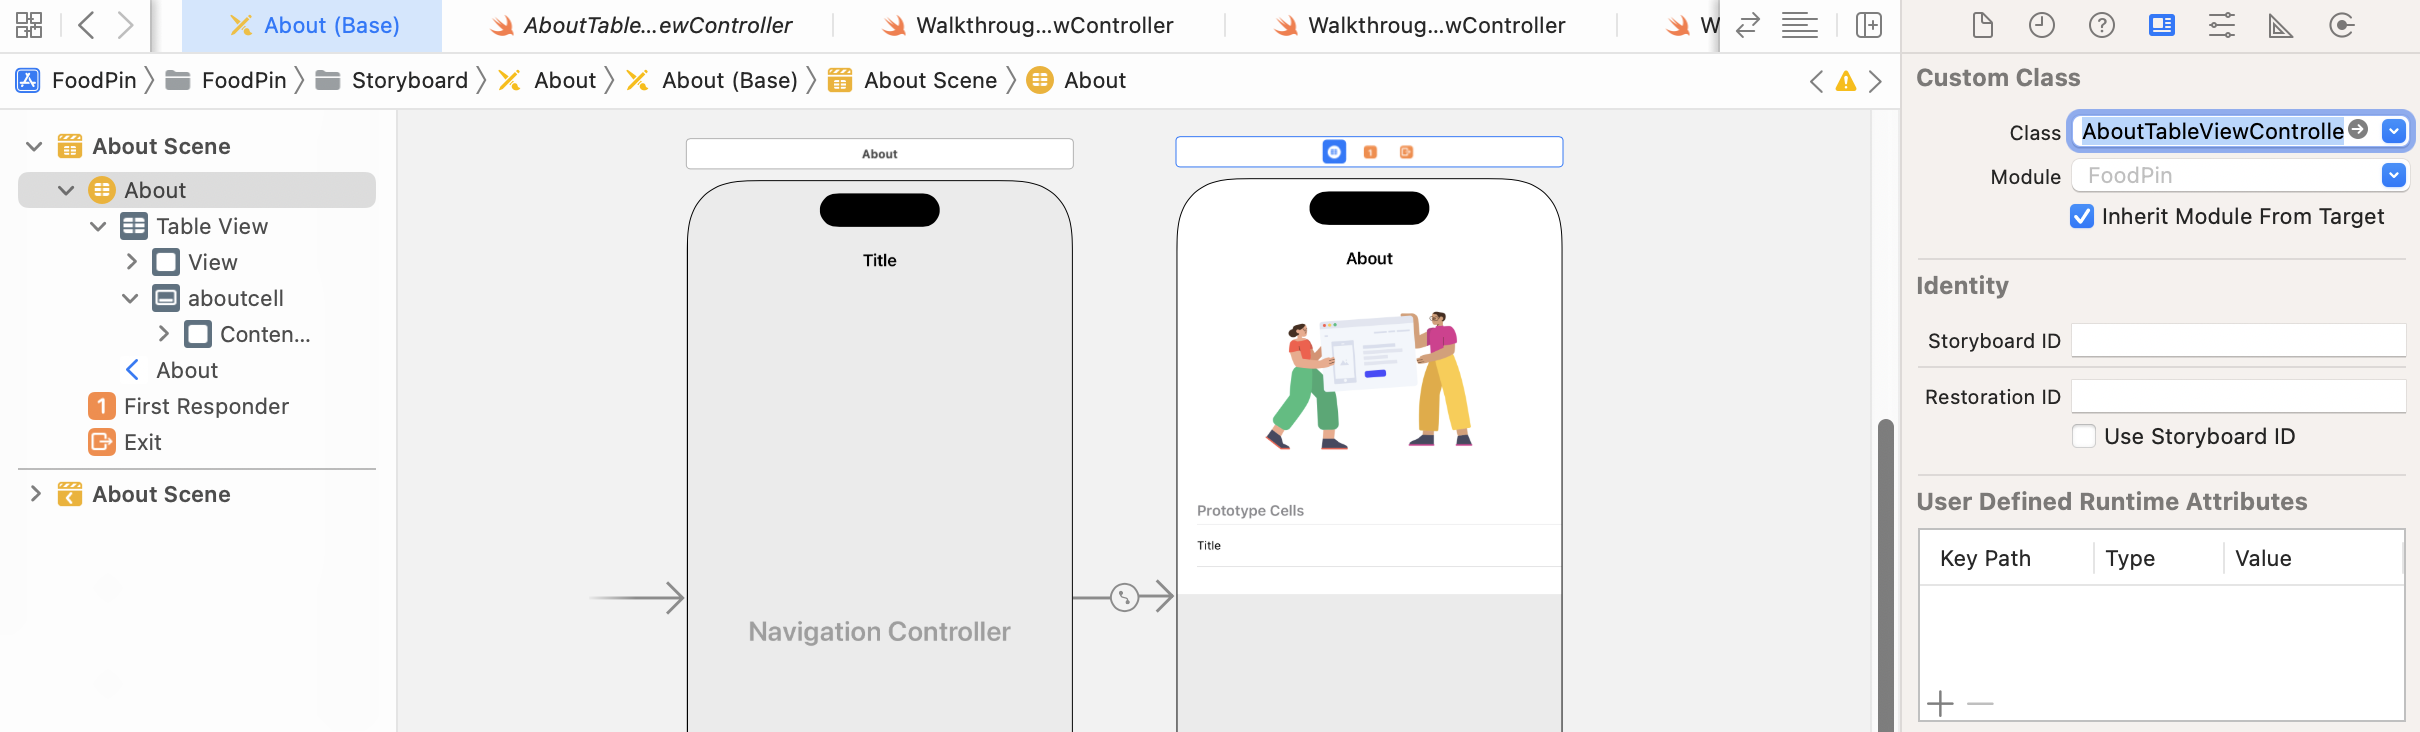
As usual, we need a class to associate with the table view controller in the About storyboard. In the project navigator, right-click the Controller folder and select New File…. Choose the Cocoa Touch Class template. Name the class AboutTableViewController and set its subclass to UITableViewController.
In the About storyboard, select the table view controller and set the custom class to AboutTableViewController in the Identity inspector.
You should be very familiar with the implementation of table views using UITableViewDiffableDataSource. But this time, it is a little different. We are going to create two sections in the table view. Let's see how to do it.
First, declare an enum for the table section in AboutTableViewController. Since we have two sections, the enum has two cases:
enum Section {
    case feedback
    case followus
}
Next, define a structure for the link items. Insert the following code inside the AboutTableViewController class:
struct LinkItem: Hashable {
    var text: String
    var link: String
    var image: String
}
Next, declare an array variable to store the items for the two sections:
var sectionContent = [ [LinkItem(text: "Rate us on App Store", link: "https://www.apple.com/ios/app-store/", image: "store"),
                        LinkItem(text: "Tell us your feedback", link: "http://www.appcoda.com/contact", image: "chat")
                        ],
                       [LinkItem(text: "Twitter", link: "https://twitter.com/appcodamobile", image: "twitter"),
                        LinkItem(text: "Facebook", link: "https://facebook.com/appcodamobile", image: "facebook"),
                        LinkItem(text: "Instagram", link: "https://www.instagram.com/appcodadotcom", image: "instagram")]
                        ]
If you go back to figure 23-1 to take a look at the About screen again, each row of data has an image and a description. When the user taps any of the rows, we will load the corresponding hyperlink of the selected item. Therefore, for each row of record, it actually has the following information:
- An image
- A description
- A link
How do you store these table data? There are many ways to do that. Try to think about the solution.
Probably you will store the data like this:
var images = [ ["store", "chat"], ["twitter", "facebook", "instagram"] ]
var text = [ ["Rate us on App Store", "Tell us your feedback"], ["Twitter", "Facebook", "Instagram"] ]
var links = [ ["https://www.apple.com/ios/app-store/", "http://www.appcoda.com/contact"], ["https://twitter.com/appcodamobile", "https://facebook.com/appcodamobile", "https://www.instagram.com/appcodadotcom"] ]
There is nothing wrong with the code above. You can use three separate arrays to store the data. It will work. However, it is not easy to reveal the relationship of the data if you store the data like that.
A better way to do that is to group related values together by using struct. This is why we define the LinkItem structure.
The value of sectionContent may look a bit complex. But actually the code is exactly the same as follows:
let section0 = [LinkItem(text: "Rate us on App Store", link: "https://www.apple.com/ios/app-store/", image: "store"), LinkItem(text: "Tell us your feedback", link: "http://www.appcoda.com/contact", image: "chat")]

let section1 = [LinkItem(text: "Twitter", link: "https://twitter.com/appcodamobile", image: "twitter"),
                        LinkItem(text: "Facebook", link: "https://facebook.com/appcodamobile", image: "facebook"), LinkItem(text: "Instagram", link: "https://www.instagram.com/appcodadotcom", image: "instagram")]

var sectionContent = [ section0, section1 ]
This is how I come up with this sectionContent variable. Let's continue to implement the table view.
First, delete the following methods generated by Xcode:
override func numberOfSections(in tableView: UITableView) -> Int {
    // #warning Incomplete implementation, return the number of sections
    return 0
}

override func tableView(_ tableView: UITableView, numberOfRowsInSection section: Int) -> Int {
    // #warning Incomplete implementation, return the number of rows
    return 0
}
We do not need them because we are going to use the diffable data source to load the data. First, create a method named configureDataSource() like this:
func configureDataSource() -> UITableViewDiffableDataSource<Section, LinkItem> {

    let cellIdentifier = "aboutcell"

    let dataSource = UITableViewDiffableDataSource<Section, LinkItem>(tableView: tableView) { (tableView, indexPath, linkItem) -> UITableViewCell? in

        let cell = tableView.dequeueReusableCell(withIdentifier: cellIdentifier, for: indexPath)

        cell.textLabel?.text = linkItem.text
        cell.imageView?.image = UIImage(named: linkItem.image)

        return cell
    }

    return dataSource
}
This method returns a diffable data source for the table view and describe how the cell data should be presented. Next, create another method for the snapshot:
func updateSnapshot() {

    // Create a snapshot and populate the data
    var snapshot = NSDiffableDataSourceSnapshot<Section, LinkItem>()
    snapshot.appendSections([.feedback, .followus])
    snapshot.appendItems(sectionContent[0], toSection: .feedback)
    snapshot.appendItems(sectionContent[1], toSection: .followus)

    dataSource.apply(snapshot, animatingDifferences: false)
}
Assuming you understand how the diffable data source works, the code above should be very familiar to you. To support a table view with multiple sections, all you need is to do is to append all the sections by calling appendSections. And, you specify the section items by using the appendItems method.
Next, declare a dataSource variable in AboutTableViewController:
lazy var dataSource = configureDataSource()
Lastly, insert the following code in the viewDidLoad() method:
tableView.dataSource = dataSource
updateSnapshot()
Now run the app and take a quick look. You have already created the user interface of the About screen.
There are a couple of things I want to tweak:
- I prefer to use a large title in the navigation bar.
- I want to break the items into two sections.
For the first tweak, you can update the viewDidLoad() method like this:
override func viewDidLoad() {
    super.viewDidLoad()

    // Use large title for the navigation bar
    navigationController?.navigationBar.prefersLargeTitles = true

    // Customize the navigation bar appearance
    if let appearance = navigationController?.navigationBar.standardAppearance {

        appearance.configureWithTransparentBackground()

        if let customFont = UIFont(name: "Nunito-Bold", size: 45.0) {

            appearance.titleTextAttributes = [.foregroundColor: UIColor(named: "NavigationBarTitle")!]
            appearance.largeTitleTextAttributes = [.foregroundColor: UIColor(named: "NavigationBarTitle")!, .font: customFont]
        }

        navigationController?.navigationBar.standardAppearance = appearance
        navigationController?.navigationBar.compactAppearance = appearance
        navigationController?.navigationBar.scrollEdgeAppearance = appearance
    }

    // Load table data
    tableView.dataSource = dataSource
    updateSnapshot()
}
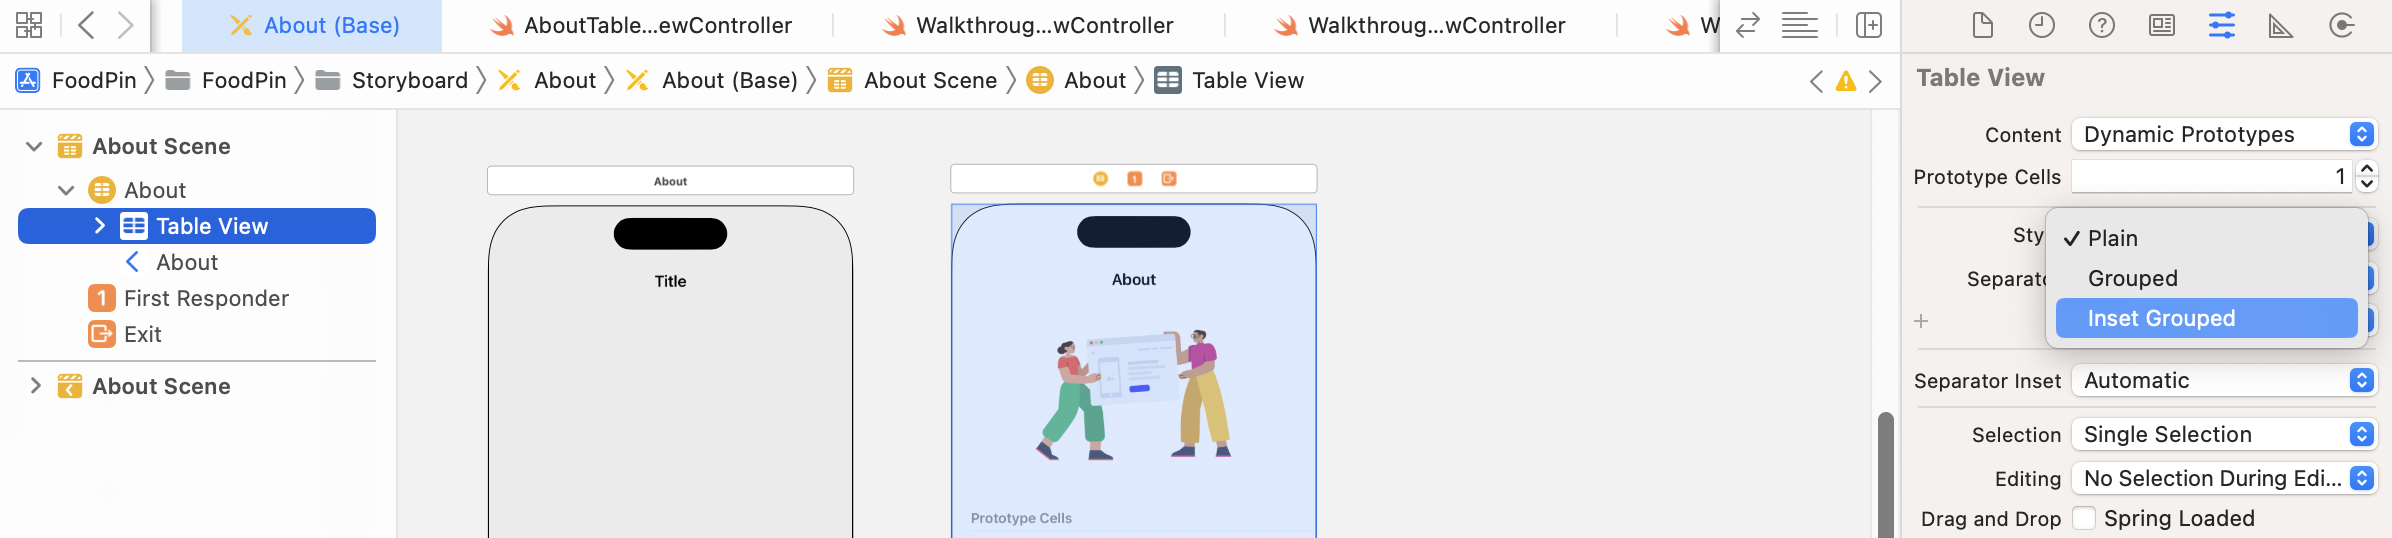
You should be familiar with the code for navigation bar customization, so I would not go into details. For the second tweak, you can switch over to the About storyboard. Select the Table View of the About screen and go to the Attributes inspector. Change the Style option to Grouped or Inset Grouped.
Run the app again and you should see the large title in the About screen. And you will see two separate sections in the table view.
Opening Web Content in Mobile Safari
Now that we've prepared the user interface of the About view, let's start to explore the first option of loading web content. When the Rate us on App Store option is selected, the app will switch to mobile Safari and load the content.
To open a link in the Safari browser, you just need to call the open(_:options:completionHandler:) method of UIApplication with a specific URL:
UIApplication.shared.open(url)
When the method is invoked, your user will leave the current application and switch over to Safari to load the web content. To handle table cell selection, as you know, we need to override the tableView(_didSelectRowAtIndexPath:) method of AboutTableViewController. Insert the following code snippet:
override func tableView(_ tableView: UITableView, didSelectRowAt indexPath: IndexPath) {

    // Get the selected link item
    guard let linkItem = self.dataSource.itemIdentifier(for: indexPath) else {
        return
    }

    if let url = URL(string: linkItem.link) {
        UIApplication.shared.open(url)
    }

    tableView.deselectRow(at: indexPath, animated: false)
}
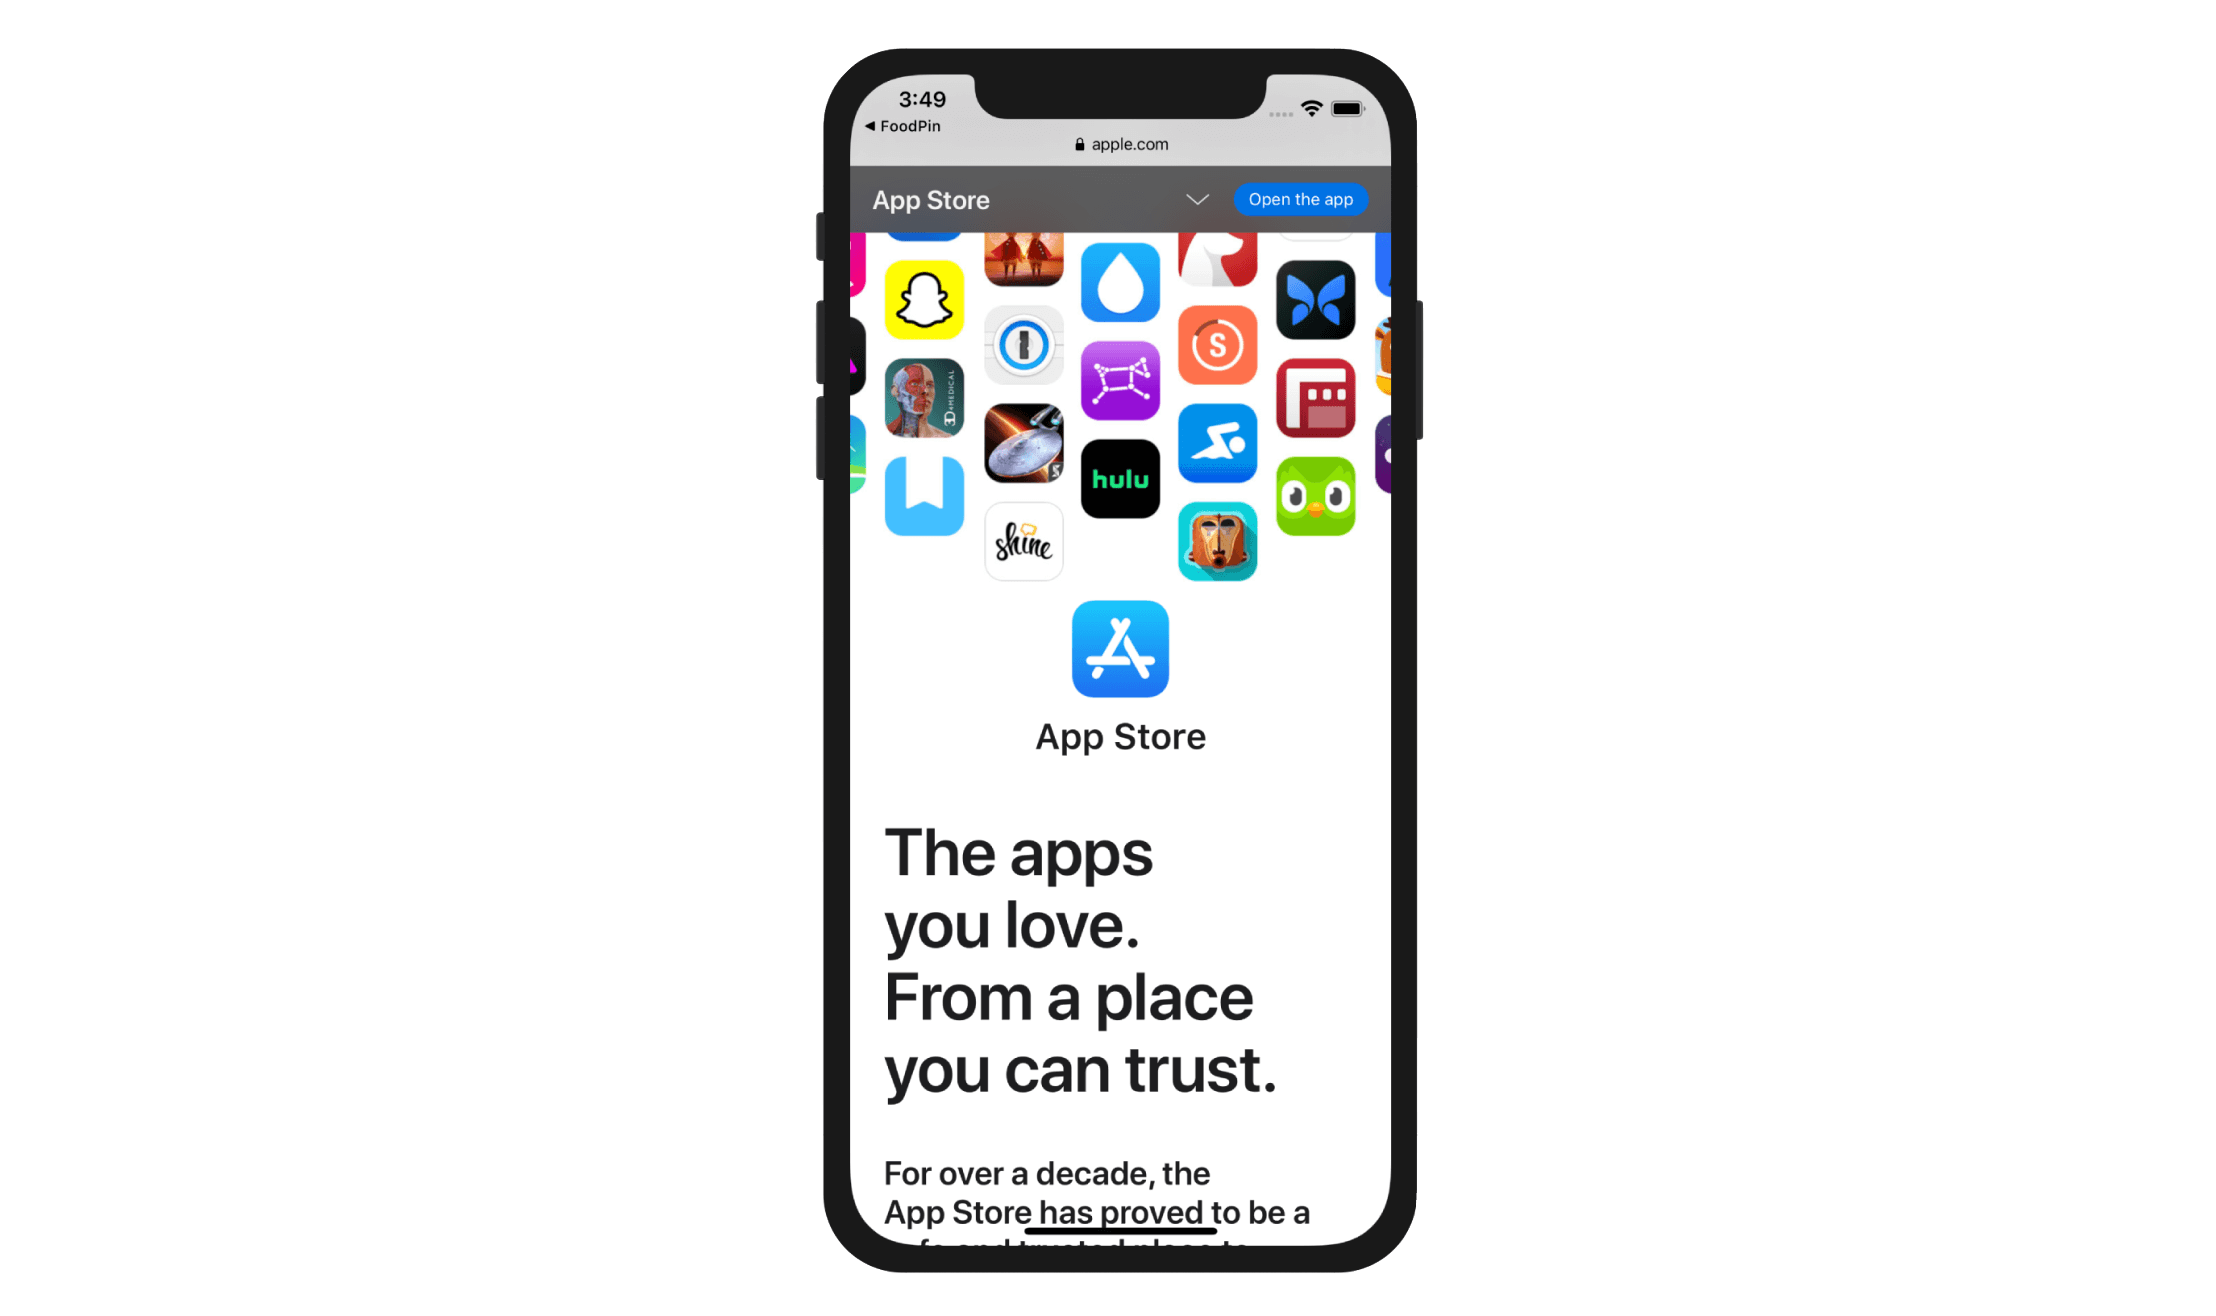
We first find out the link of the selected row and then call UIApplication.shared.open(url) to open the Safari browser. Now, run the app in the simulator. In the About tab, tapping any of the items will switch over to Mobile Safari to display the web content.
Loading Web Content Using WKWebView
It's very easy to open a web page in Mobile Safari. To load web content using WKWebView, it will take you a few more steps. The WKWebView class is a successor of UIWebView, which is capable of loading remote web content. If you bundle an HTML file in your app, you can also use the class to load the web page locally.
You can no longer use UIWebView as Apple has deprecated the API and rejects any apps which utilize UIWebView. You now have to use WKWebView, which outperforms its predecessor in terms of page loading speed.
Practically, you need to create an URL object, followed by a URLRequest object, and then load the request by calling the load method of WKWebView. Here is a sample code snippet:
if let url = URL(string: "http://www.appcoda.com/contact") {
    let request = URLRequest(url: url)
    webView.load(request)
}
The above code instructs the web view (i.e. the instance of WKWebView) to load web content remotely. As mentioned before, you're allowed to load a local web page. Let's say, there is an HTML file bundled in your app. You can initialize an URL object using the fileURLWithPath parameter:
let url = URL(fileURLWithPath: "about.html")
let request = URLRequest(url: url)
webView.load(request)
WKWebView will then load the web page locally, which works even without an Internet connection.
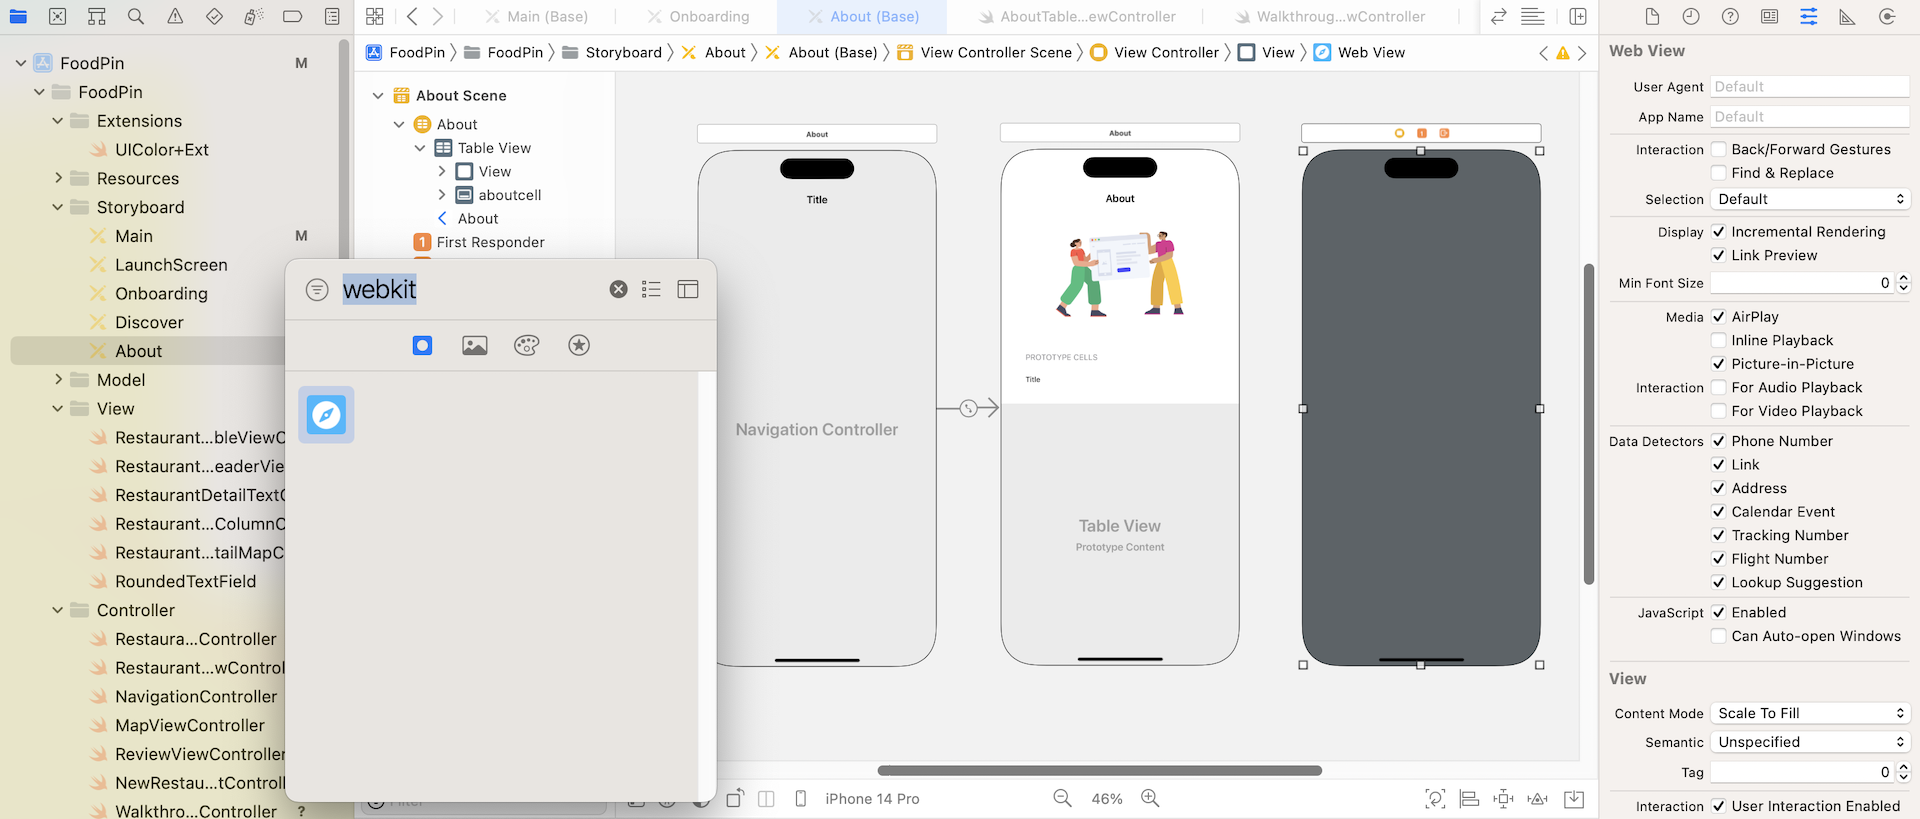
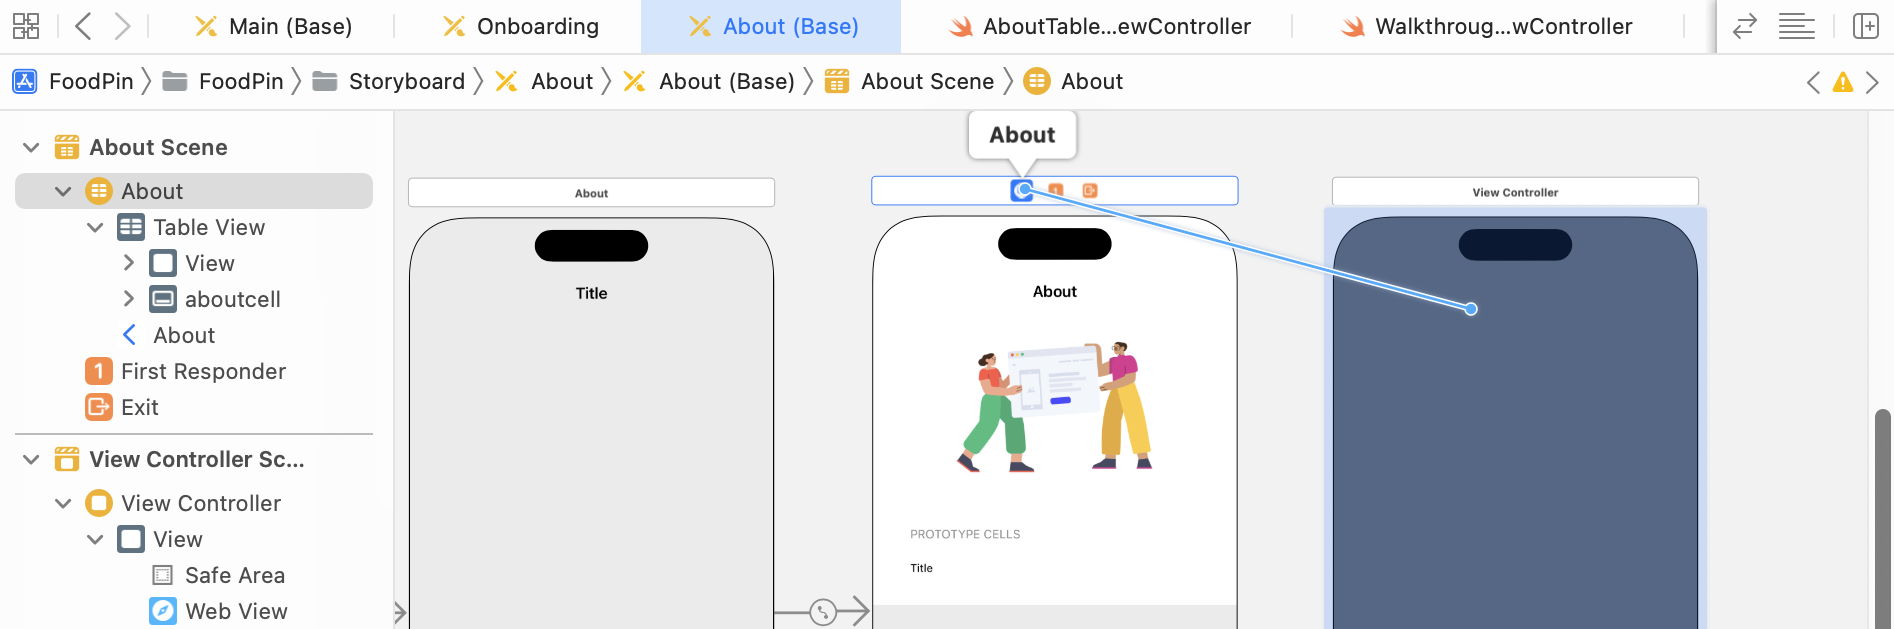
With a basic understanding of the WKWebView class, let's start to implement it in the app. In the About storyboard, drag a View Controller object from the Object library to the storyboard. Then drag a WebKit View object (i.e. WKWebView) to the view controller. Resize it to make it take up the whole view. Next, click the Add New Constraints button to add some spacing constraints for the top, left, bottom and right sides. Your view controller should look like figure 23-8.
When any of the items is tapped, the app will transit to the new view controller to display the web content. To do that, we have to define a segue between the About view controller and the web view controller. Drag from the view controller button in the scene dock to the new view controller. Release the buttons and select Present Modally as the segue type.
This creates a segue between the two controllers. Select the segue and set the identifier to showWebView in the Attributes inspector.
As usual, the next step is to create a custom class for the web view controller. Right-click the Controller folder in the project navigator, and select New File…. Choose the Cocoa Touch Class template and name the class WebViewController. Set it as a subclass of UIViewController. Click Next and save the file.
In the WebViewController.swift file, declare an outlet variable for the web view and a property:
@IBOutlet var webView: WKWebView!

var targetURL = ""
The targetURL variable is used for storing the target URL, passed by AboutTableViewController. Since WKWebView is in the WebKit framework, you have to insert the following import statement at the very beginning of the file:
import WebKit
For the viewDidLoad method, update it with the following line of code to load a web page:
override func viewDidLoad() {
    super.viewDidLoad()

    if let url = URL(string: targetURL) {
        let request = URLRequest(url: url)
        webView.load(request)
    }
}
Now go back to the AboutTableViewController class and update the tableView(_didSelectRowAtIndexPath:) method like this:
override func tableView(_ tableView: UITableView, didSelectRowAt indexPath: IndexPath) {

    performSegue(withIdentifier: "showWebView", sender: self)

    tableView.deselectRow(at: indexPath, animated: false)
}
When the cell is selected, we simply call performSegue(withIdentifier:sender:) method to trigger the showWebView segue and transit to the web view controller.
Additionally, create the prepare(for:sender:) method:
override func prepare(for segue: UIStoryboardSegue, sender: Any?) {

    if segue.identifier == "showWebView" {
        if let destinationController = segue.destination as? WebViewController,
           let indexPath = tableView.indexPathForSelectedRow,
           let linkItem = self.dataSource.itemIdentifier(for: indexPath) {

            destinationController.targetURL = linkItem.link
        }
    }
}
The purpose of this method is to find out the link of the selected item and pass it to the web view controller by setting the targetURL property. The if let syntax of the code above may be new to you. In Swift, you can unwrap multiple optionals using a single if let block. It's if followed by a series of let statements, each separated by a comma.
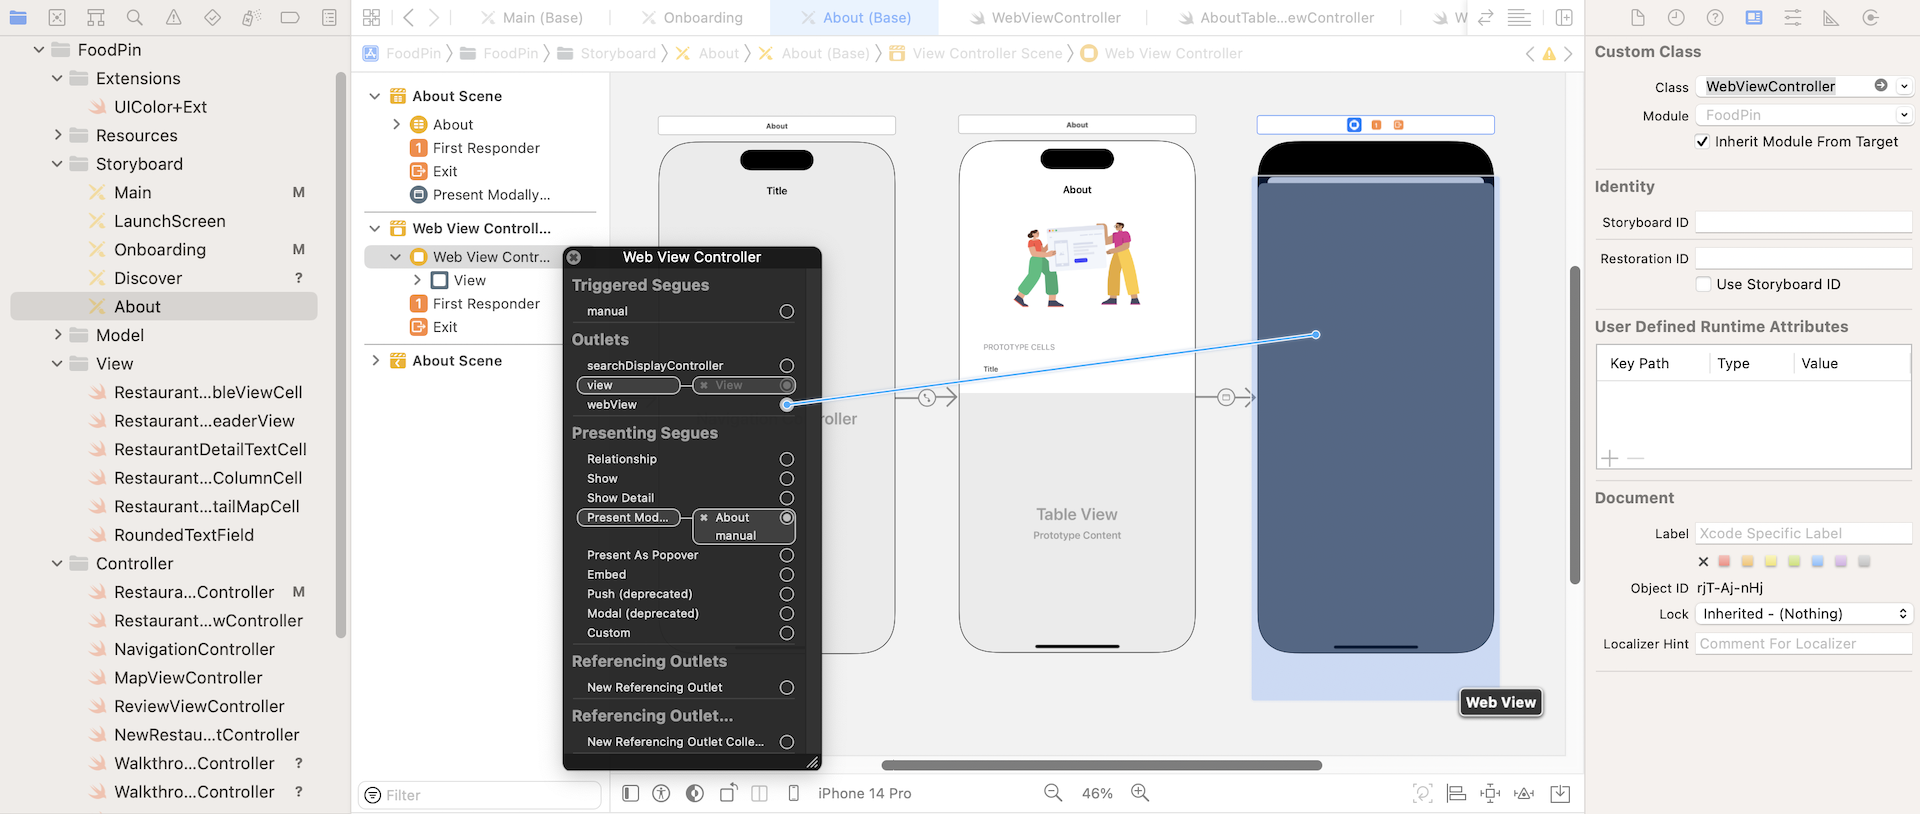
Lastly, switch over to the About storyboard. Select the view controller that contains the web view. In the Identify inspector, set its custom class to WebViewController. Also, establish a connection between the webView outlet and the WebKit view object in Interface Builder.
Now run the project to test out the changes. You should be able to load the web view controller for most of the links. However, if you tap the Tell us your feedback item, it shows a blank view.
What's the problem? It's due to the non-HTTPS URL. Starting from iOS 9, Apple introduced a feature called App Transport Security or ATS for short. The purpose of this feature is to improve the security of connections between an app and web services by enforcing some of the best practices. One of them is the use of secure connections. With ATS, all network requests should now be sent over HTTPS. If you make a network connection using HTTP, ATS will block the request.
To resolve the issue, you should always load a network request over HTTPS instead of HTTP. That is what Apple wants you to do. And, this is why all our links work except the one for the Tell us your feedback item.
So, how can you work around this restriction if the websites that you're talking to is out of your control and that doesn't support HTTPS?
Apple provides an option for developers to disable ATS restrictions for content loaded inside of web views. To do so, you need to set the value of the specific key named NSAllowsArbitraryLoadsInWebContent in your app's Info.plist.
The Info.plist file contains essential configuration information for your app. To edit the file, select Info.plist in the project navigator to display the content in a property list editor. To add a new key, right-click Information Property List and select Add Row. For the key column, enter App Transport Security Settings. Then follow the procedures in figure 23-10 to add the Allow Arbitrary Loads in Web Content key.
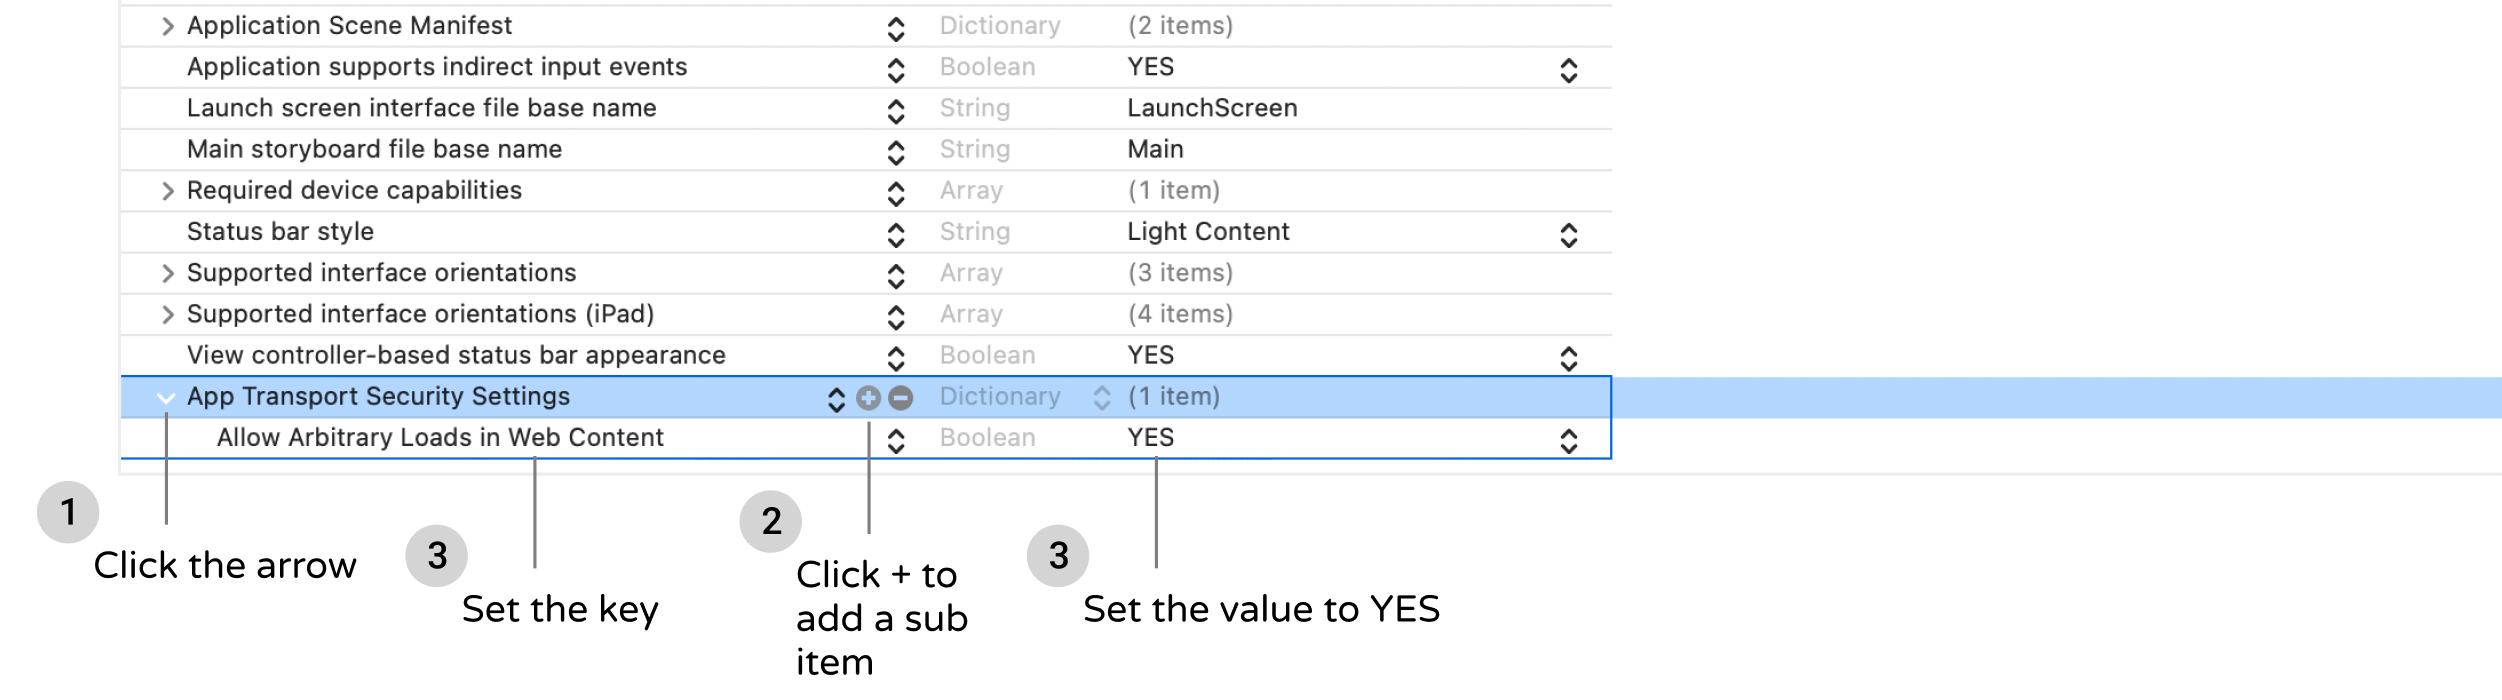
By setting the key to YES, you explicitly disable App Transport Security. Now run the app again. It should be able to load the web page.
Loading Web Content Using SFSafariViewController
Finally, let's talk about SFSafariViewController. As discussed earlier, this new controller allows developers to embed a Safari browser in your app. It shares many great features of Safari such as Safari AutoFill and Safari Reader. According to Apple, if your app displays web content in a standard browser, it is recommended to use SFSafariViewController.
To embed SFSafariViewController in your app, all you need is a couple line of code:
let safariController = SFSafariViewController(url: url)
present(safariController, animated: true, completion: nil)
You first create the SFSafariViewController object with a specified URL. Optionally, you can set entersReaderIfAvailable to true to enable Safari Reader. The next step is to present the controller by calling the present(_:animated:completion:) method.
Now open the AboutTableViewController.swift file. We'll update the code so that the app displays the social links (Twitter/Facebook/Instagram) using SFSafariViewController. First, insert the following import statement at the very beginning of the file:
import SafariServices
You have to import the SafariServices framework before using SFSafariViewController. Next, create a new method called openWithSafariViewController for loading the web content with SFSafariViewController like this:
func openWithSafariViewController(indexPath: IndexPath) {
    guard let linkItem = self.dataSource.itemIdentifier(for: indexPath) else {
        return
    }

    if let url = URL(string: linkItem.link) {
        let safariController = SFSafariViewController(url: url)
        present(safariController, animated: true, completion: nil)
    }
}
This function accepts an index path of the selected item. We then retrieve the link item from the index path and display the web content with SFSafariViewController.
Lastly, update tableView(_:didSelectRowAtIndexPath:) to the following:
override func tableView(_ tableView: UITableView, didSelectRowAt indexPath: IndexPath) {

    switch indexPath.section {
    case 0: performSegue(withIdentifier: "showWebView", sender: self)

    case 1: openWithSafariViewController(indexPath: indexPath)

    default: break
    }

    tableView.deselectRow(at: indexPath, animated: false)
}
For demo purpose, the items in the first section are loaded using WKWebView. For the second section, we use the SFSafariViewController to display the web content. This will give you a better idea about the visual difference between WKWebView and SFSafariViewController.
It's ready to test the app! Once launched, tap an item in the second section. The app will open the link in a Safari-like browser.

Summary
We have explored three options for displaying web content. You do not need to use all options in your app like we did. It is just for demo purpose.
The SFSafariViewController class provides developers a simple way to embed a web browser in your app. If your app needs to provide a first class browsing experience for your user, the Safari view controller should save you a lot of time from creating your own version of web browser.
In some cases, you may just want a simple web view to display web content. WKWebView will be probably your choice.
Take some time to study all the web browsing options and pick the one that most fits your need.
For reference, you can download the complete Xcode project from http://www.appcoda.com/resources/swift57/FoodPinWebView.zip.