- Made by AppCoda
- Contact us / Support
- Tweet this book
- Preface
- 1. The Development Tools, the Learning Approach, and the App Idea
- 2. Your First Taste of Swift with Playgrounds
- 3. Hello World! Build Your First App in Swift
- 4. Hello World App Explained
- 5. Introduction to Auto Layout
- 6. Designing UI Using Stack Views
- 7. Introduction to Prototyping
- 8. Creating a Simple Table-based App
- 9. Customize Table Views Using Prototype Cell, Diffable Data Source and Dark Mode
- 10. Displaying Alerts with UIAlertController and Handling Table View Selection
- 11. Object Oriented Programming, Project Organization and Code Documentation
- 12. Table Row Deletion, Custom Action Button and MVC
- 13. Introduction to Navigation Controller and Segue
- 14. Detail View Enhancement and Navigation Bar Customization
- 15. Navigation Bar Customization, Extensions and Dynamic Type
- 16. Working with Maps
- 17. Basic Animations, Visual Effects and Unwind Segues
- 18. Working with Static Table Views, Camera and NSLayoutConstraint
- 19. Working with Core Data
- 20. Search Bar and UISearchController
- 21. Building Walkthrough Screens with UIPageViewController and Container Views
- 22. Exploring Tab Bar Controller and Storyboard References
- 23. Getting Started with WKWebView and SFSafariViewController
- 24. Exploring CloudKit
- 25. Localizing Your App to Reach More Users
- 26. Deploying and Testing Your App on a Real iOS Device
- 27. Beta Testing with TestFlight and CloudKit Production Deployment
- 28. Submit Your App to App Store
- 29. Adopting 3D Touch, Haptic Touch and Context Menus
- 30. Developing User Notifications in iOS
- 31. Appendix - Swift Basics
- Published with GitBook
Chapter 16
Working with Maps

The longer it takes to develop, the less likely it is to launch.
-Jason Fried, Basecamp
The MapKit framework provides APIs for developers to display maps, navigate through maps, add annotations for specific locations, add overlays on existing maps, etc. With the framework, you can embed a fully functional map interface into your app without any coding.
The latest version of the framework also allows developers to provide pin customization, transit, and flyover support. With the built-in API, developers are given with the option to customize the annotation. I will go over some of these features with you. In particular, you will learn a few things about the framework:
- How to embed a map in a view and a table view cell
- How to translate an address into coordinates using Geocoder
- How to add and customize a pin (i.e. annotation) on map
- How to customize an annotation
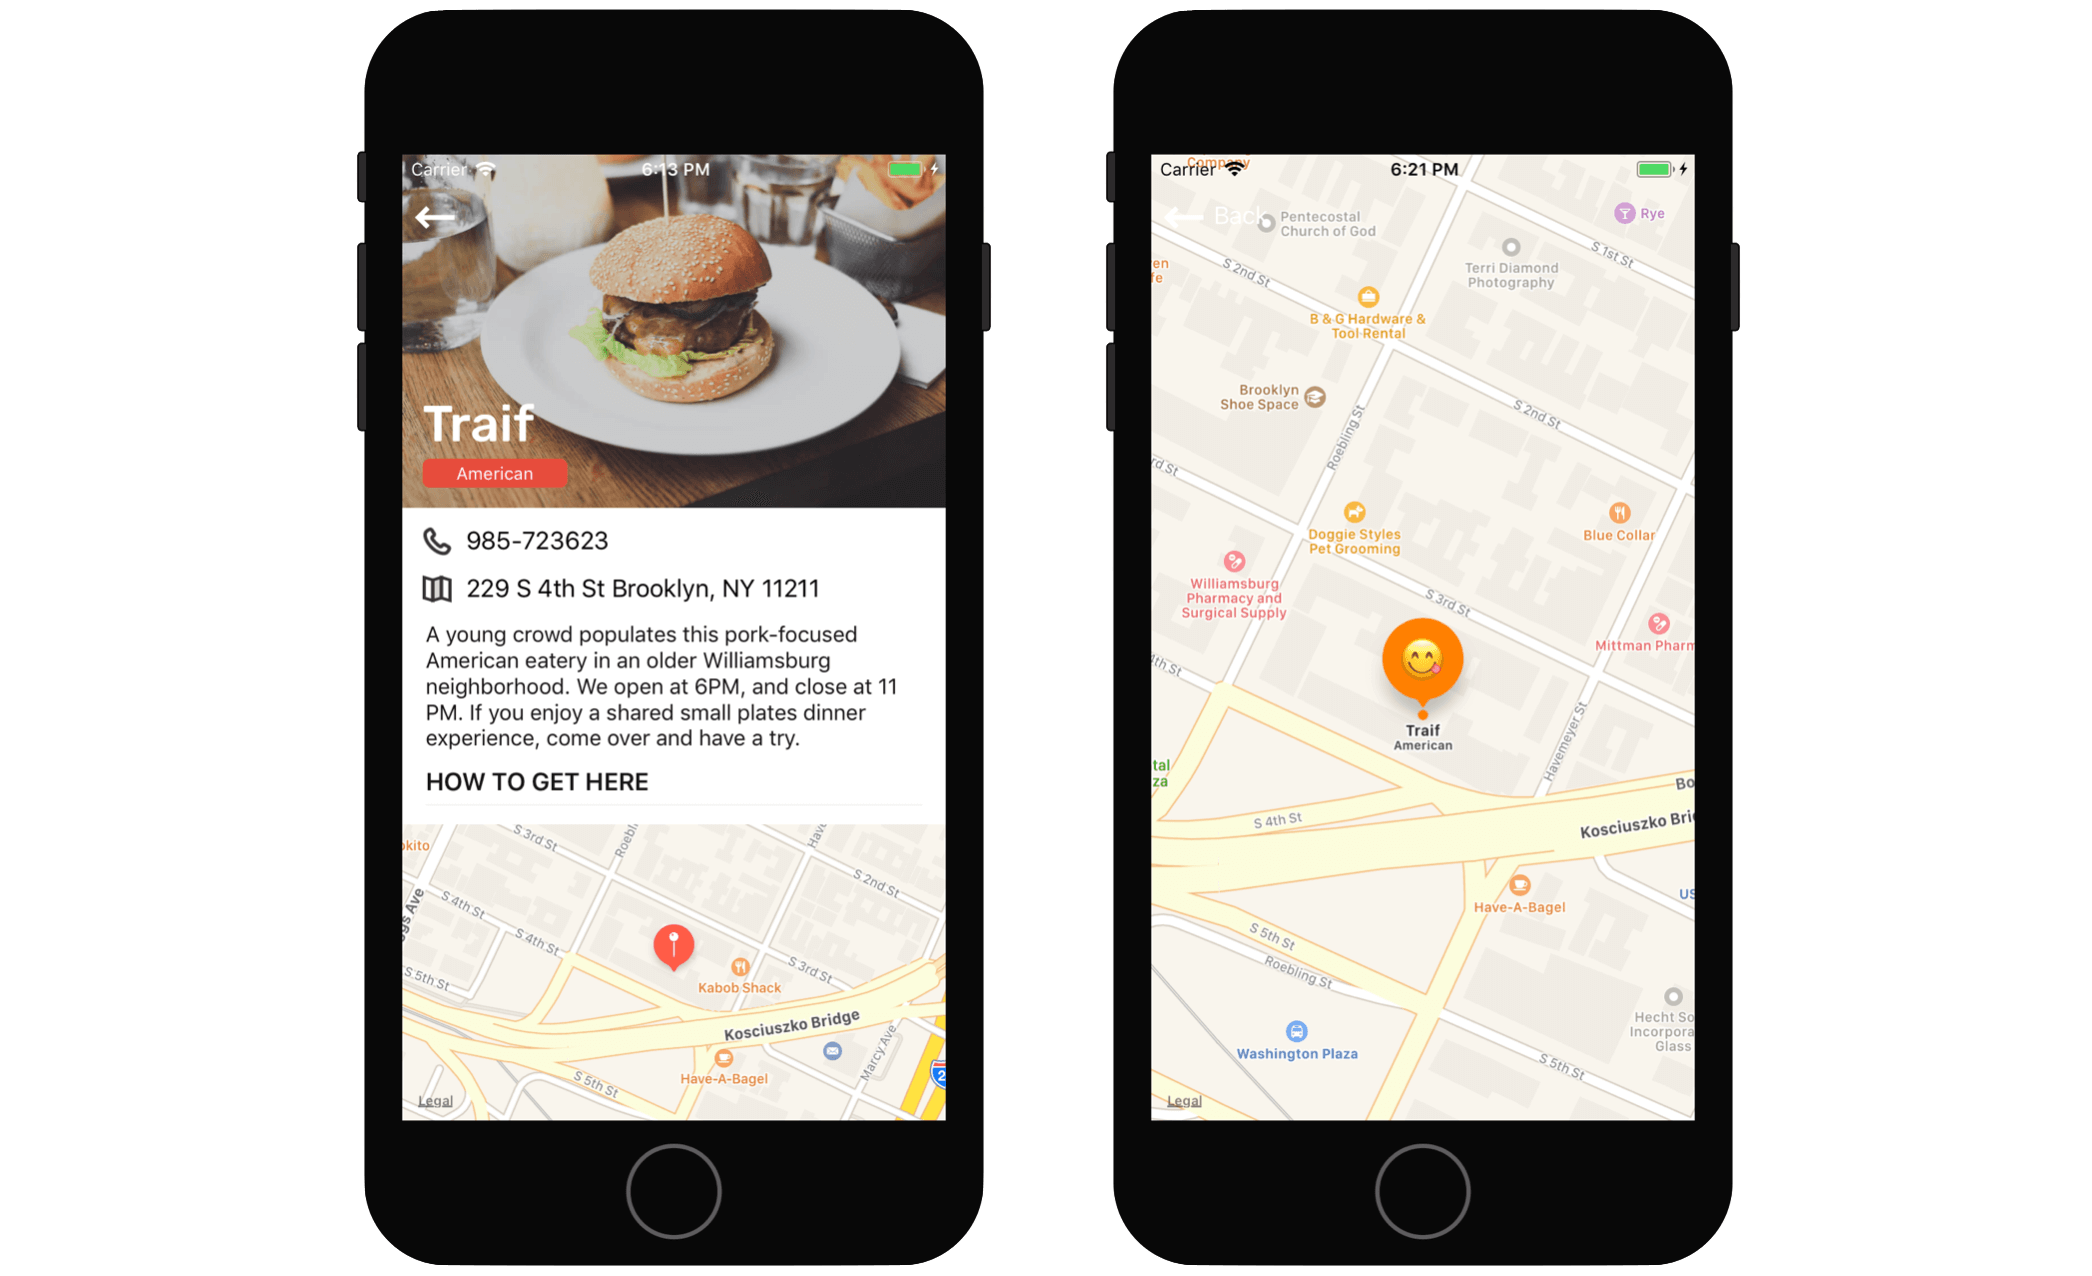
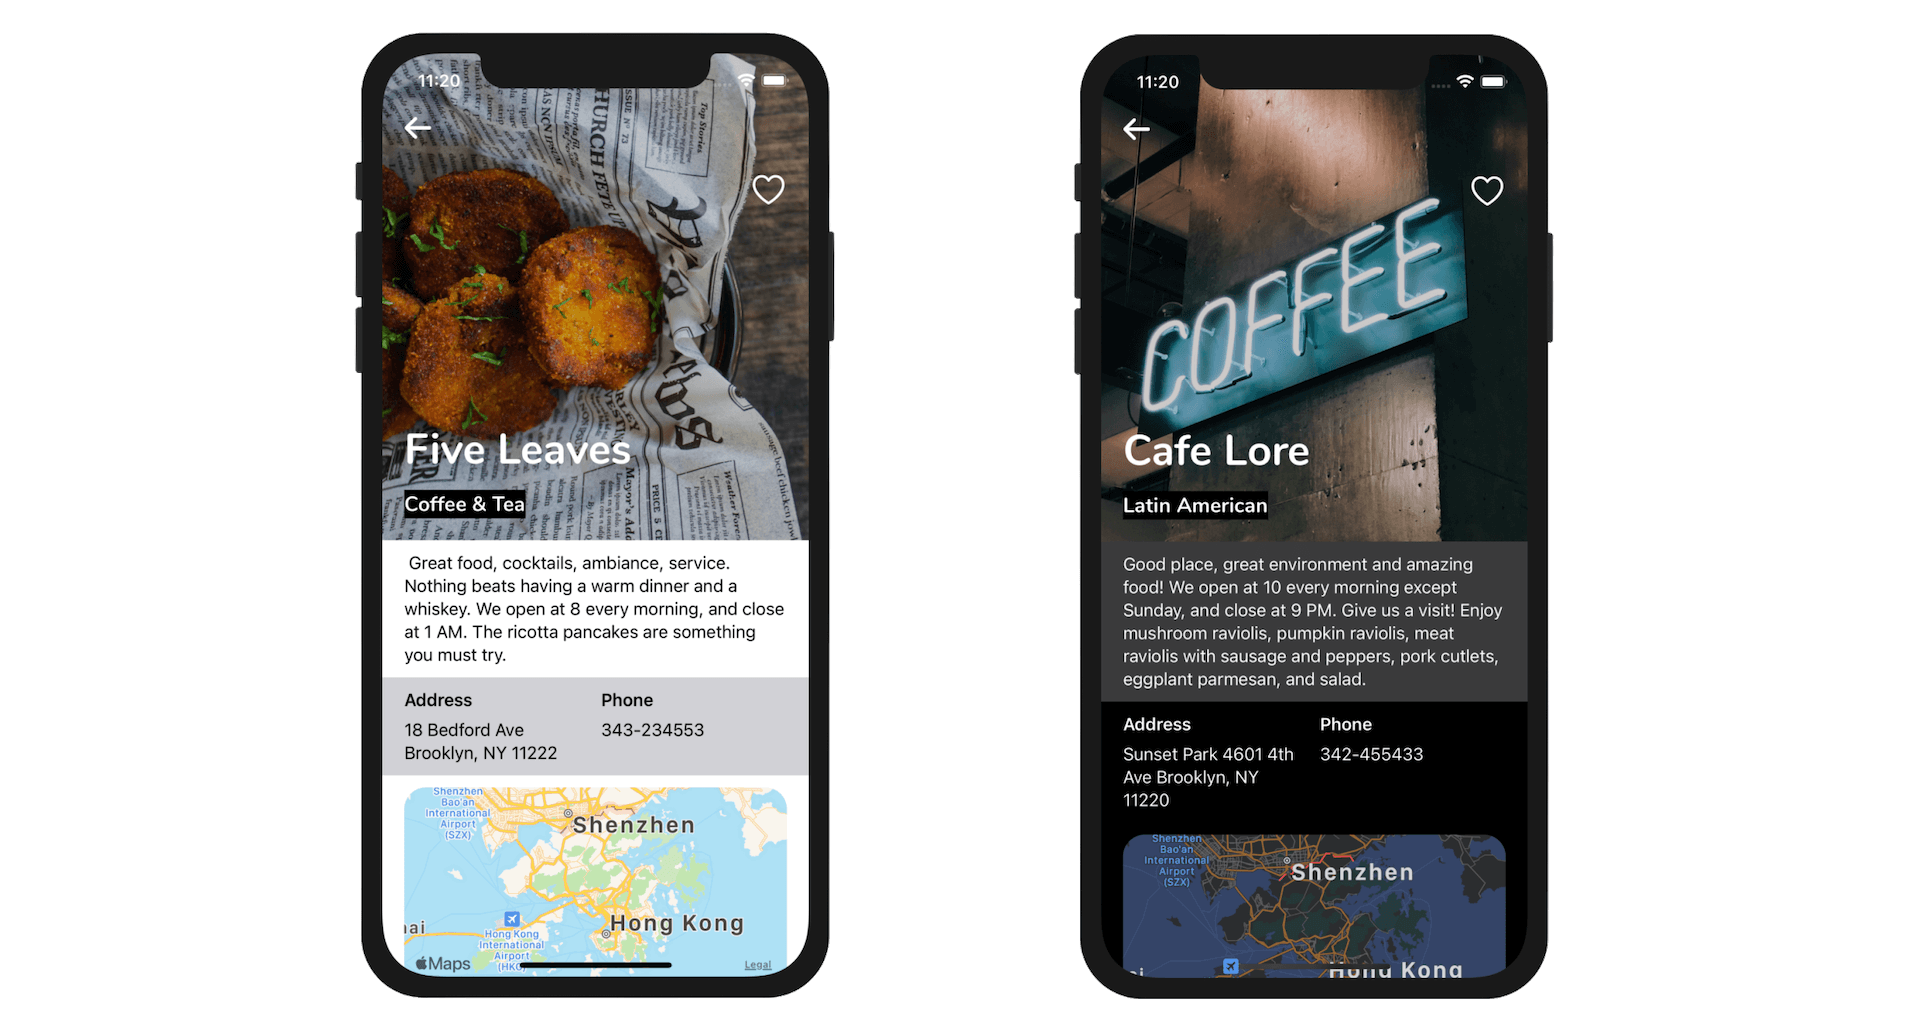
To give you a better understanding of the MapKit framework, we will add a map feature to the FoodPin app. After the change, the app will display a small map view in the detail screen. When a user taps that map view, the app will further bring up an interactive map that takes up the whole screen.
Cool, right? It's gonna be fun. Let's get started.
Using MapKit Framework
By default, the MapKit framework is not bundled in the Xcode project. To use it, you have to first add the framework and bundle it in your project. But you don't need to do it manually. Xcode has a capability section that lets you configure frameworks for various Apple technologies such as Maps and iCloud.
In the project navigator, select the FoodPin project and choose the FoodPin target. You can then enable the Maps feature by clicking the + Capabilities button. Just look for Maps and double click it. Xcode will automatically configure the project to use the MapKit framework.

Adding a Map Interface to Your App
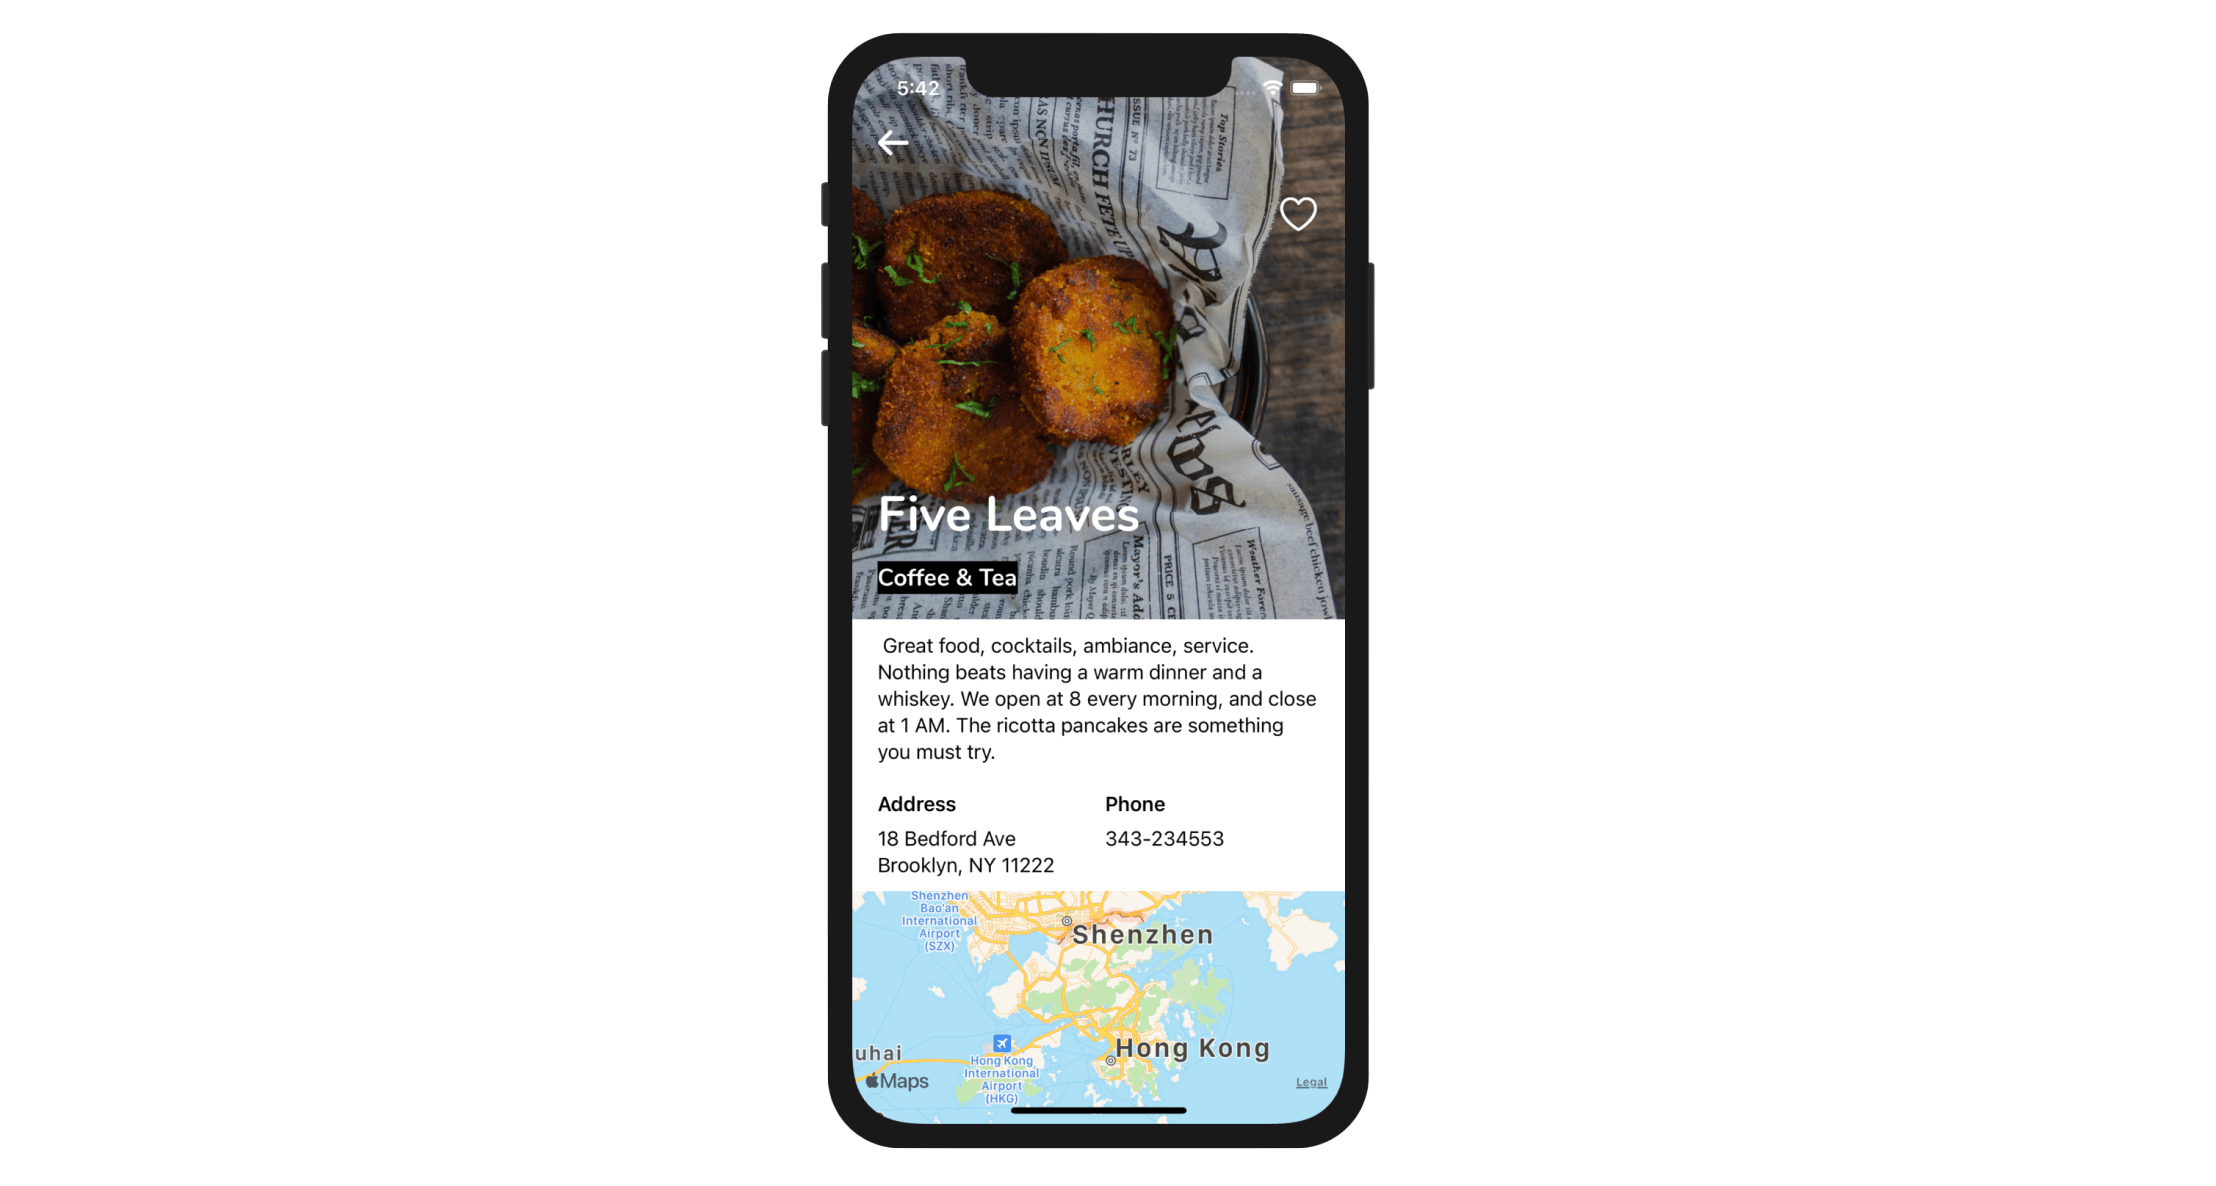
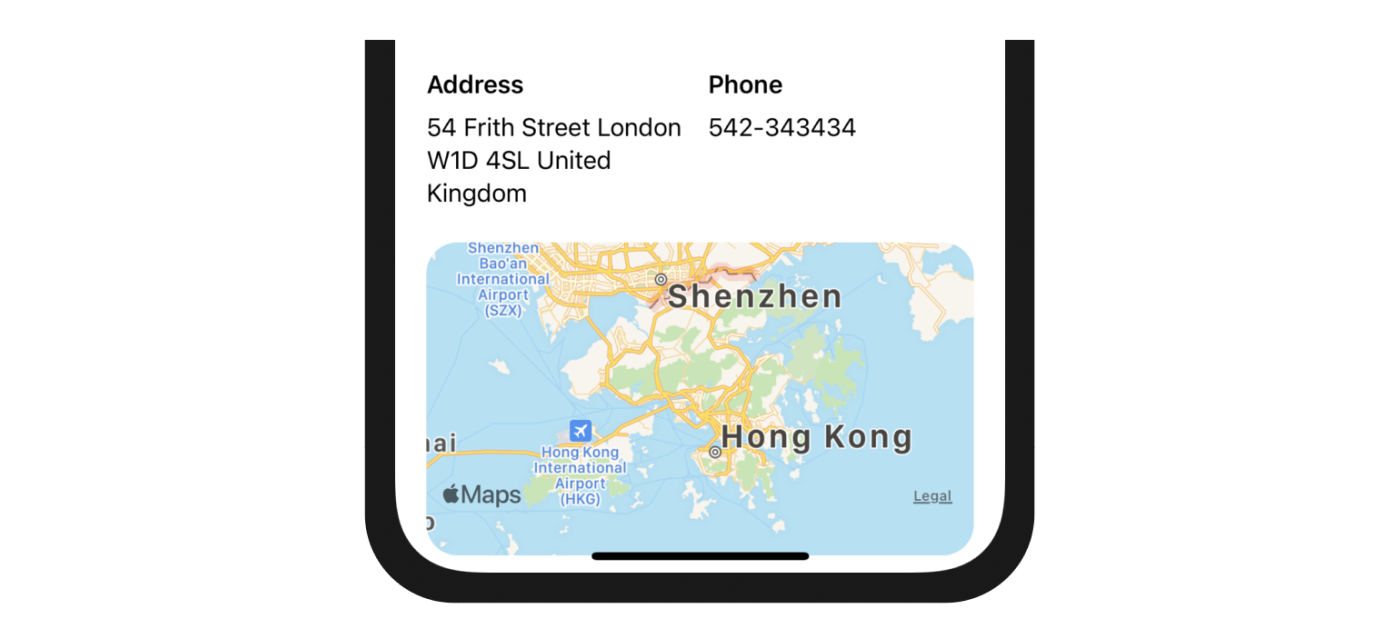
What we're going to do is to add a non-interactive map to the footer of the restaurant detail view. When a user taps the map, the app navigates to a map view controller showing a full-screen map of the restaurant location. Figure 16-2 displays the resulting UI of the app.
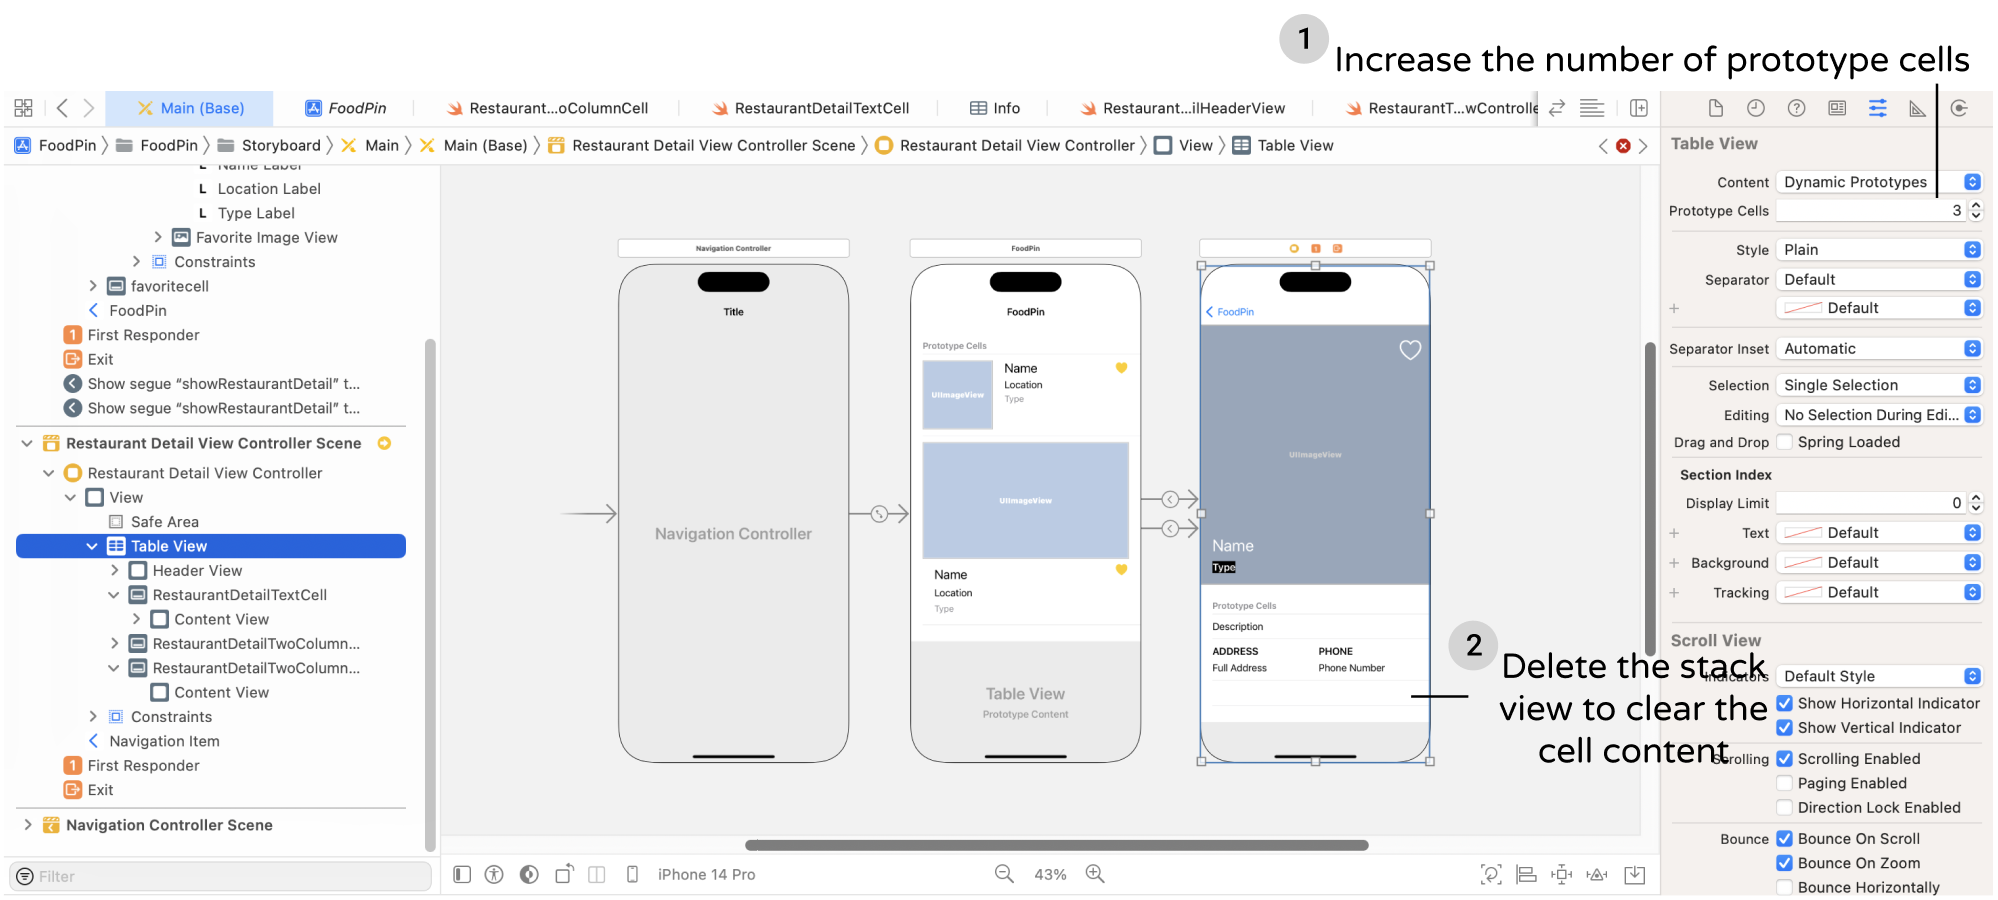
We first start to modify the detail view to support the map function. As you may know, we need to implement a new prototype cell to display the map view. Now open Main storyboard and select the table view of the detail view controller. In the Attributes inspector, change the value of Prototype cell from 2 to 3. Xcode will automatically duplicate the 2 column cell in the table view. Then delete the stack view to clear its content.
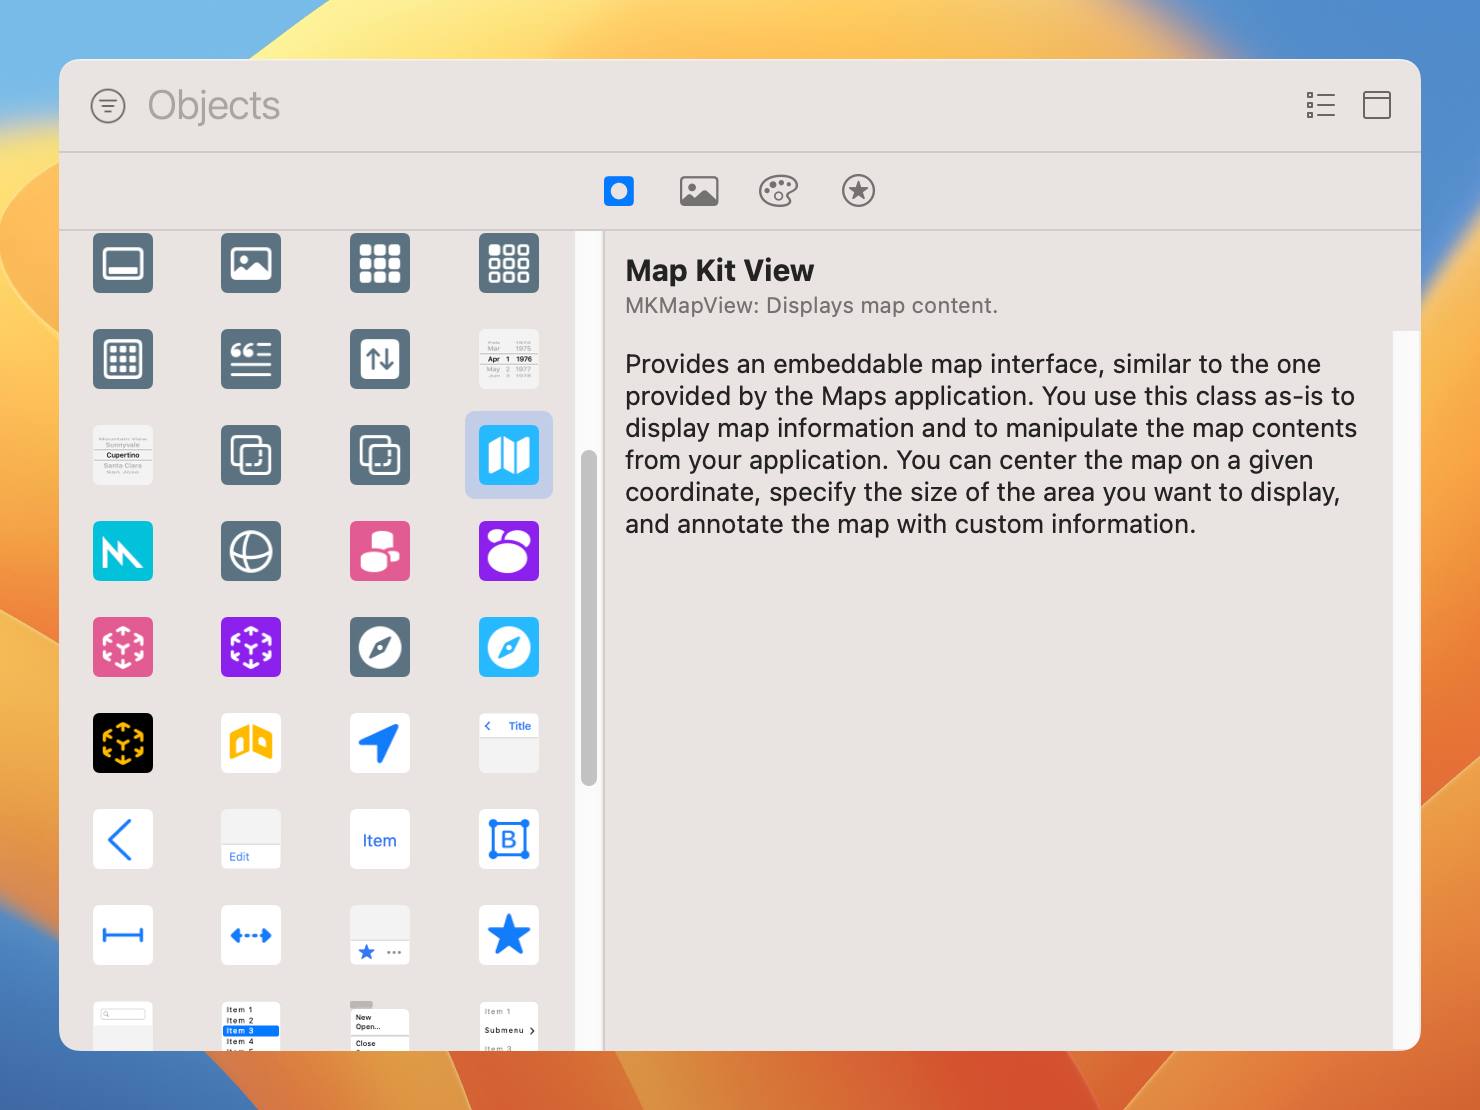
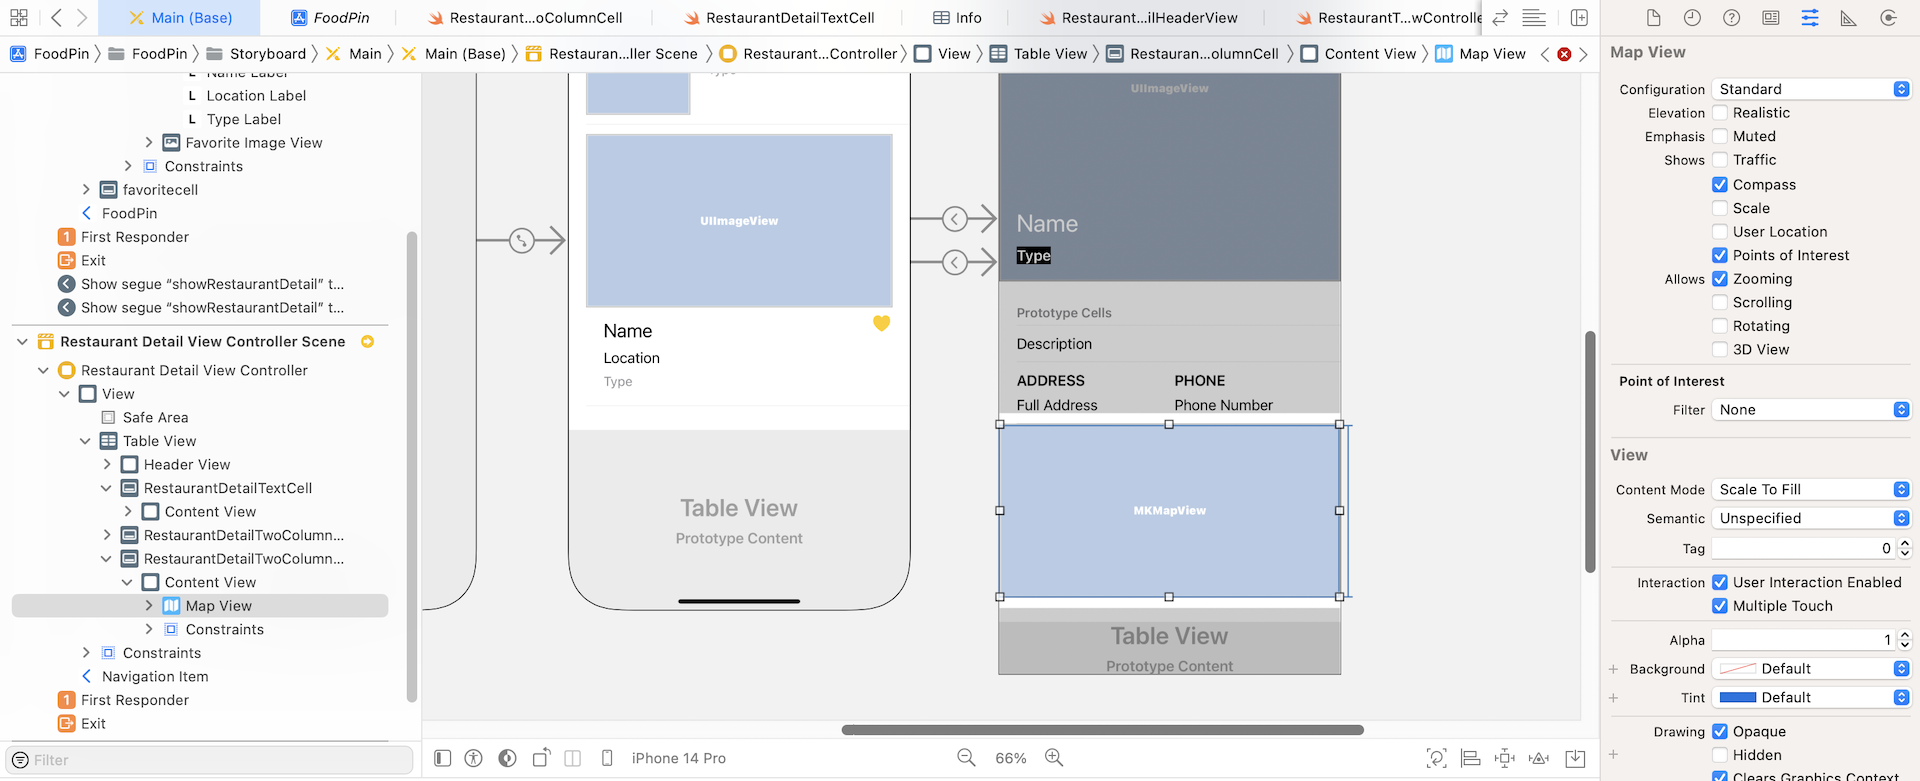
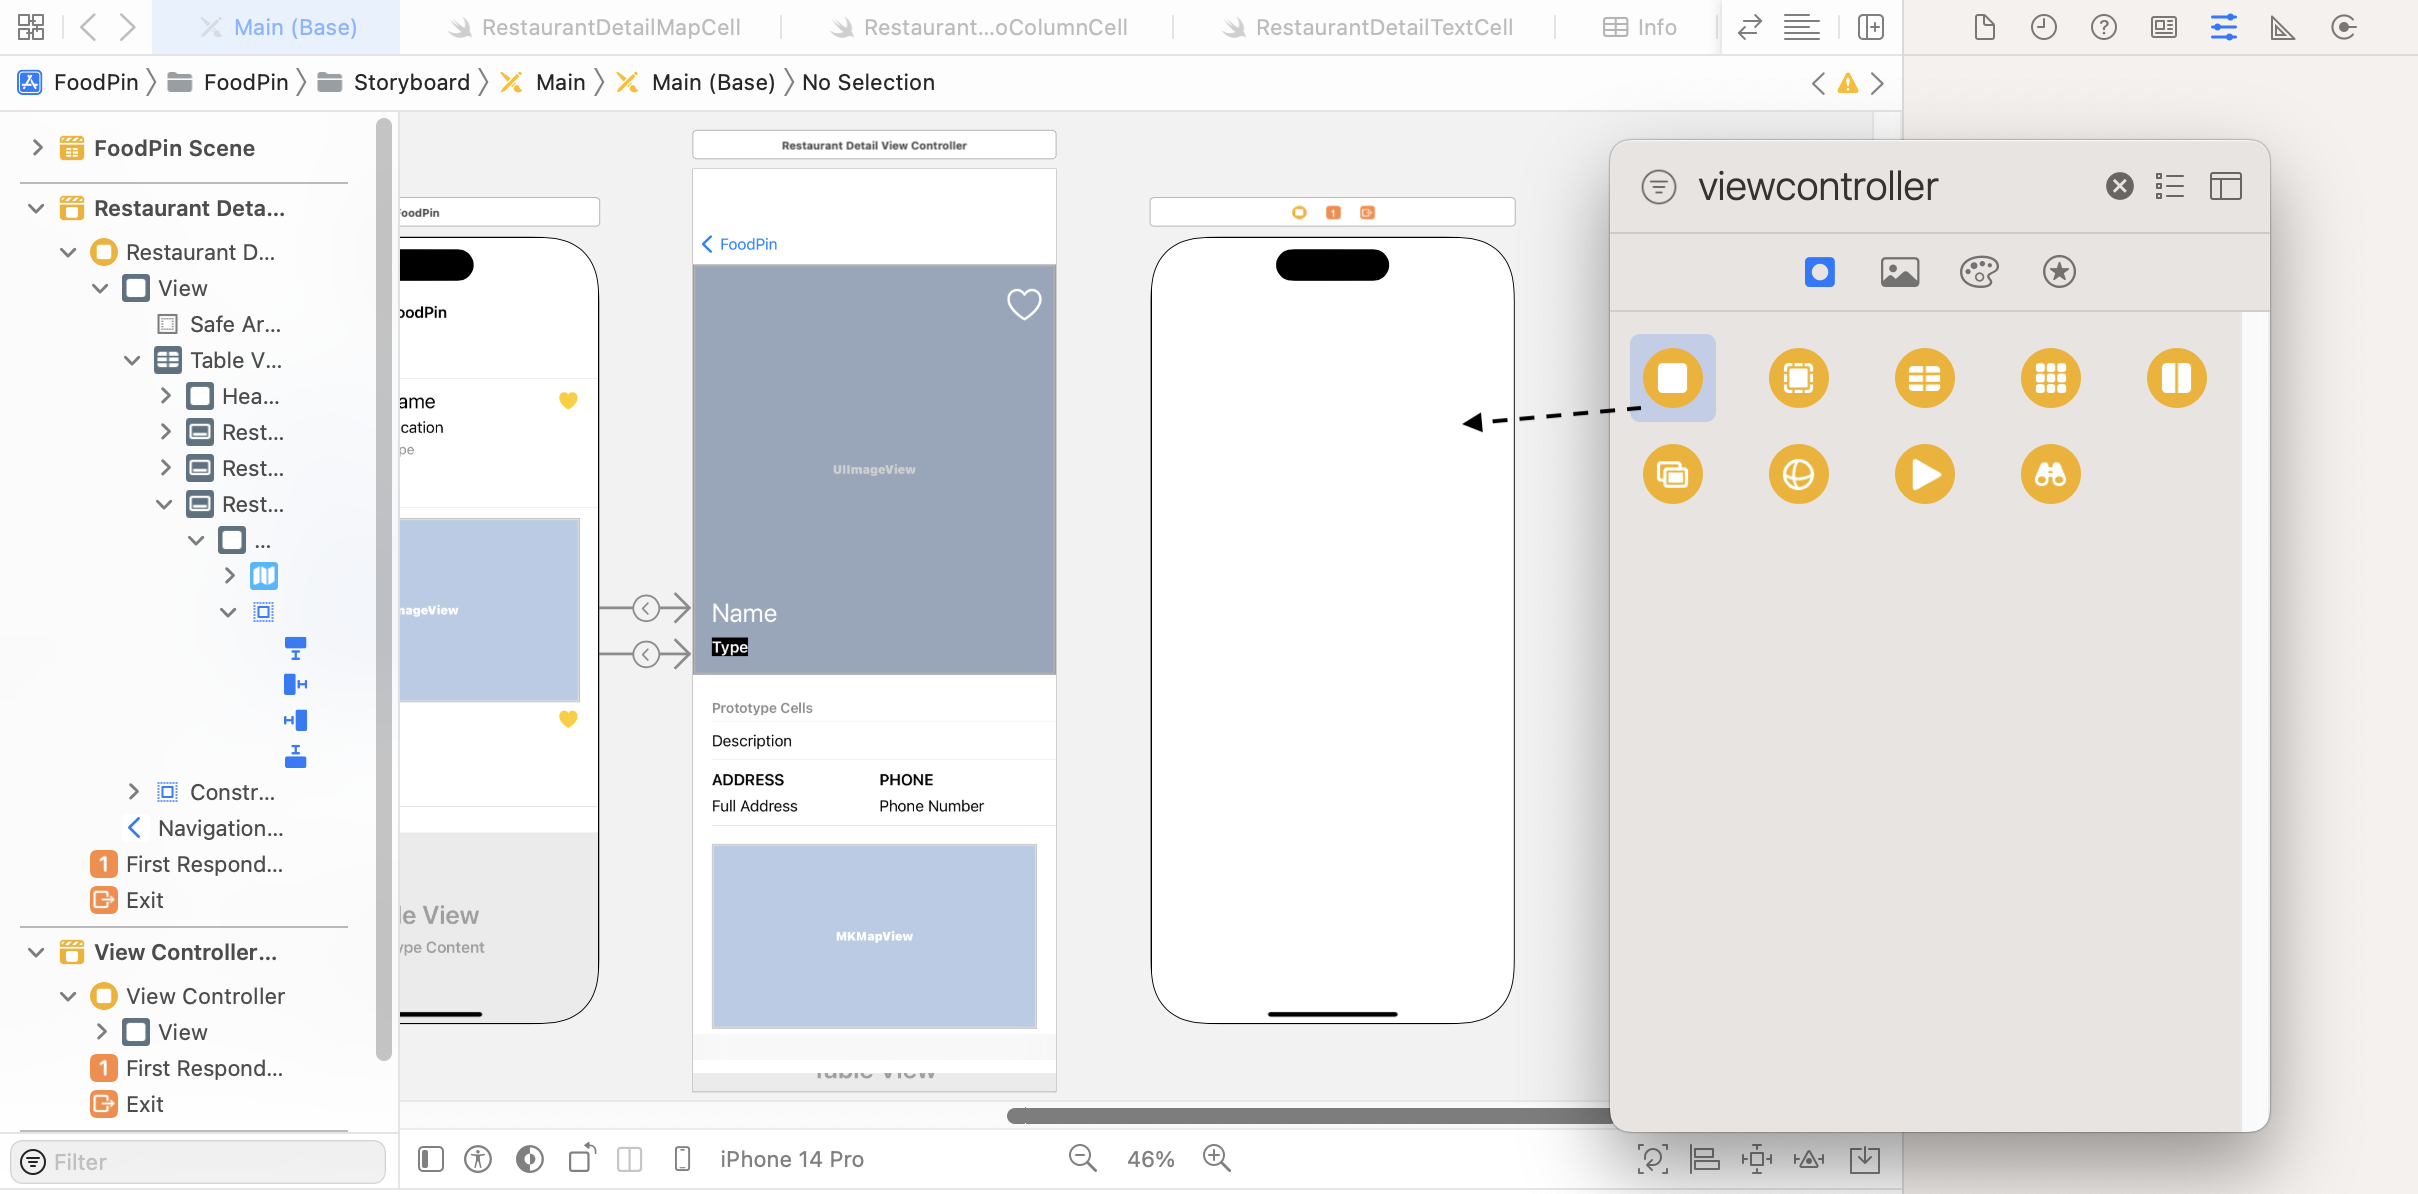
Open the Object library, look for the Map Kit View. This is the object for embedding a map interface.
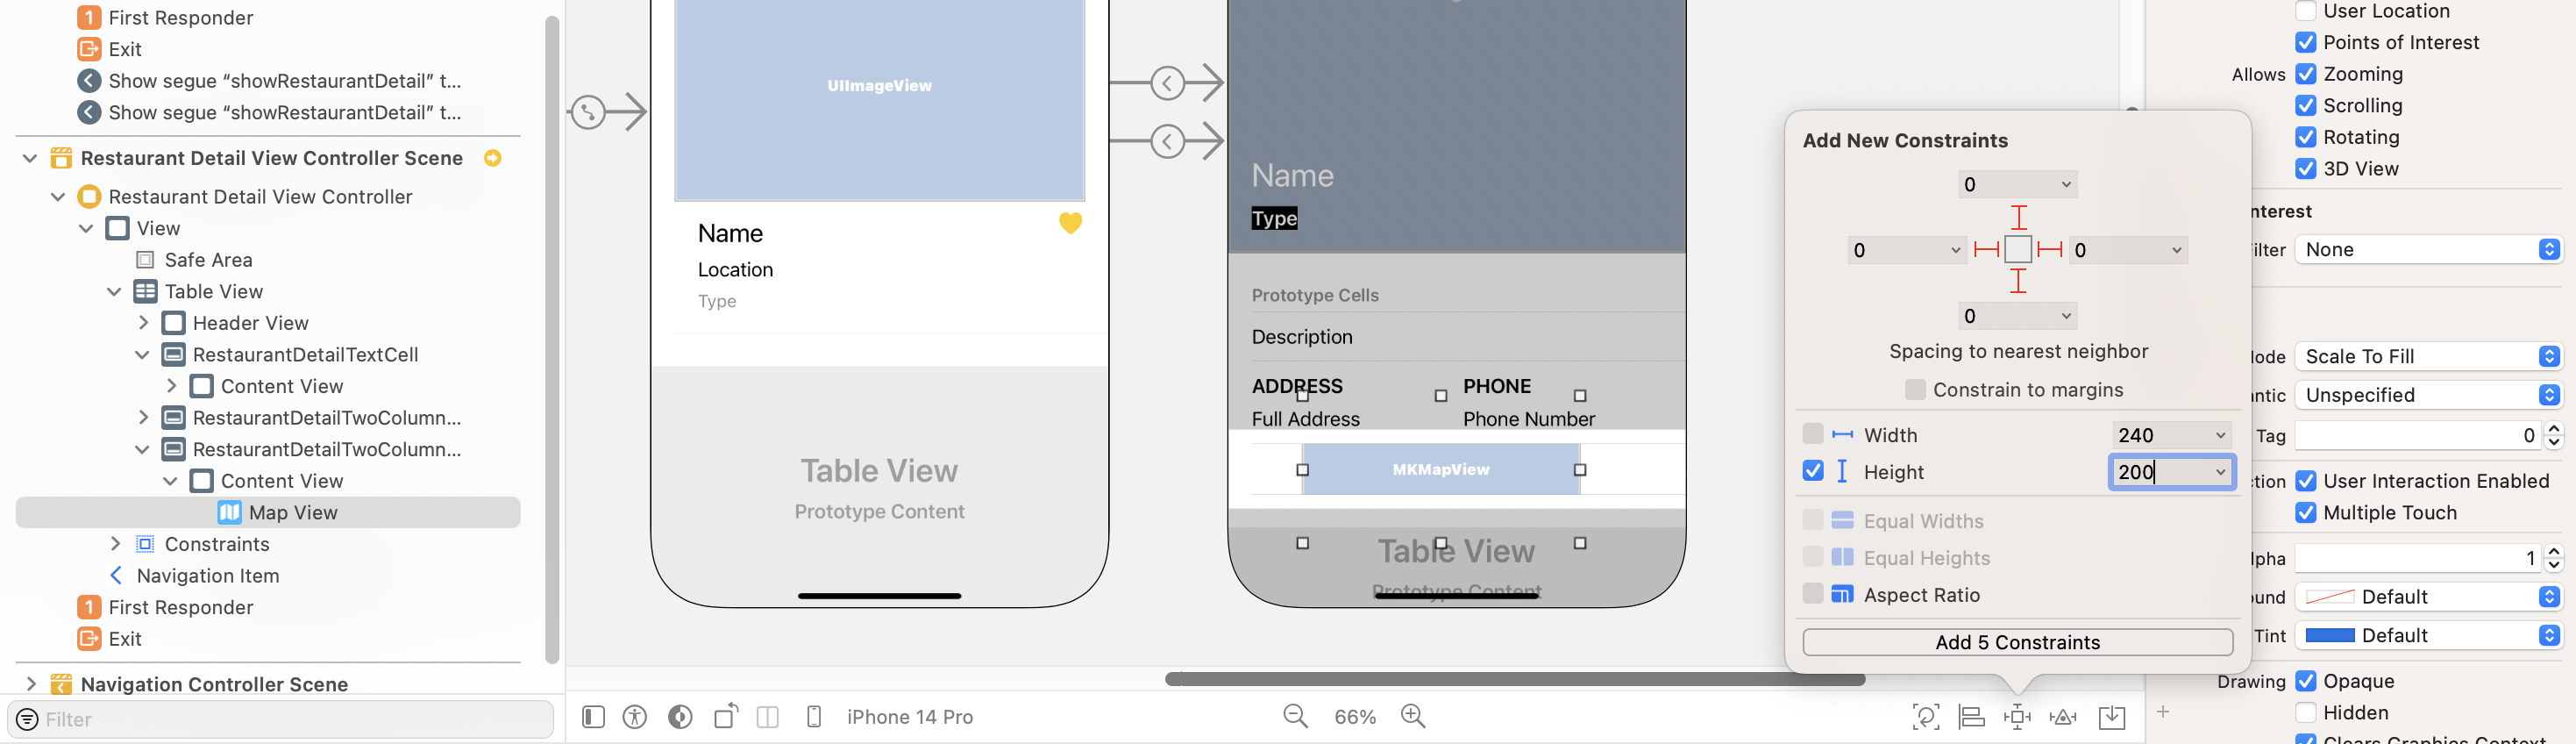
Drag the Map Kit View to the new cell. Then click the Add new constraints button and add the spacing constraints for the map view. Set the value of all sides to 0 and height to 200 points. Also, make sure the Constrain to margins option is unchecked. Then click Add 5 constraints to make the map view fit the whole cell.
As you will notice, the cell goes beyond the boundary of the table view. For the ease of editing, you can make the view controller a bit larger. Select the Restaurant Detail View Controller in Document Outline. In the Size inspector, change its simulated size from Fixed to Freeform. Set the height to 1000. This stretches the detail view controller to 1000 points. Now you can easily edit the map cell.

If you select the map view and go to the Attributes inspector, you will find several options such as zooming and scrolling for configuring its behavior. As this map view is just displayed in a table cell, I want to keep it less interactive. Uncheck the Scrolling, Rotating and 3D View options.
I know you can't wait to test the change. However, there are a couple things we need to set up. We haven't created the Swift files for the map cell yet.
In project navigator, right click the View folder and choose New File…. Use the Cocoa Touch Class template. In the next screen, name the class RestaurantDetailMapCell and set its subclass to UITableViewCell. Once the Swift file is saved, update its content like this:
import UIKit
import MapKit

class RestaurantDetailMapCell: UITableViewCell {

    @IBOutlet var mapView: MKMapView!

    override func awakeFromNib() {
        super.awakeFromNib()
        // Initialization code
    }

    override func setSelected(_ selected: Bool, animated: Bool) {
        super.setSelected(selected, animated: animated)

        // Configure the view for the selected state
    }

}
Here we've made a couple of changes. First, we add an import statement at the beginner of the code. The other thing is the mapView outlet. Because the class MKMapView is made available through the MapKit package, we have to add the import statement.
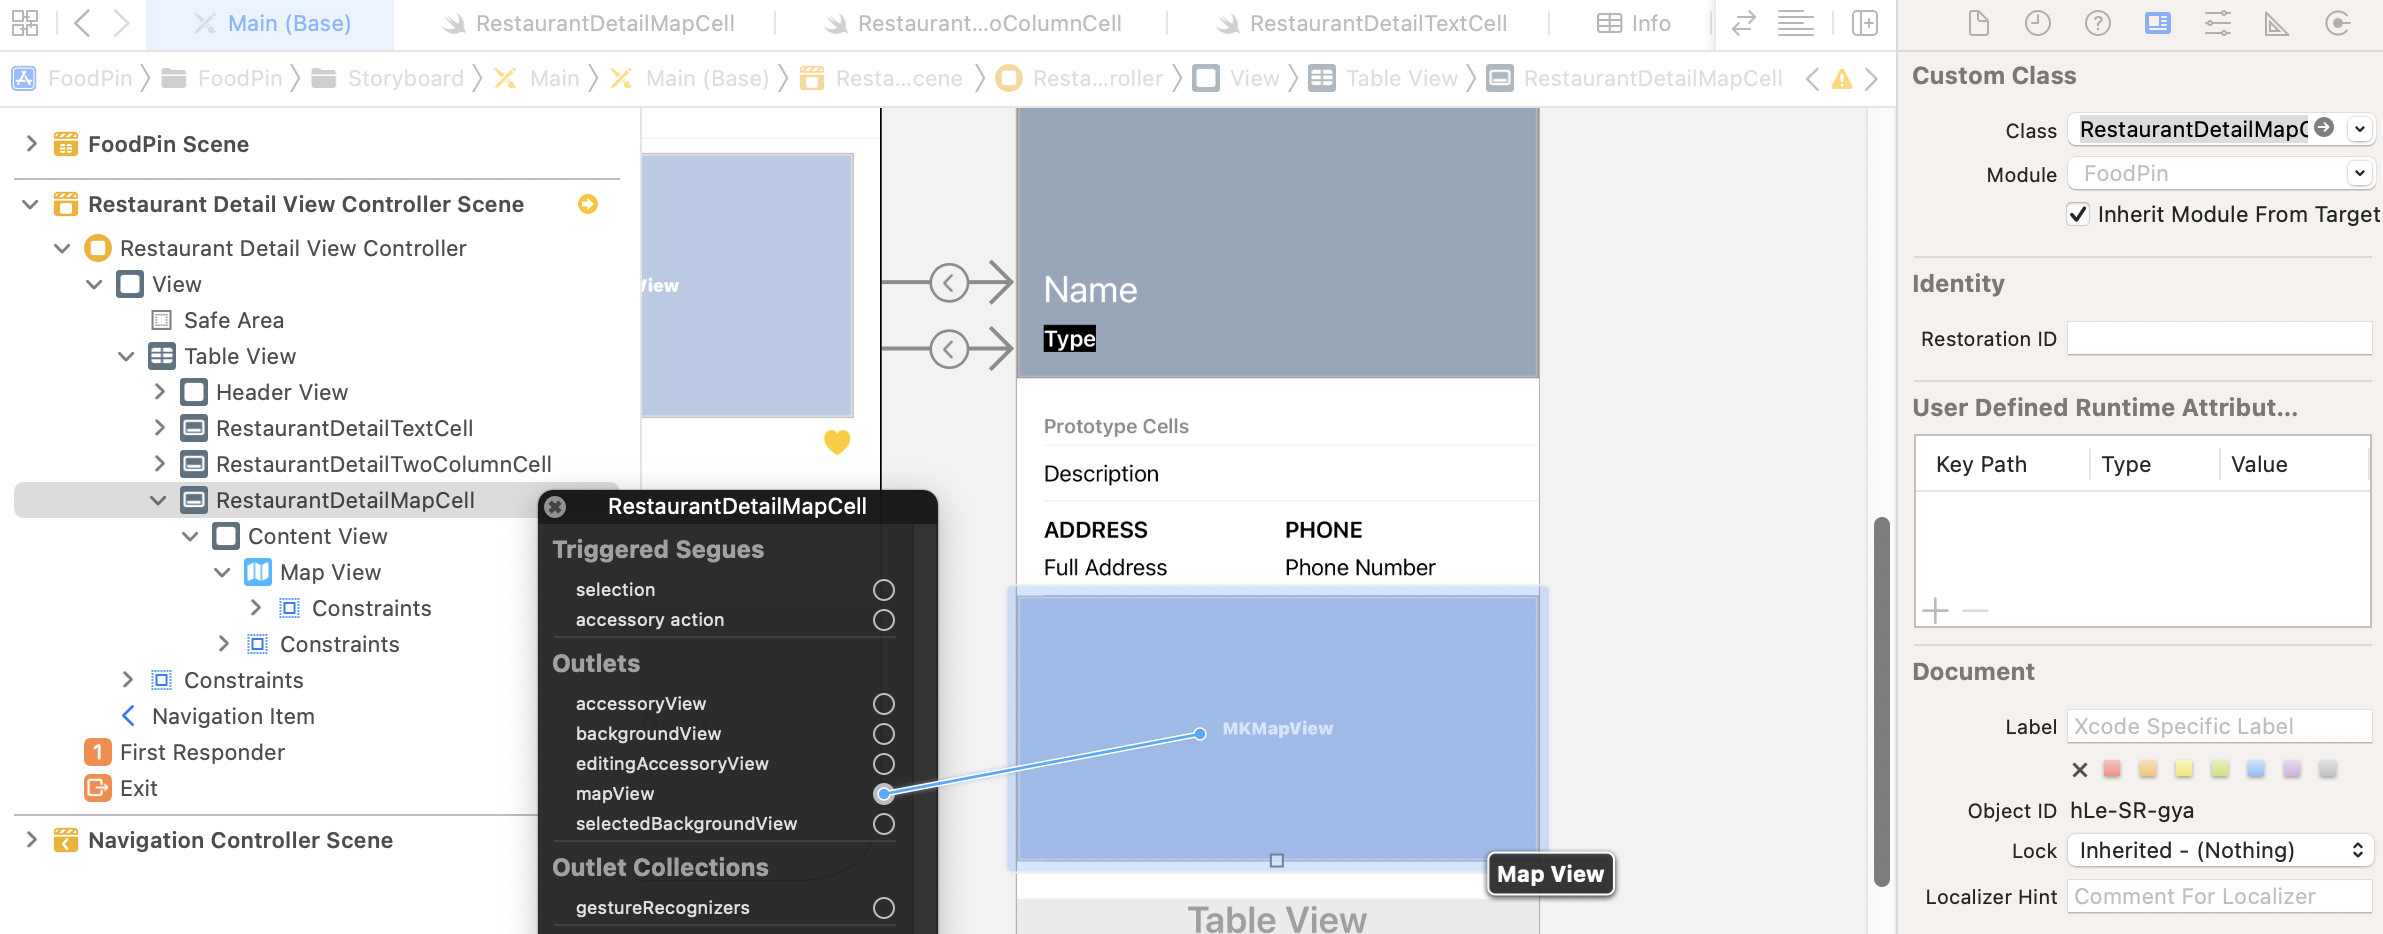
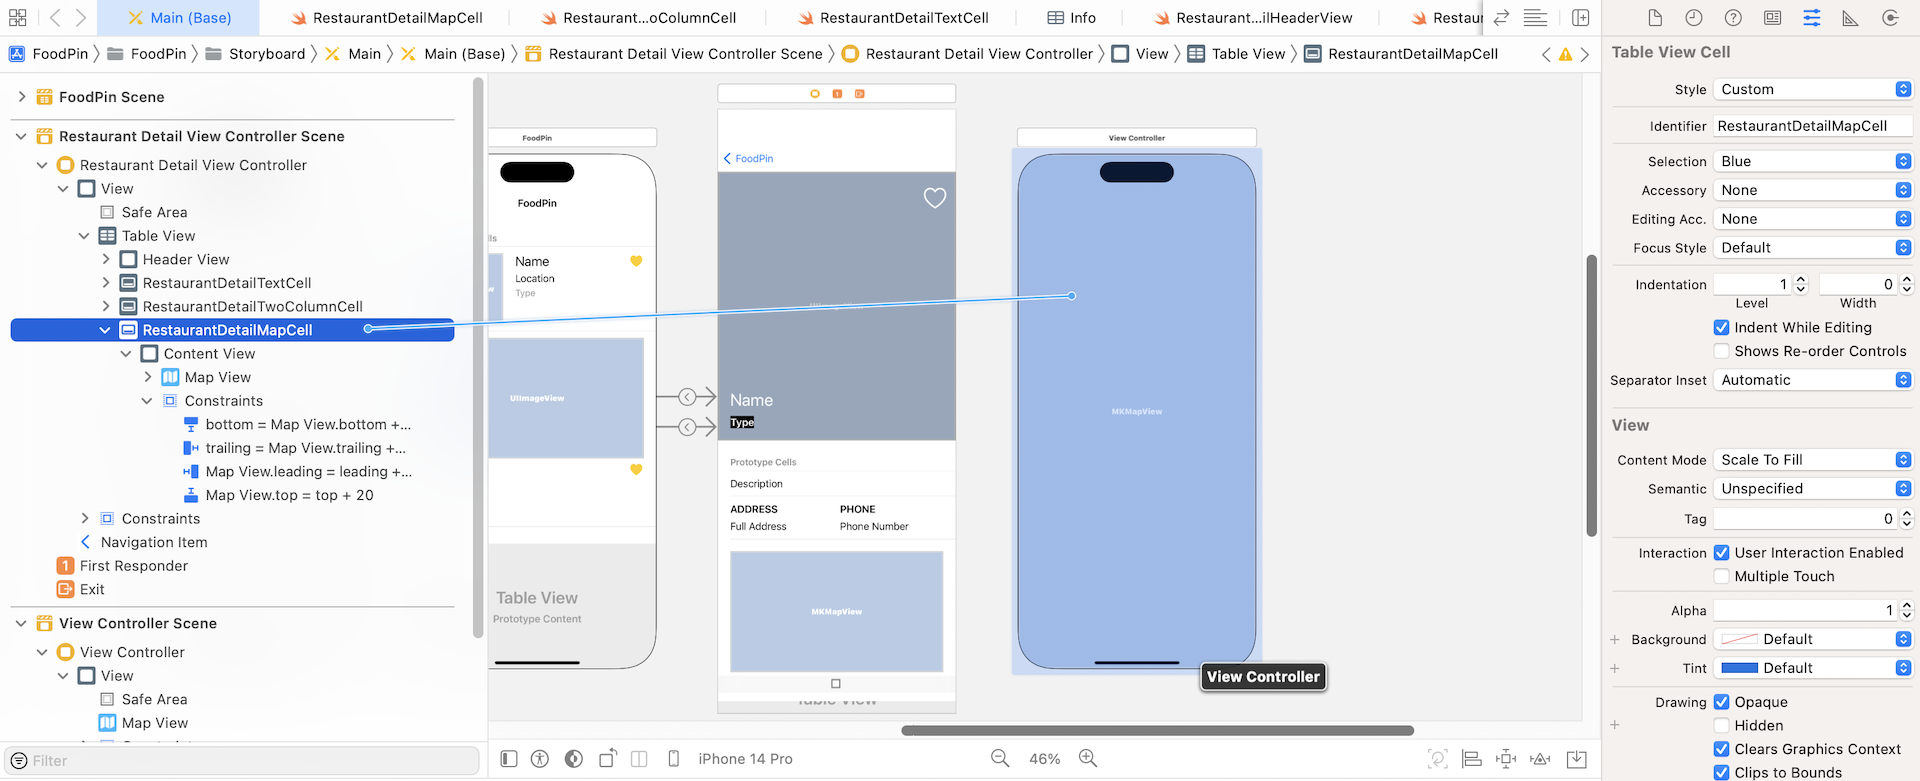
Now go back to Interface Builder to establish the outlet connection. Select the prototype cell with the map view. Go to the Attributes inspector and change its identifier to RestaurantDetailMapCell.
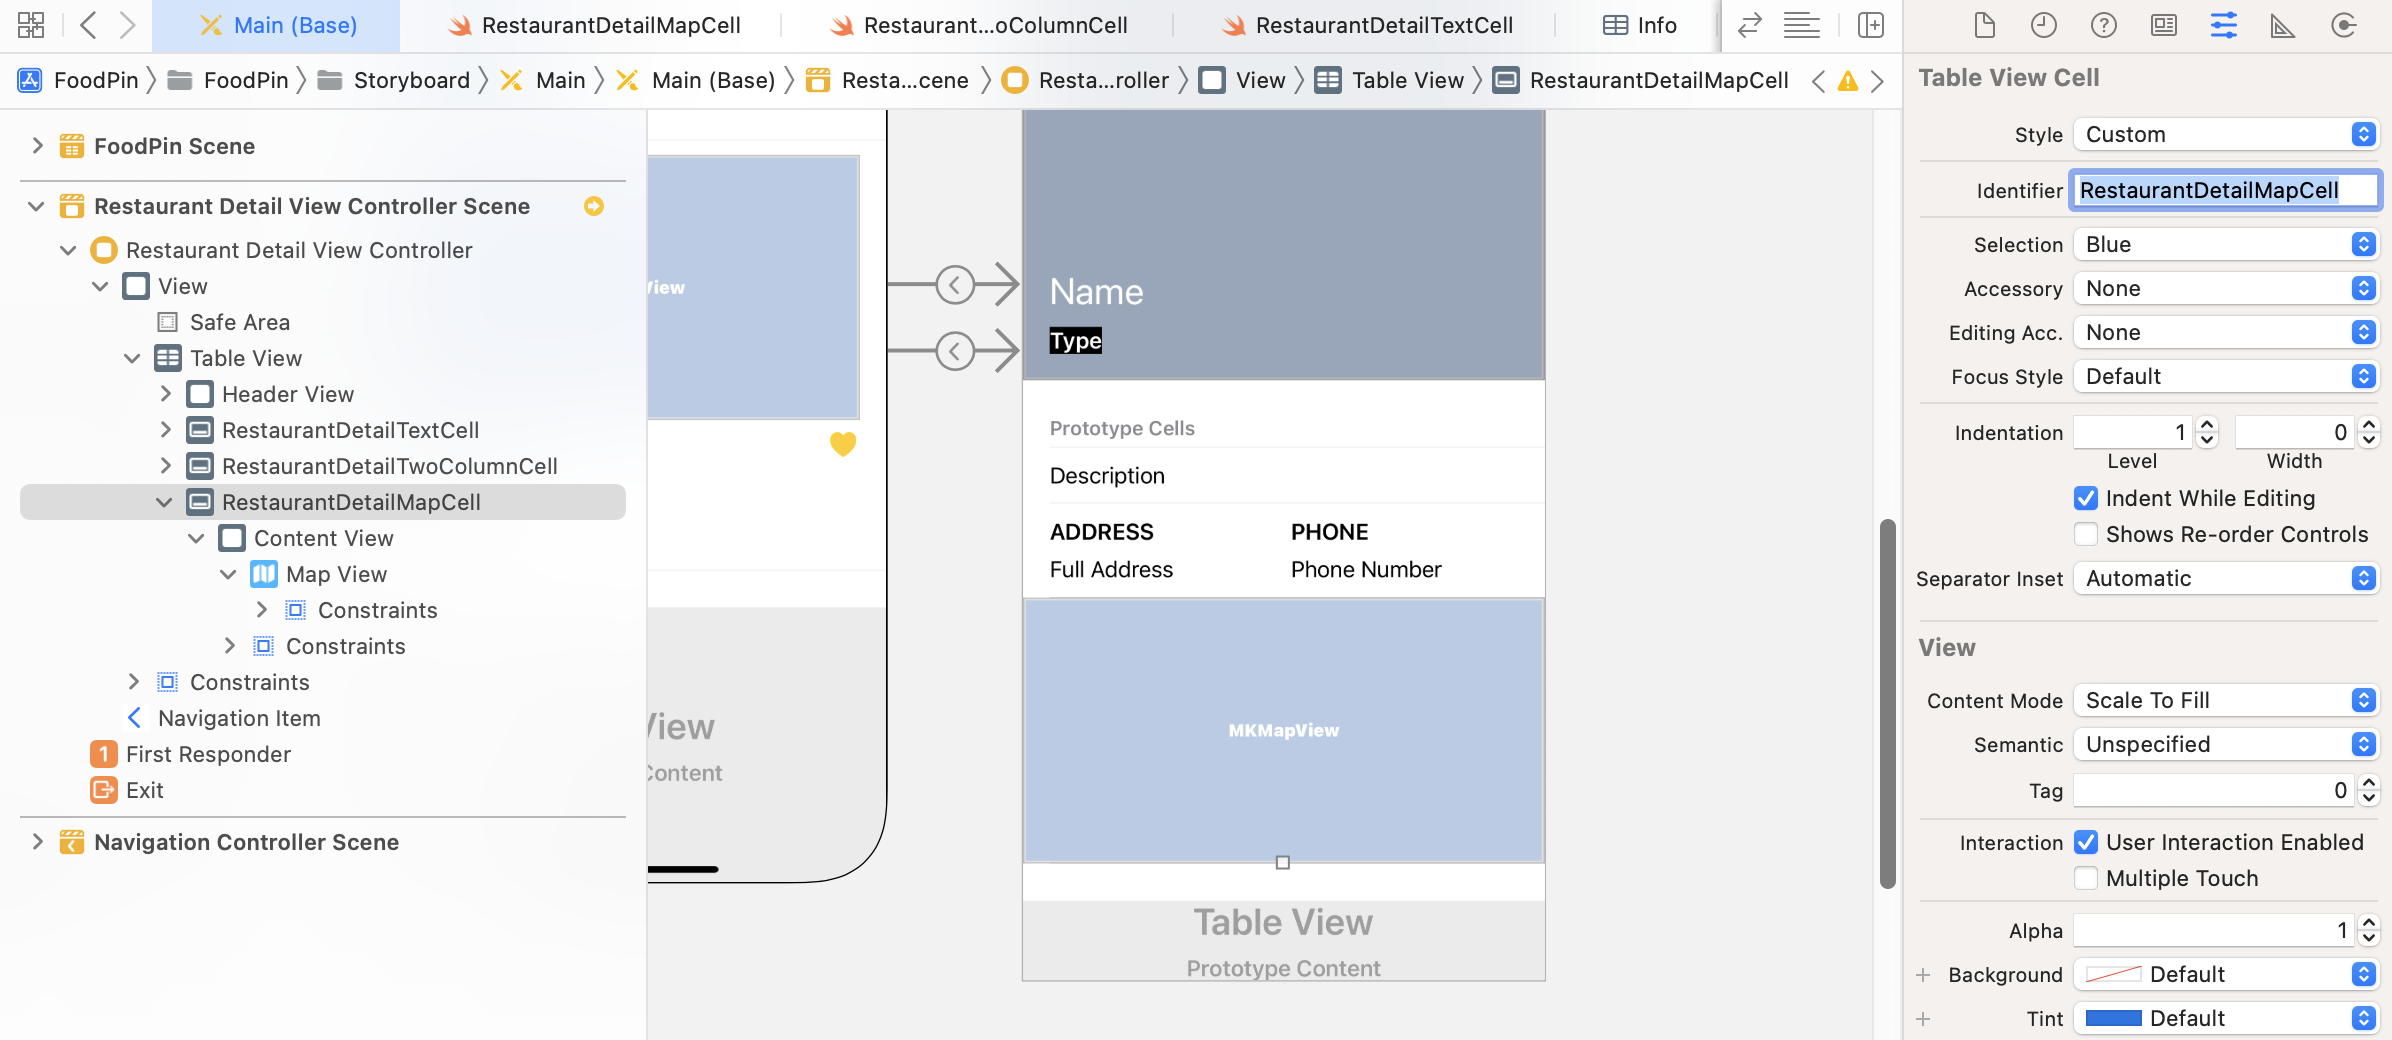
In the Identity inspector, set the custom class to RestaurantDetailMapCell. Next, establish the connection between the mapView variable and the map view.
Cool! You are almost done. With this new prototype cells, you have to make some changes to the RestaurantDetailViewController.swift file:
- The total number of cells in the detail view is now changed from 2 to 3.
- The
tableView(_:cellForRowAt:)method should be updated because we have to return a different cell type for row #2.
Now open RestaurantDetailViewController.swift and update the total number of cells:
func tableView(_ tableView: UITableView, numberOfRowsInSection section: Int) -> Int {
    return 3
}
Also, update the tableView(_:cellForRowAt:) method like this:
func tableView(_ tableView: UITableView, cellForRowAt indexPath: IndexPath) -> UITableViewCell {
    switch indexPath.row {
    case 0:
        let cell = tableView.dequeueReusableCell(withIdentifier: String(describing: RestaurantDetailTextCell.self), for: indexPath) as! RestaurantDetailTextCell

        cell.descriptionLabel.text = restaurant.description

        return cell

    case 1:
        let cell = tableView.dequeueReusableCell(withIdentifier: String(describing: RestaurantDetailTwoColumnCell.self), for: indexPath) as! RestaurantDetailTwoColumnCell

        cell.column1TitleLabel.text = "Address"
        cell.column1TextLabel.text = restaurant.location
        cell.column2TitleLabel.text = "Phone"
        cell.column2TextLabel.text = restaurant.phone

        return cell

    case 2:
        let cell = tableView.dequeueReusableCell(withIdentifier: String(describing: RestaurantDetailMapCell.self), for: indexPath) as! RestaurantDetailMapCell

        return cell

    default:
        fatalError("Failed to instantiate the table view cell for detail view controller")

    }
}
In the code above, we just added a new case to handle the map cell. Let's hit the Run button to have a quick test. When you select a restaurant to navigate to the detail view, it shows a map. This is the power of MapKit. Without writing a line of code for the map view, you already embed a map within your app. Right now, it only displays a default map based on your current location. But it's really cool, right?
Exercise #1
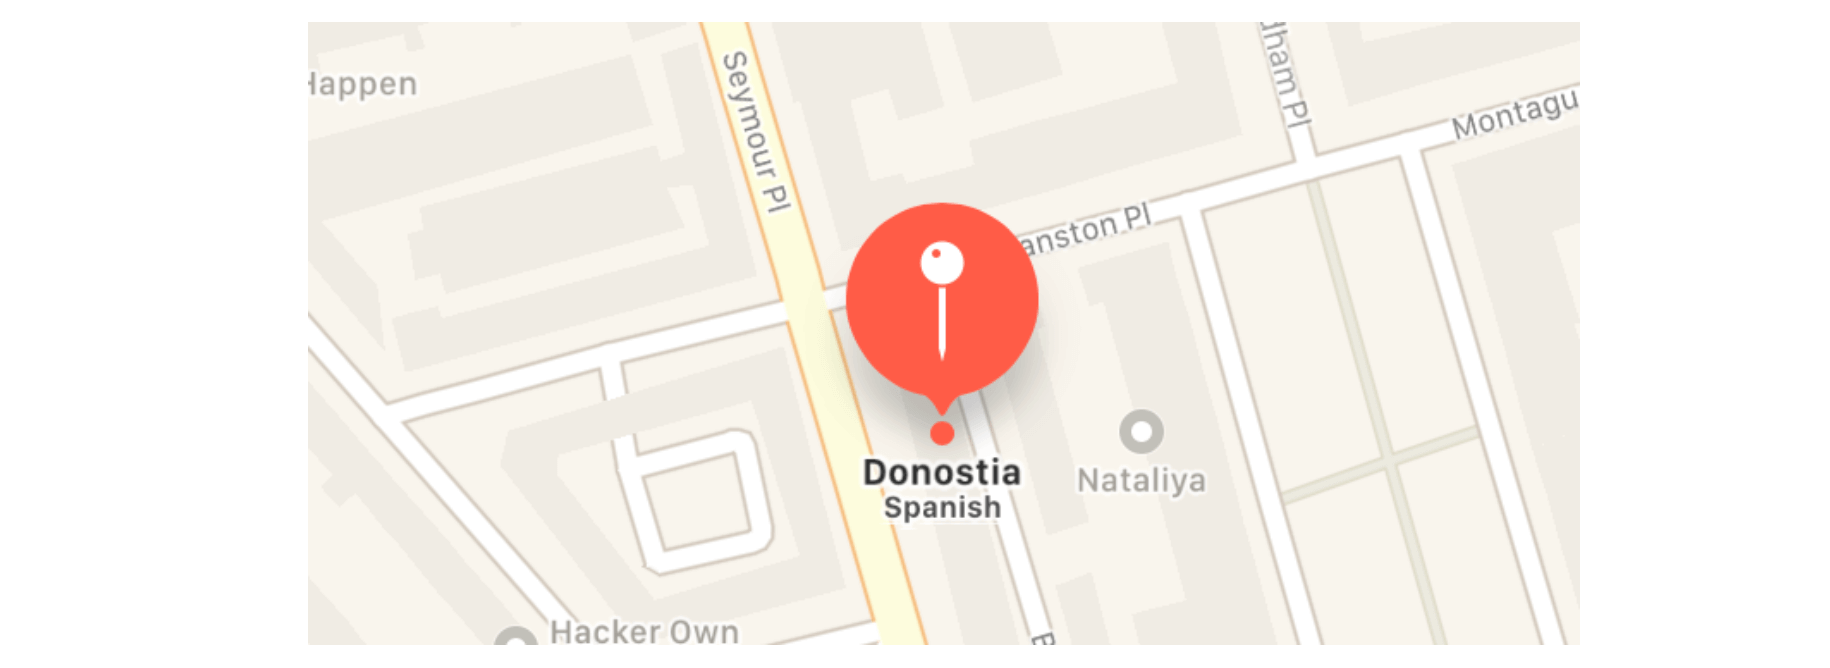
We haven't completed the implementation of the map view yet. Before we move on, let's have a simple exercise. Modify the layout constraints and corner radius of the map view to make it like the one shown in figure 16-11.
If you can't figure out the solution, you can download the complete project at http://www.appcoda.com/resources/swift57/FoodPinRoundedMap.zip.
Displaying a Full Screen Map
We haven't completed the UI yet. When the user taps the map, it will navigate to another screen which shows a full-screen map. Now let's implement the UI of the full-screen map. For this map, we will implement it as a separate view controller. Open the Object library and drag a view controller to the storyboard.
Then drag a map view to the view controller and resize it to fit the view. Next, click the Add New Constraints button to add the required layout constraints. Set the value of top, left, bottom and right side to 0 and click Add 4 Constraints to confirm.
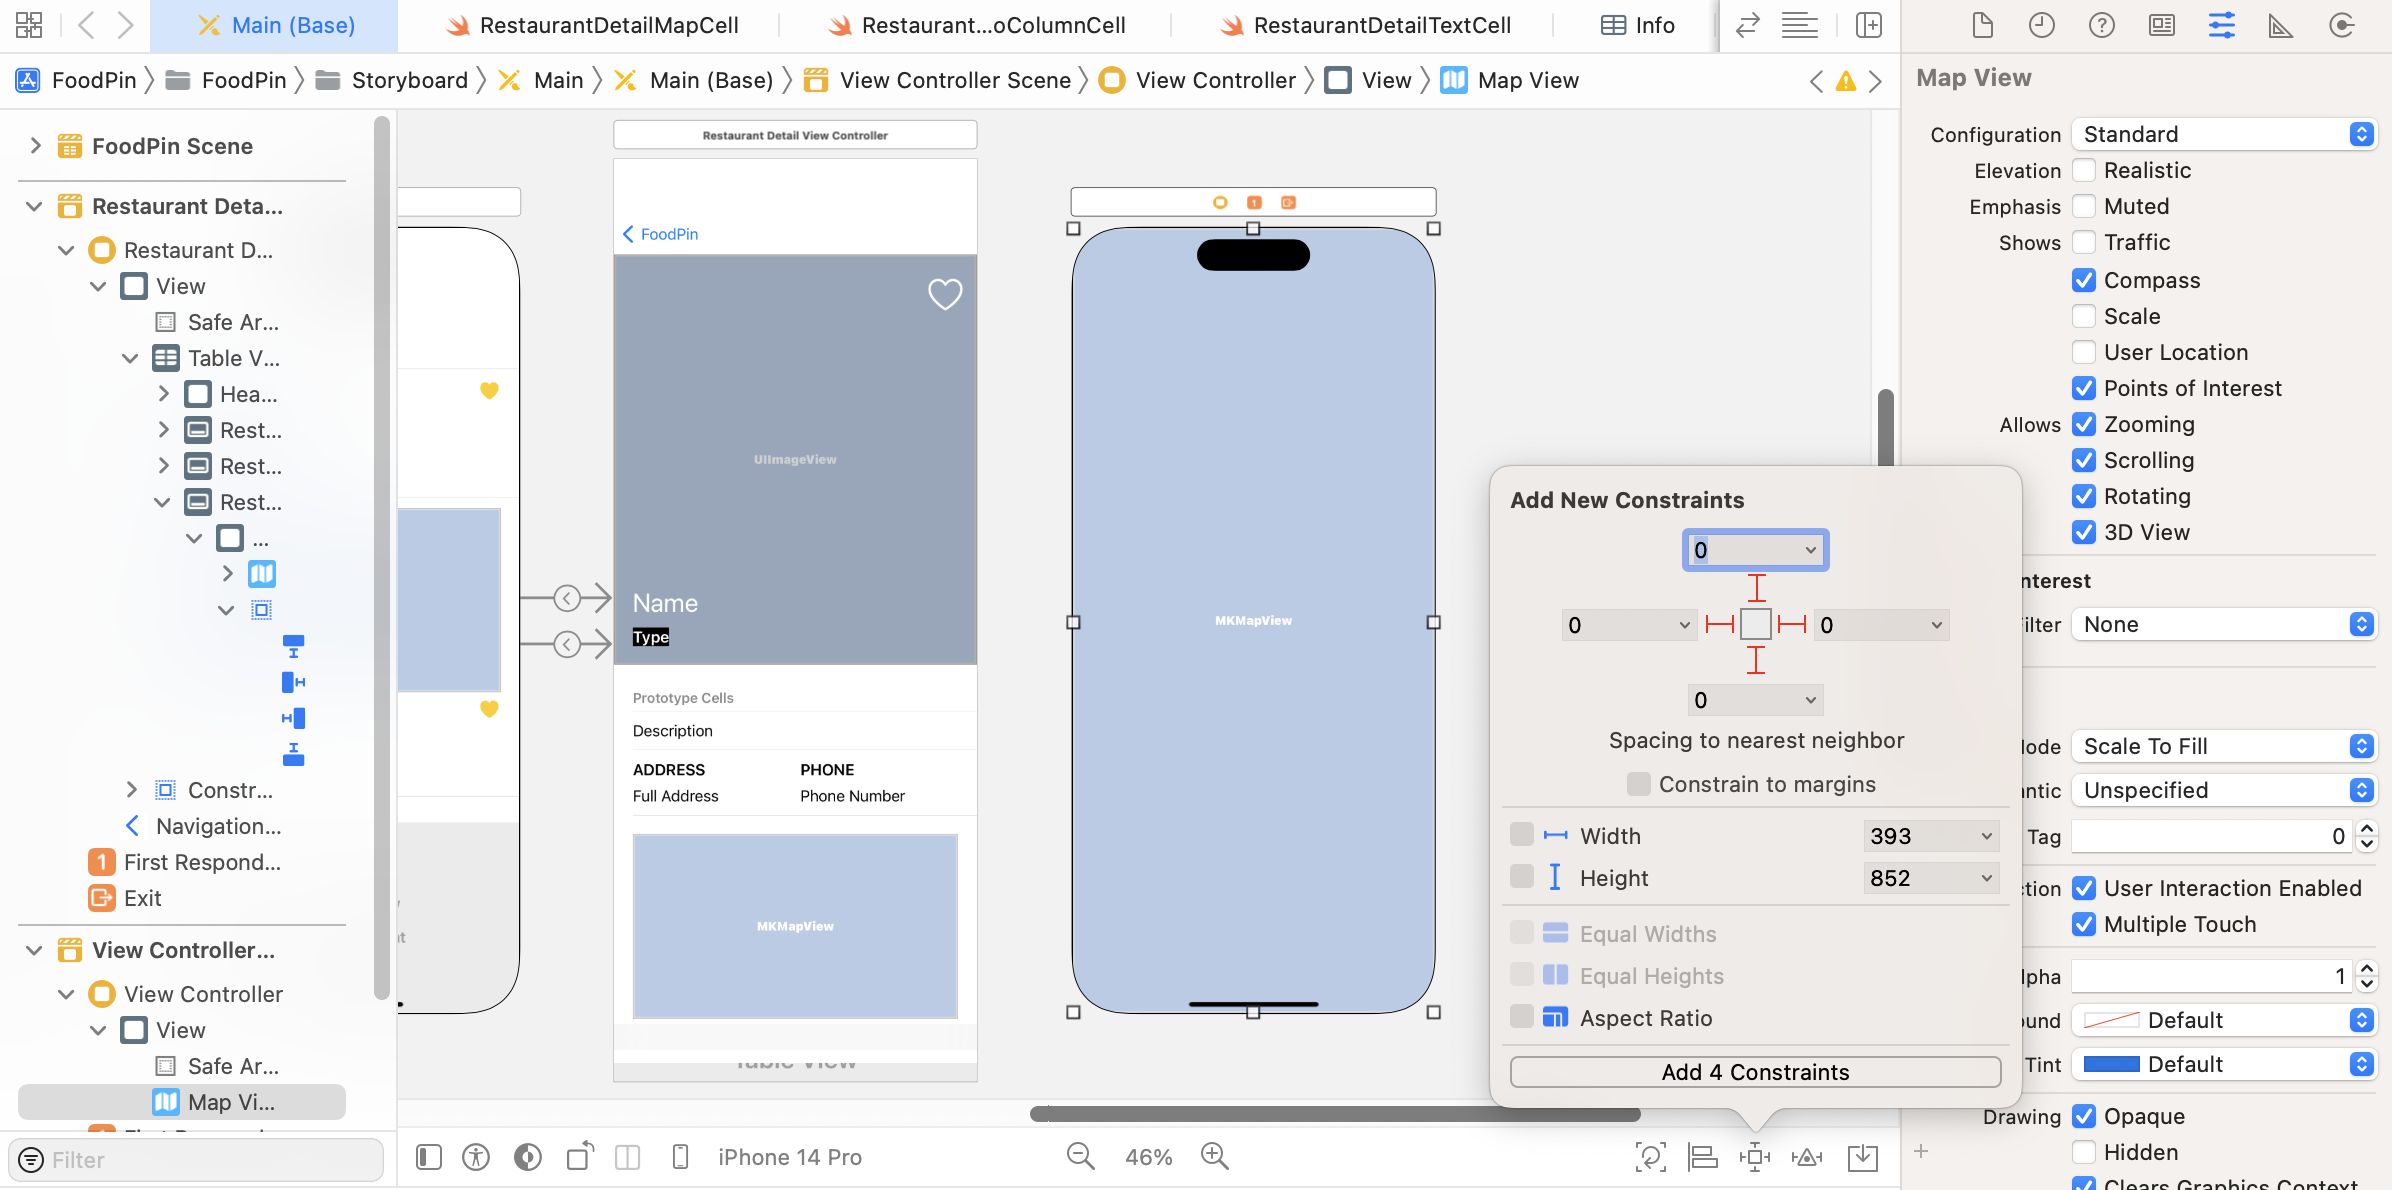
To bring up a full-screen map when a user taps the map cell, we have to set up a segue between the view controller and the cell. Now hold the control key and drag from RestaurantDetailMapCell to the new map view controller to create a segue. Select Show as the segue type. Once the segue is created, select it and set its identifier to showMap in the Attribute inspector.
If you compile and run the app, tap the map in the detail view. The app should navigate to a fully functional map.
Exercise #2
Here comes to another adhoc exercise. Again, it's about bug fixing. In the detailed view, did you try to tap the description or the address cell? When you tap any of the cells, the cell is highlighted in gray and it never switches back to white. We have discussed this problem before, your task is to figure out a solution for this issue.
Converting an Address into Coordinates Using Geocoder
Now that you should know how to embed a map in your app, but how can you pin a location on maps? Before we pin the restaurant's location on the map, let's understand how to work with a location on maps.
To highlight a location on the map, you cannot just use a physical address. The MapKit framework doesn't work like that. Instead, the map has to know the geographical coordinates expressed in terms of the latitude and longitude of the corresponding point on the globe.
The framework provides a Geocoder class for developers to convert a textual address, known as placemark, into global coordinates. This process is usually referred to forward geocoding. Conversely, you can use Geocoder to convert latitude and longitude values back to a placemark. This process is known as reverse geocoding.
To initiate a forward-geocoding request using the CLGeocoder class, all you need do is to create an instance of CLGeocoder, followed by calling the geocodeAddressString method with the address parameter. Here is an example:
let geoCoder = CLGeocoder()
geoCoder.geocodeAddressString("524 Ct St, Brooklyn, NY 11231", completionHandler: { placemarks, error in

// Process the placemark

})
There is no designated format of an address string. The method submits the specified location data to the geocoding server asynchronously. The server then parses the address and returns you an array of placemark objects. The number of placemark objects returned greatly depends on the address you provide. The more specific the address information you have given, the better the result. If your address is not specific enough, you may end up with multiple placemark objects.
With the placemark object, which is an instance of CLPlacemark class, you can easily get the geographical coordinates of the address using the code below:
let coordinate = placemark.location?.coordinate
The completion handler is the code block to be executed after the forward-geocoding request completes. Operations like annotating the placemark will be done in the code block.
A Quick Overview of Map Annotations
Now that you have a basic idea of Geocoder and understand how to get the global coordinates of an address, we will look at how you can pin a location on maps. To do that, the MapKit framework provides an annotation feature for you to pinpoint a specific location.
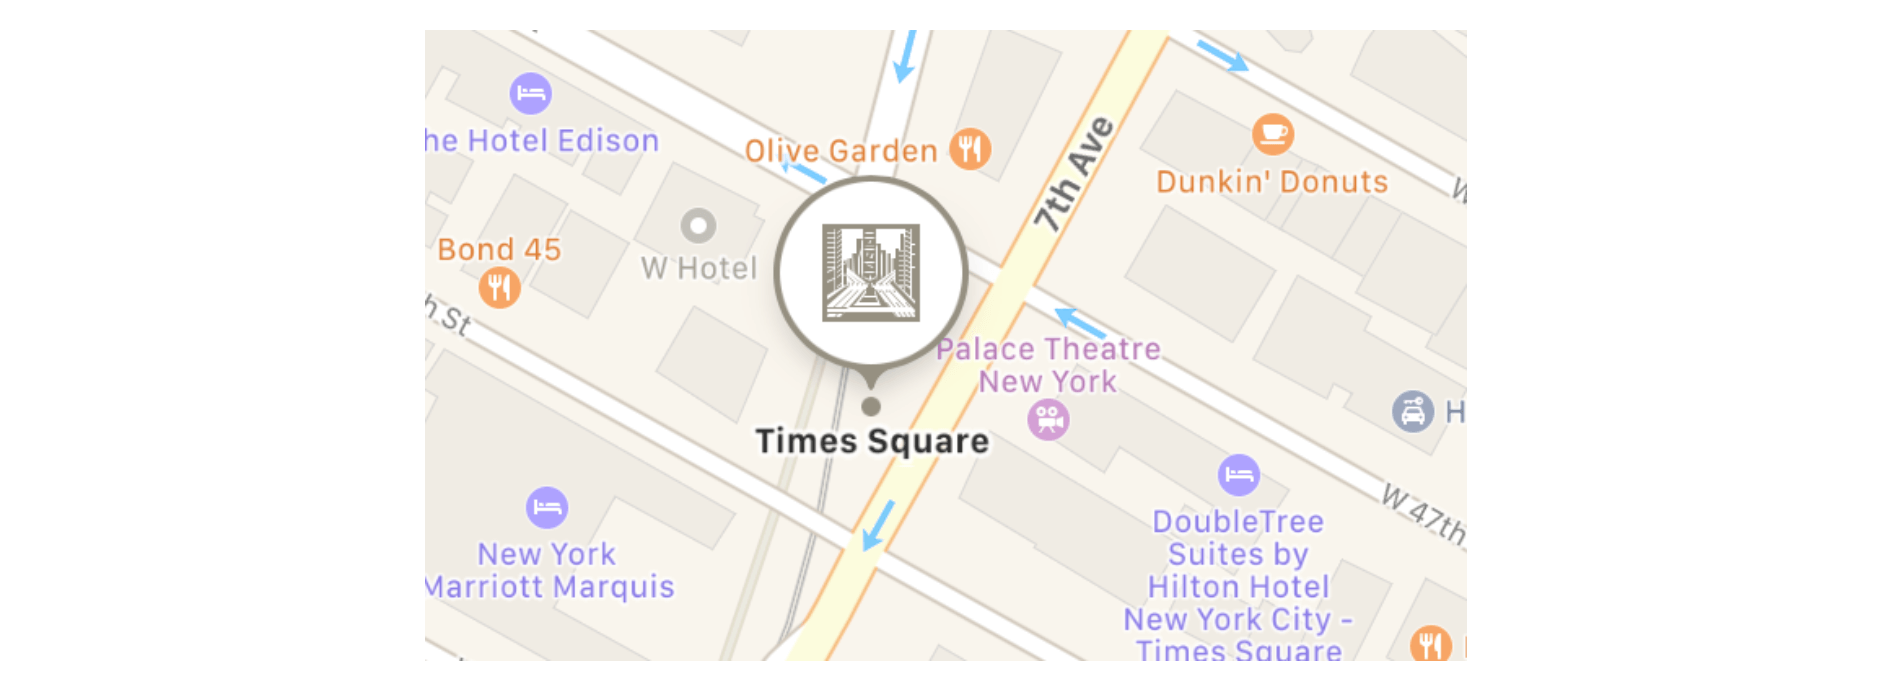
An annotation can appear in many forms. Prior to iOS 11, the annotation appears in the form of a pin. In the latest version of the MapKit framework, Apple has redesigned the default annotation to make it look more modern. Typically an annotation consists of an icon (e.g. pin or custom image) and a title.
From a developer's point of view, an annotation actually consists of two different objects:
- an annotation object - which stores the data of an annotation such as the name of the placemark. The object should conform to the
MKAnnotationprotocol as defined in the Map Kit. - an annotation view - which is the actual object for the visual representation of the annotation. The pin image is an example. If you want to display the annotation in your own form (say, use pencil instead of pin), you'll need to create your own annotation view.
The MapKit framework comes with a standard annotation object and an annotation view (known as MarkerAnnotationView). Therefore, you do not need to create your own, unless you want to customize the annotation.
In the simplest form, a standard annotation appears like this one shown in figure 16-17. To add a pin on a map, you just need a few lines of code:
let annotation = MKPointAnnotation()
if let location = placemark.location {
    annotation.coordinate = location.coordinate
    mapView.addAnnotation(annotation)
}
The MKPointAnnotation class is a standard class, which adopts the MKAnnotation protocol. By specifying the coordinates in the annotation object, you can call the addAnnotation method of the mapView object to put a pin on the map.
Adding an Annotation to the Map
After introducing the basics of annotations and geocoding, let's get back to the FoodPin project. We first add a pin annotation to the map in the table cell.
In RestaurantDetailMapCell.swift, insert the following code method:
func configure(location: String) {
    // Get location
    let geoCoder = CLGeocoder()

    print(location)
    geoCoder.geocodeAddressString(location, completionHandler: { placemarks, error in
        if let error = error {
            print(error.localizedDescription)
            return
        }

        if let placemarks = placemarks {
            // Get the first placemark
            let placemark = placemarks[0]

            // Add annotation
            let annotation = MKPointAnnotation()

            if let location = placemark.location {
                // Display the annotation
                annotation.coordinate = location.coordinate
                self.mapView.addAnnotation(annotation)

                // Set the zoom level
                let region = MKCoordinateRegion(center: annotation.coordinate, latitudinalMeters: 250, longitudinalMeters: 250)
                self.mapView.setRegion(region, animated: false)
            }
        }

    })
}
This map cell is responsible to handle the map view and display an annotation on the map. So, we add a new method called configure that accepts the restaurant's address as the parameter. I will not go into the code above line by line as we've discussed the usage of Geocoder and annotation earlier. In brief, we first convert the address of the selected restaurant (i.e. location) into coordinates using Geocoder. In most cases, the placemarks array should contain a single entry. So we just pick the first element from the array and then display the annotation on the map view.
The last two lines of code are new to you. Here we use the MKCoordinateRegion function to adjust the initial zoom level of the map to 250m radius.
Note: You can still annotate the location without these two lines of code. Try to remove these lines of code and see how the map differs.Now edit the
RestaurantDetailViewController.swift file, update case 2 of the tableView(_:cellForRowAt:) method like this:
case 2:
    let cell = tableView.dequeueReusableCell(withIdentifier: String(describing: RestaurantDetailMapCell.self), for: indexPath) as! RestaurantDetailMapCell
    cell.configure(location: restaurant.location)
    cell.selectionStyle = .none

    return cell
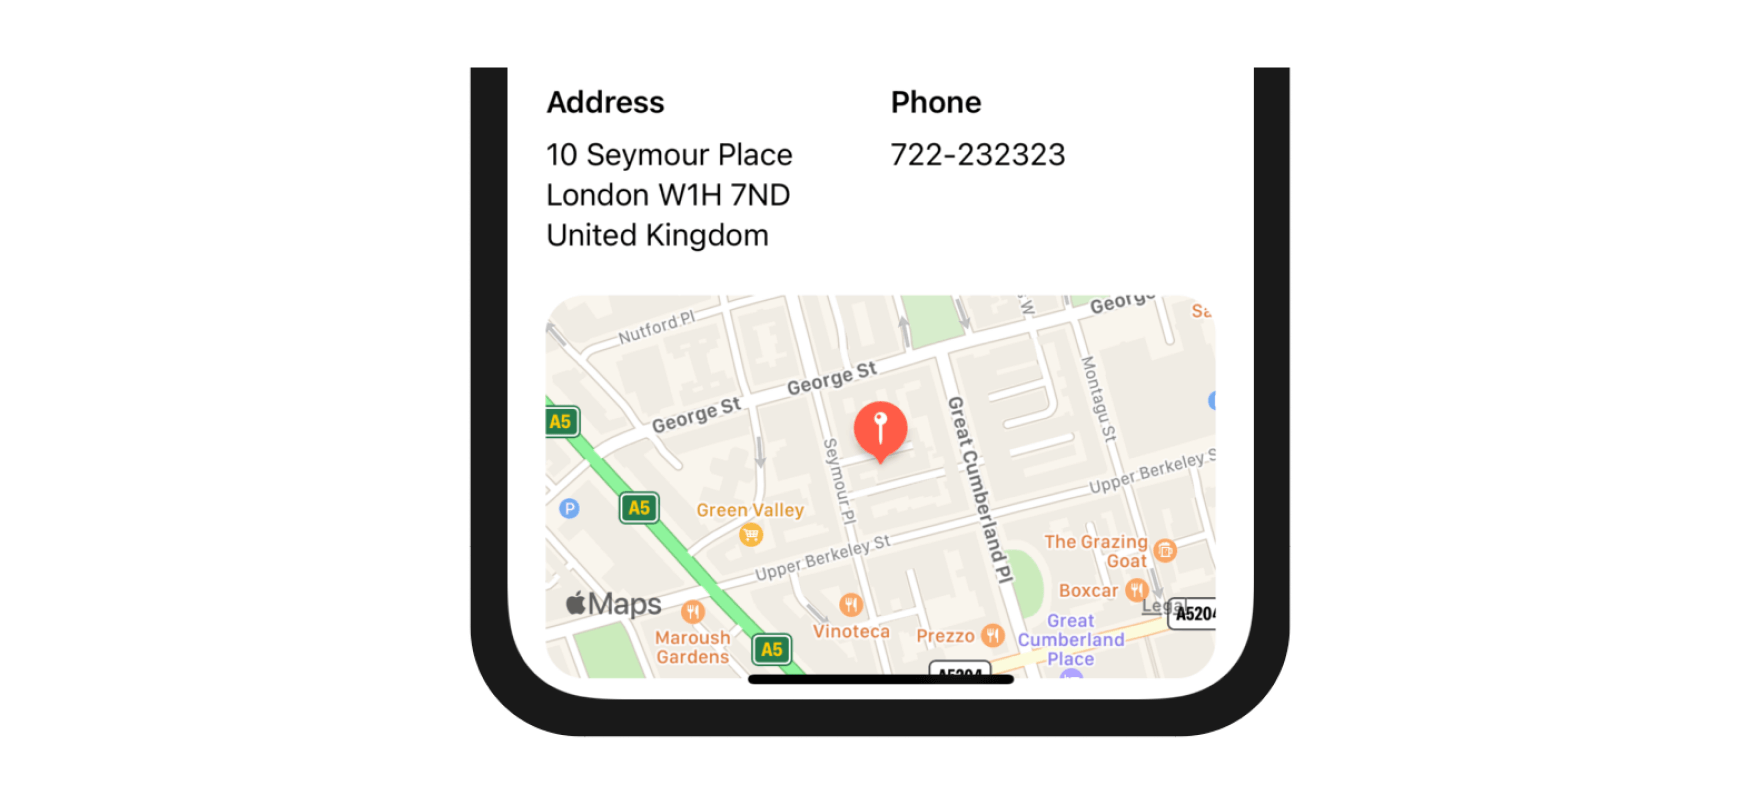
We just add a line of code to call the configure method with the restaurant's location. If you run the app now, it should correctly display the restaurant's location on the map.
Adding an Annotation to the Full Screen Map
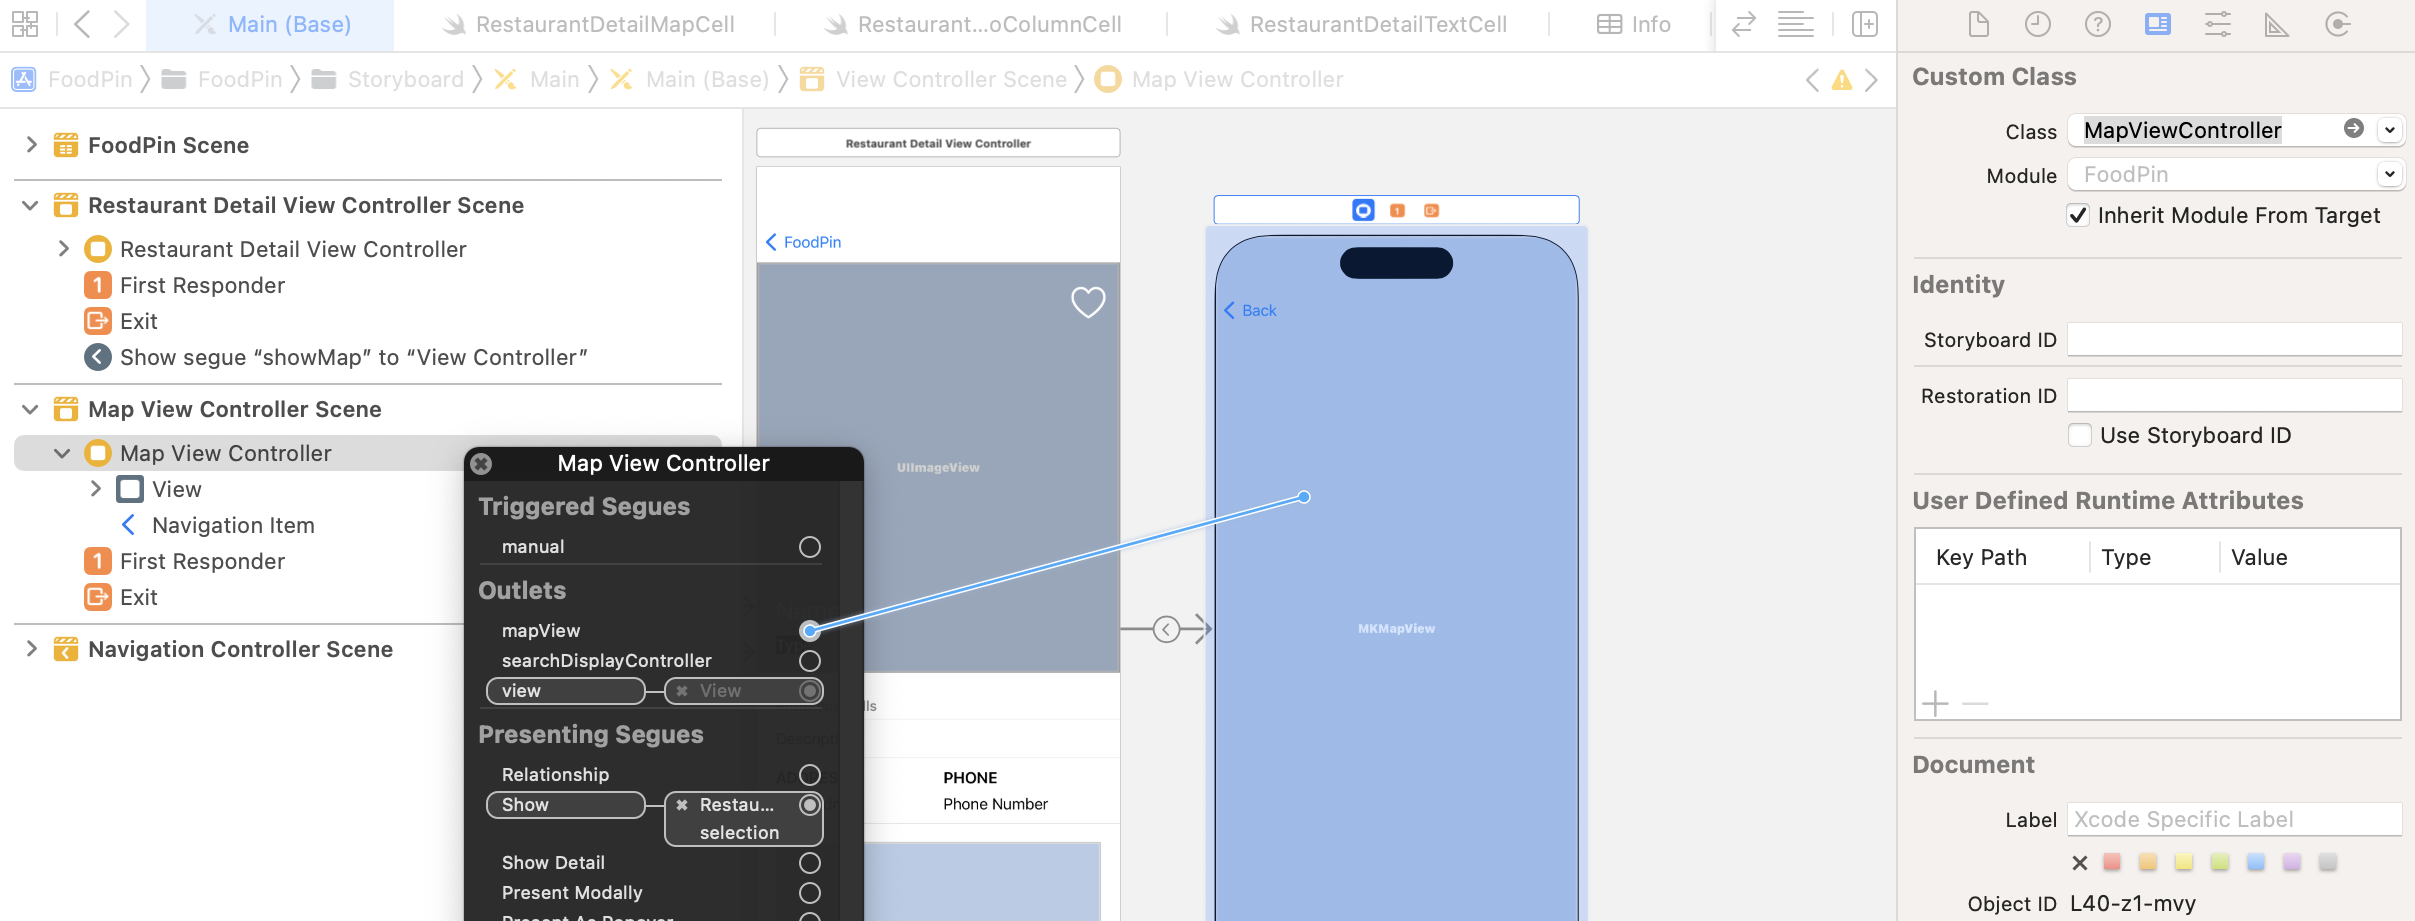
Okay, let's move onto the implementation of the full-screen map. As usual, we first create a custom class for the map view controller. In the project navigator, right click the Controller folder and select New File…. Create the new class using the Cocoa Touch class template and name the class MapViewController. Make sure you set it as a subclass of UIViewController and save the file.
Again, we first import the MapKit framework. Insert the following line of code at the very beginning of the MapViewController.swift file:
import MapKit
Next, declare the following outlet variable for the map view and another variable for the selected restaurant:
@IBOutlet var mapView: MKMapView!

var restaurant = Restaurant()
The outlet variable is used for establishing a connection with the map view in the storyboard. Go to Interface Builder and select the map view controller. Under the Identity inspector, set the custom class to MapViewController. Then establish a connection between the outlet variable and the map view.
To add an annotation on the map, update the viewDidLoad method of the MapViewController class to the following code:
override func viewDidLoad() {
    super.viewDidLoad()

    // Convert address to coordinate and annotate it on map
    let geoCoder = CLGeocoder()
    geoCoder.geocodeAddressString(restaurant.location, completionHandler: { placemarks, error in
        if let error = error {
            print(error)
            return
        }

        if let placemarks = placemarks {
            // Get the first placemark
            let placemark = placemarks[0]

            // Add annotation
            let annotation = MKPointAnnotation()
            annotation.title = self.restaurant.name
            annotation.subtitle = self.restaurant.type

            if let location = placemark.location {
                annotation.coordinate = location.coordinate

                // Display the annotation
                self.mapView.showAnnotations([annotation], animated: true)
                self.mapView.selectAnnotation(annotation, animated: true)
            }
        }

    })

}
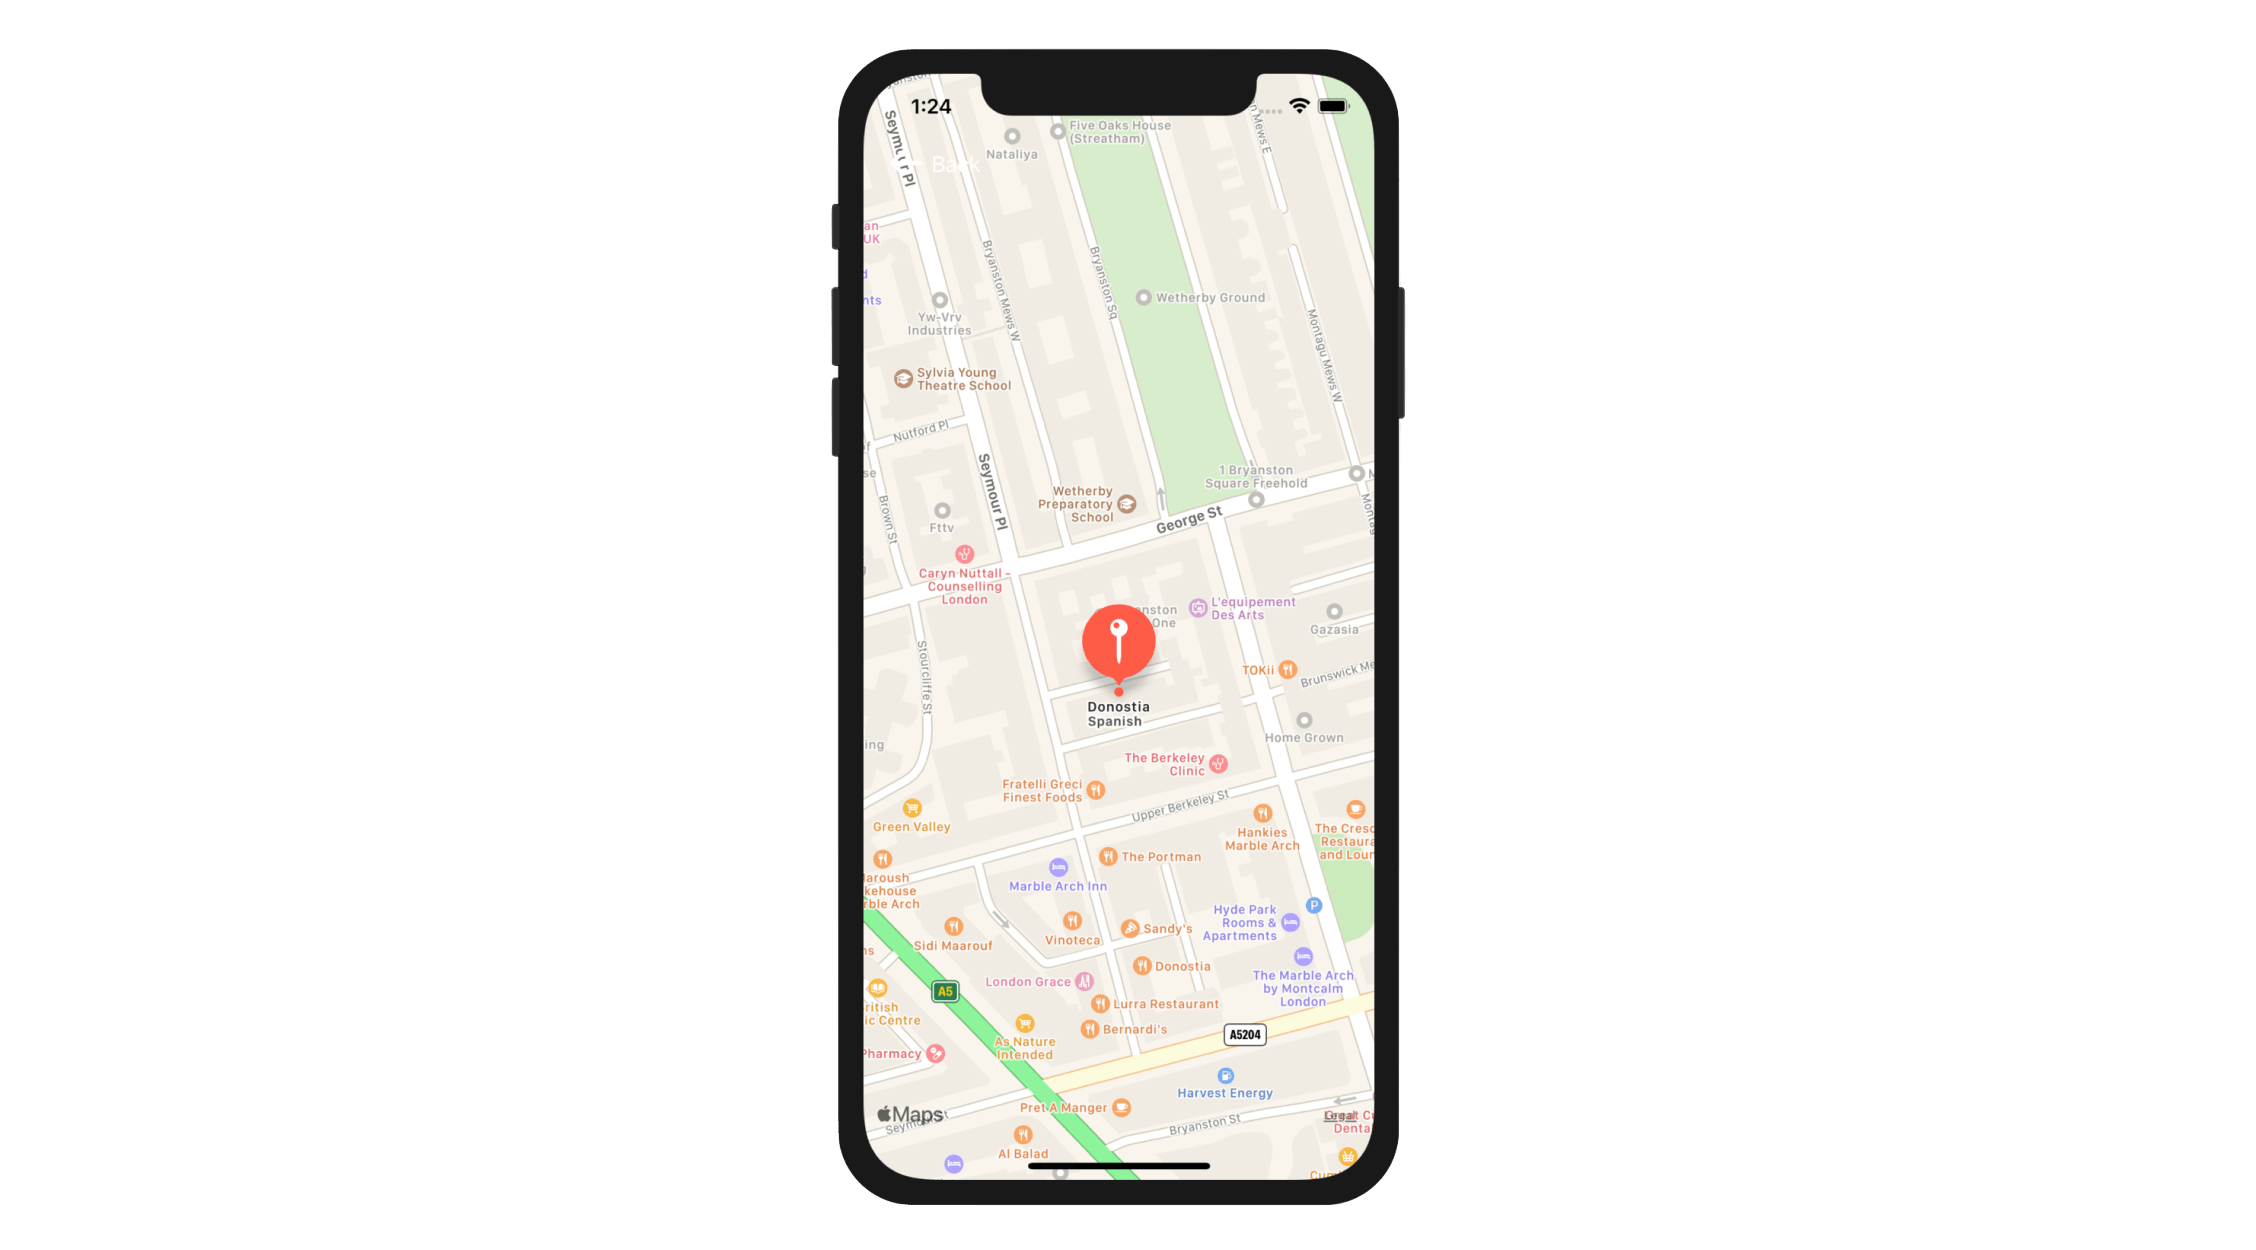
The above code is very similar to the one we have just discussed, so I will not go into the code above line by line. We convert the address into a coordinate for annotation. Once again, we use MKPointAnnotation to add a pin to the map. But this time we assign it with a title and a subtitle and use the showAnnotations method of the mapView object to put a pin on the map. The method is smart enough to determine the best-fit region for the annotation.
The annotation marker has three states. By default, when the annotation marker is not selected, it is in a normal state that appears smaller. In the code above, we invoke the selectAnnotation method to select the annotation marker to turn it into the selected state. Its icon will grow larger in this state. You will better understand what I mean about the size when you test the app.
There is still one thing left before testing the app. We haven't passed the selected restaurant to the map view controller. In the RestaurantDetailViewController class, insert the prepare(for:sender:) method like this:
override func prepare(for segue: UIStoryboardSegue, sender: Any?) {
    if segue.identifier == "showMap" {
        let destinationController = segue.destination as! MapViewController
        destinationController.restaurant = restaurant
    }
}
We simply get the selected restaurant and pass it to the destination view controller. In this case, it's the MapViewController class. Okay, let's compile and run the app. Tap the Map button in the detail view and you'll see a pin on the map.
Customizing the Annotation
You are allowed to change the look and feel of the Marker Annotation View (i.e. MKMarkerAnnotationView) like customizing its color and icon. If you go up to read the API documentation of MKMarkerAnnotationView (https://developer.apple.com/documentation/mapkit/mkmarkerannotationview), you will find several properties for customization. Here are some examples:
markerTintColor- the background color of the marker balloonglyphText- the text to display in the marker balloonglyphImage- the image displayed in the marker balloon
As mentioned at the beginning of this chapter, an annotation view controls the visual part of an annotation. In order to modify the appearance of the annotation, we have to modify the annotation view. To do that, we have to adopt the MKMapViewDelegate protocol, which defines a set of optional methods that you can use to receive map-related update messages. The map view uses one of these methods to request annotation. Every time when the map view needs an annotation view, it calls the mapView(_:viewFor:) method:
optional func mapView(_ mapView: MKMapView, viewFor annotation: MKAnnotation) -> MKAnnotationView?
So far we haven't adopted the protocol and provided our own implementation for the method. This is why a default annotation view is displayed. We're going to implement the method and customize the color & icon of annotation view:
Go back to the MapViewController.swift file and adopt the MKMapViewDelegate protocol using an extension like this:
extension MapViewController: MKMapViewDelegate {

    func mapView(_ mapView: MKMapView, viewFor annotation: MKAnnotation) -> MKAnnotationView? {
        let identifier = "MyMarker"

        if annotation.isKind(of: MKUserLocation.self) {
            return nil
        }

        // Reuse the annotation if possible
        var annotationView: MKMarkerAnnotationView? = mapView.dequeueReusableAnnotationView(withIdentifier: identifier) as? MKMarkerAnnotationView

        if annotationView == nil {
            annotationView = MKMarkerAnnotationView(annotation: annotation, reuseIdentifier: identifier)
        }

        annotationView?.glyphText = "😋"
        annotationView?.markerTintColor = UIColor.orange

        return annotationView
    }
}
Let's go through the above code line by line. Every time when the map view needs to display an annotation, the method above will be called. Earlier, we haven't implemented this method. In that case, the map view will use the default annotation. Basically, there are two types of annotations:
- Placemark
- Current location
The user's current location is also a kind of annotation. The map view will also call this method when annotating the user's location. As you may know, the current location is displayed as a blue dot in maps. Even though we haven't enabled the app to display the current location, we don't want to change its annotation view. This is why we verify if the annotation object is a kind of MKUserLocation. If yes, we simply return nil and then the map view will just display the location using a blue dot.
For performance reasons, it is preferred to reuse an existing annotation view instead of creating a new one. The map view is intelligent enough to cache unused annotation views that it isn't using. Similar to UITableView, we can call up the dequeueReusableAnnotationView(withIdentifier:) method to see if any unused views are available. If yes, we then downcast it to MKMarkerAnnotationView.
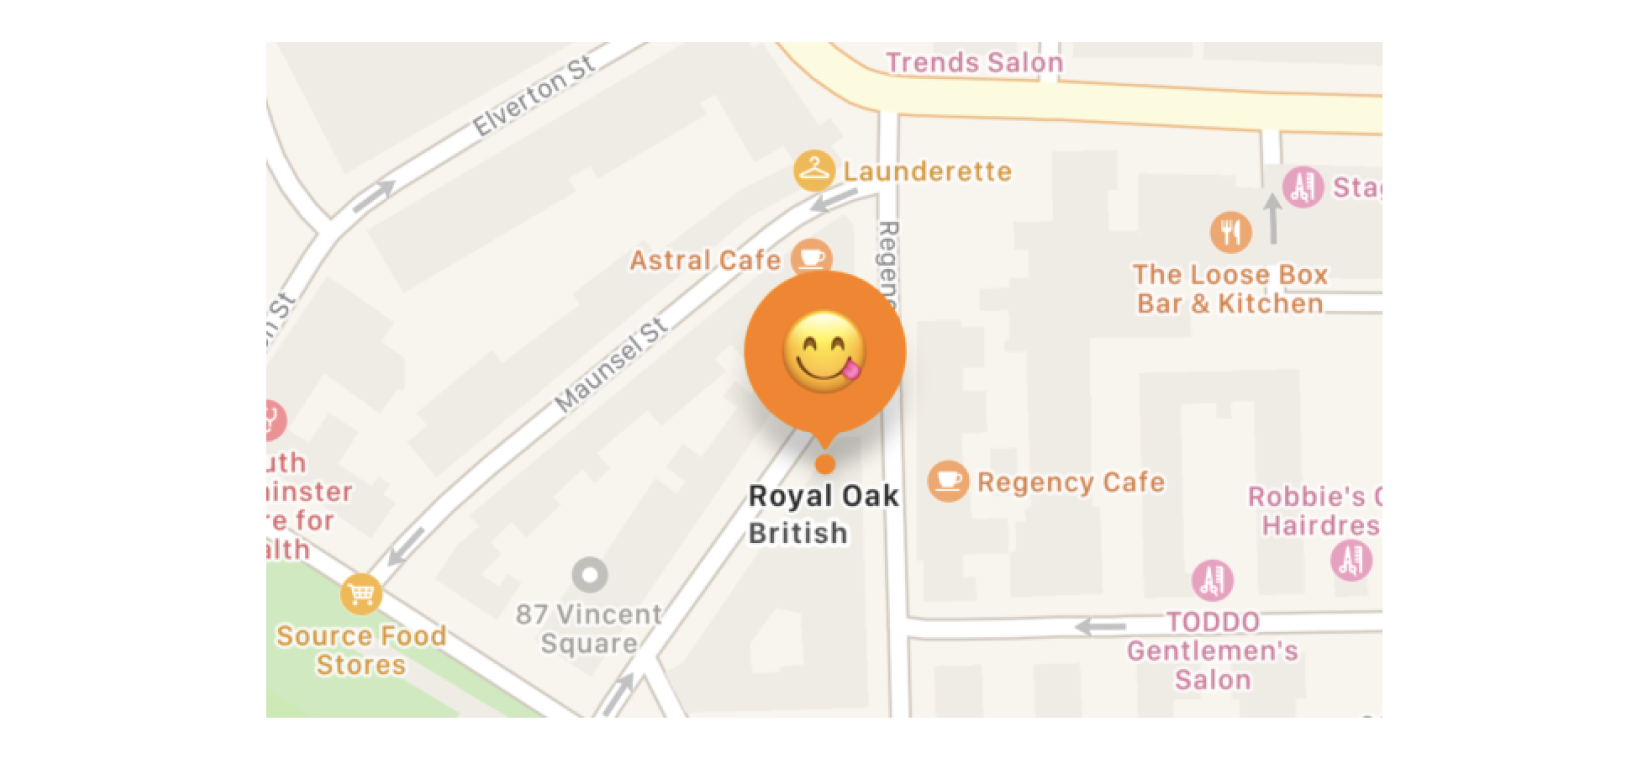
If there are no unused views available, we create a new one by instantiating a MKMarkerAnnotationView object. Once we get hold of the annotation view, we modify its glphyText and markerTintColor property to customize the look and feel.
In the viewDidLoad method, add the following line of code to define the delegate of mapView:
mapView.delegate = self
Here we define MapViewController as the delegate object of mapView.
Cool! We're done. Press the Run button and launch the app. Pick a restaurant and tap the Map button to see the modified annotation.
If you want to replace the annotation with an image, you replace glyphText with glypImage like this:
annotationView?.glyphImage = UIImage(systemName: "arrowtriangle.down.circle")
Map Customizations
Apple also lets developers control what goes on the map view. Here are the three new properties for you to control the content of a map view:
- showTraffic - shows any high traffic on your map view
- showScale - shows a scale on the top-left corner of your map view.
- showCompass - displays a compass control on the top-right corner of your map view. Please note that the compass will only appear when the map is rotated a little bit away from pure north.

As a demo, you can insert the following lines of code in the viewDidLoad method to give it a try:
mapView.showsCompass = true
mapView.showsScale = true
mapView.showsTraffic = true
If you run the app on the simulator, you may not see the compass icon when the map is first loaded up. You can hold the Option key and drag the map to reveal it.
Exercise #3
Here comes to the final exercise. In the map view controller, the back button in the navigation bar shows the title "Back". Your task is to modify the code to remove the title.
Summary
In this chapter, I've walked you through the basics of the MapKit framework. By now, you should know how to embed a map in your app and add an annotation. But this is just a beginning. There is a lot more you can explore from here. One thing you can do is to further explore MKDirection . It provides you with route-based directions data from Apple servers to get travel-time information or driving or walking directions. You can take the app further by showing directions.
For your reference, you can download the complete Xcode project from http://www.appcoda.com/resources/swift57/FoodPinMaps.zip.