- Made by AppCoda
- Contact us / Support
- Tweet this book
- Preface
- 1. The Development Tools, the Learning Approach, and the App Idea
- 2. Your First Taste of Swift with Playgrounds
- 3. Hello World! Build Your First App in Swift
- 4. Hello World App Explained
- 5. Introduction to Auto Layout
- 6. Designing UI Using Stack Views
- 7. Introduction to Prototyping
- 8. Creating a Simple Table-based App
- 9. Customize Table Views Using Prototype Cell, Diffable Data Source and Dark Mode
- 10. Displaying Alerts with UIAlertController and Handling Table View Selection
- 11. Object Oriented Programming, Project Organization and Code Documentation
- 12. Table Row Deletion, Custom Action Button and MVC
- 13. Introduction to Navigation Controller and Segue
- 14. Detail View Enhancement and Navigation Bar Customization
- 15. Navigation Bar Customization, Extensions and Dynamic Type
- 16. Working with Maps
- 17. Basic Animations, Visual Effects and Unwind Segues
- 18. Working with Static Table Views, Camera and NSLayoutConstraint
- 19. Working with Core Data
- 20. Search Bar and UISearchController
- 21. Building Walkthrough Screens with UIPageViewController and Container Views
- 22. Exploring Tab Bar Controller and Storyboard References
- 23. Getting Started with WKWebView and SFSafariViewController
- 24. Exploring CloudKit
- 25. Localizing Your App to Reach More Users
- 26. Deploying and Testing Your App on a Real iOS Device
- 27. Beta Testing with TestFlight and CloudKit Production Deployment
- 28. Submit Your App to App Store
- 29. Adopting 3D Touch, Haptic Touch and Context Menus
- 30. Developing User Notifications in iOS
- 31. Appendix - Swift Basics
- Published with GitBook
Chapter 22
Exploring Tab Bar Controller and Storyboard References
If you're trying to achieve, there will be roadblocks. I've had them; everybody has had them. But obstacles don't have to stop you. If you run into a wall, don't turn around and give up. Figure out how to climb it, go through it, or work around it.
- Michael Jordan
The tab bar is a row of persistently visible buttons, which open different features of the app, at the bottom of the screen. Once a less-prominent UI design in the mainstream, the tab bar design becomes popular again lately.
Before the debut of the large screen devices, there were only 3.5-inch and 4-inch iPhones. One drawback of tab bars is that you sacrifice a bit of screen estate. This was really an issue for small screen devices. As Apple rolled out the iPhone 6 and 6 Plus with larger screen sizes in late 2014, app developers started to replace the existing menus of their apps with tab bars. The Facebook app has switched from a sidebar menu design to a tab bar. Other popular apps like Whatsapp, Twitter, Quora, Instagram, and Apple Music also adopt tab bars for navigation.

Tab bars allow users to access the core features of an app quickly, with just a single tap. Though it takes up a bit of screen estate, it is worth it.
While navigation controllers let users navigate hierarchical content by managing a stack of view controllers, tab bars manage multiple view controllers that don't necessarily have a relation to one another. Normally a tab bar controller contains at least two tabs and you're allowed to add up to five tabs depending on your needs.
In this chapter, I will walk you through the implementation of tab bars and see how we can customize its appearance. We will also take a look at another feature of Interface Builder called storyboard references.
Building a Tab Bar Controller
First, let's open the FoodPin project. We're going to create a tab bar with three items:
- Favorites - this is the restaurant list screen.
- Discover - this is a new screen to discover favorite restaurants recommended by your friends or other foodies around the globe. We will implement this tab in the iCloud chapter.
- About - this is the "About" the about screen of the app. Once again we'll keep this page blank until the next chapter.

Creating a tab bar is easy and doesn't require to write a line of code. All you need to do is embed a set of view controllers in a tab bar controller using Interface Builder.
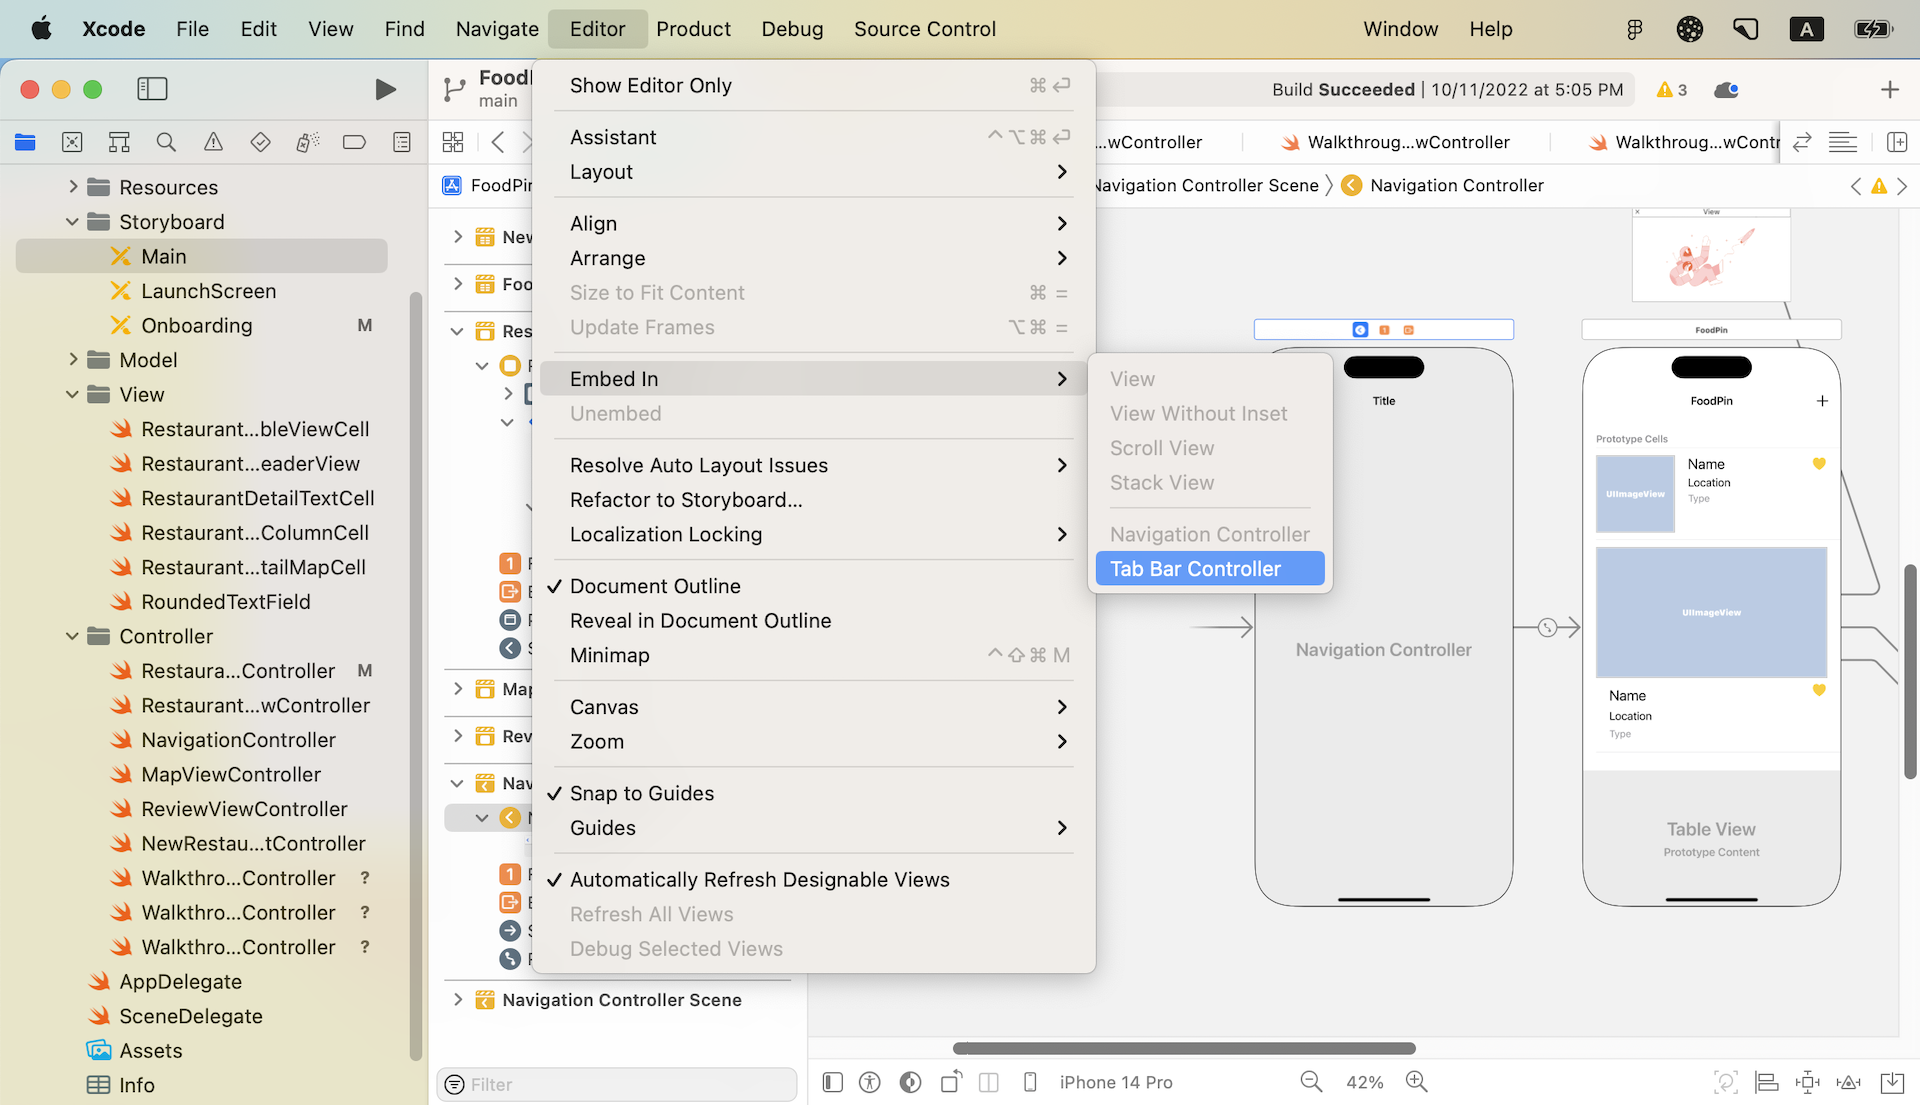
Open the Main storyboard and select the Navigation Controller, which is the initial controller of the app. This is the controller we want to embed in a tab bar controller. Now go up to the Xcode menu, select Editor > Embed in > Tab Bar Controller.
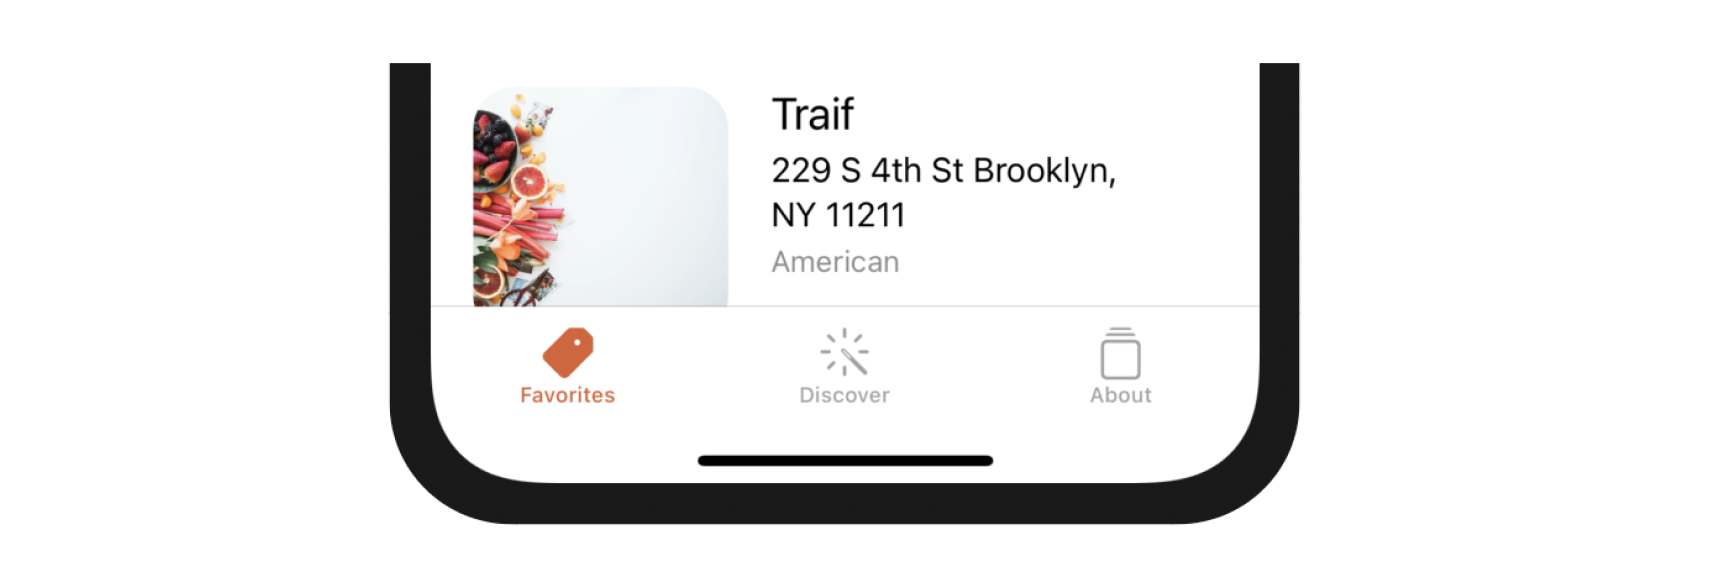
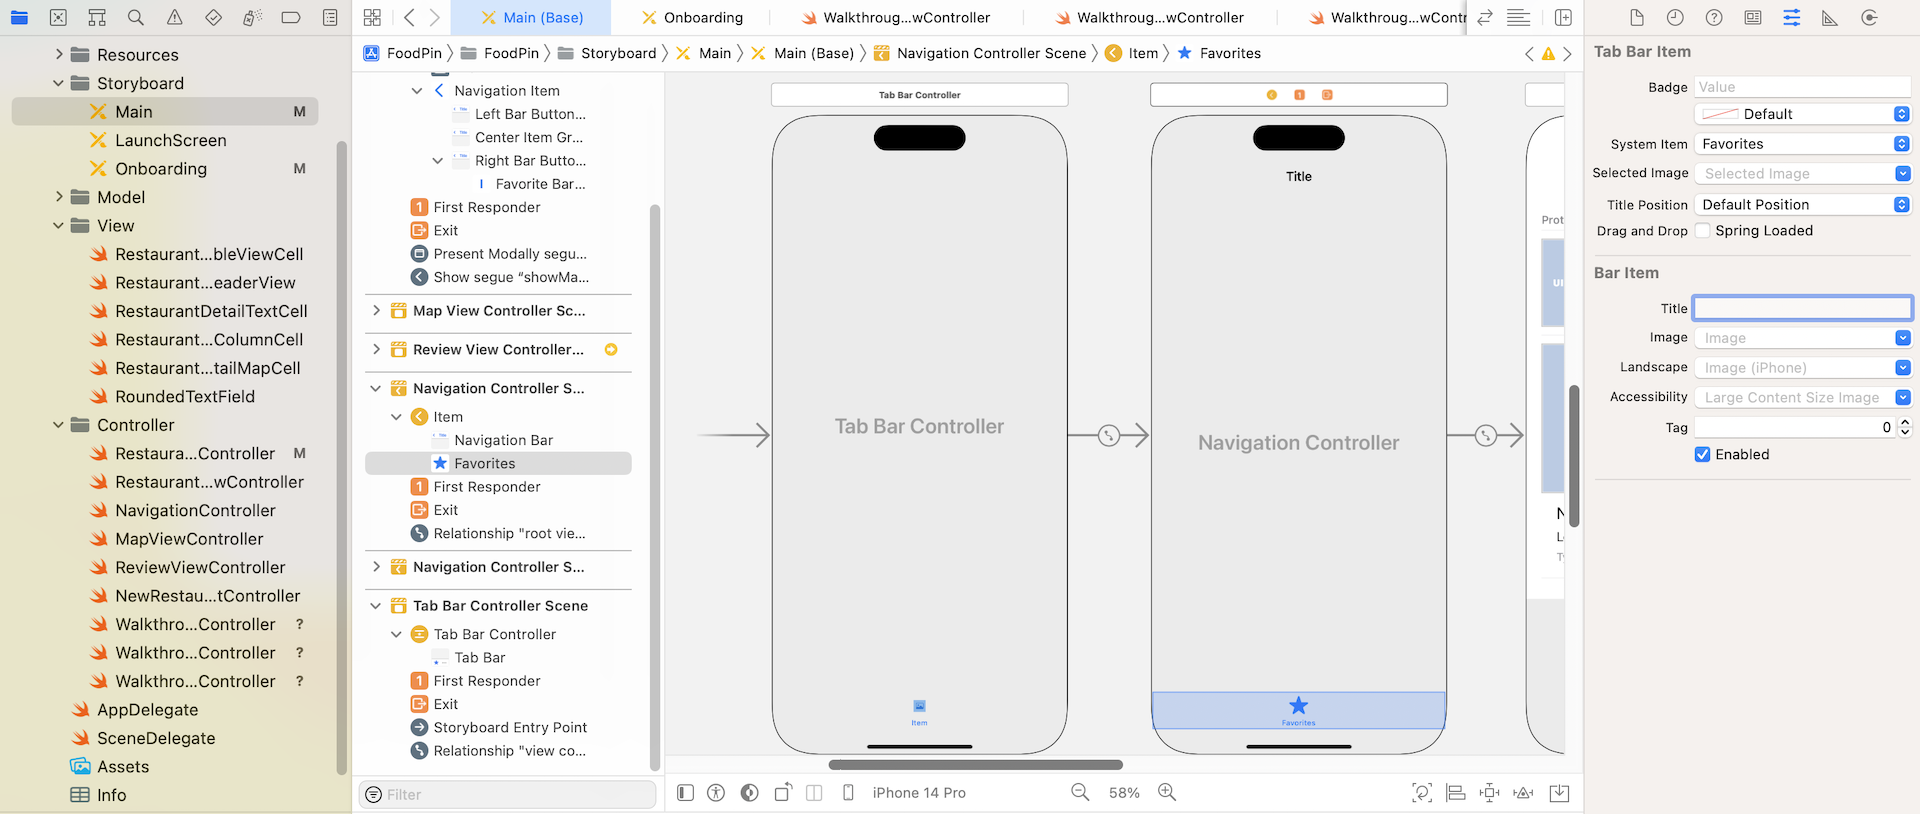
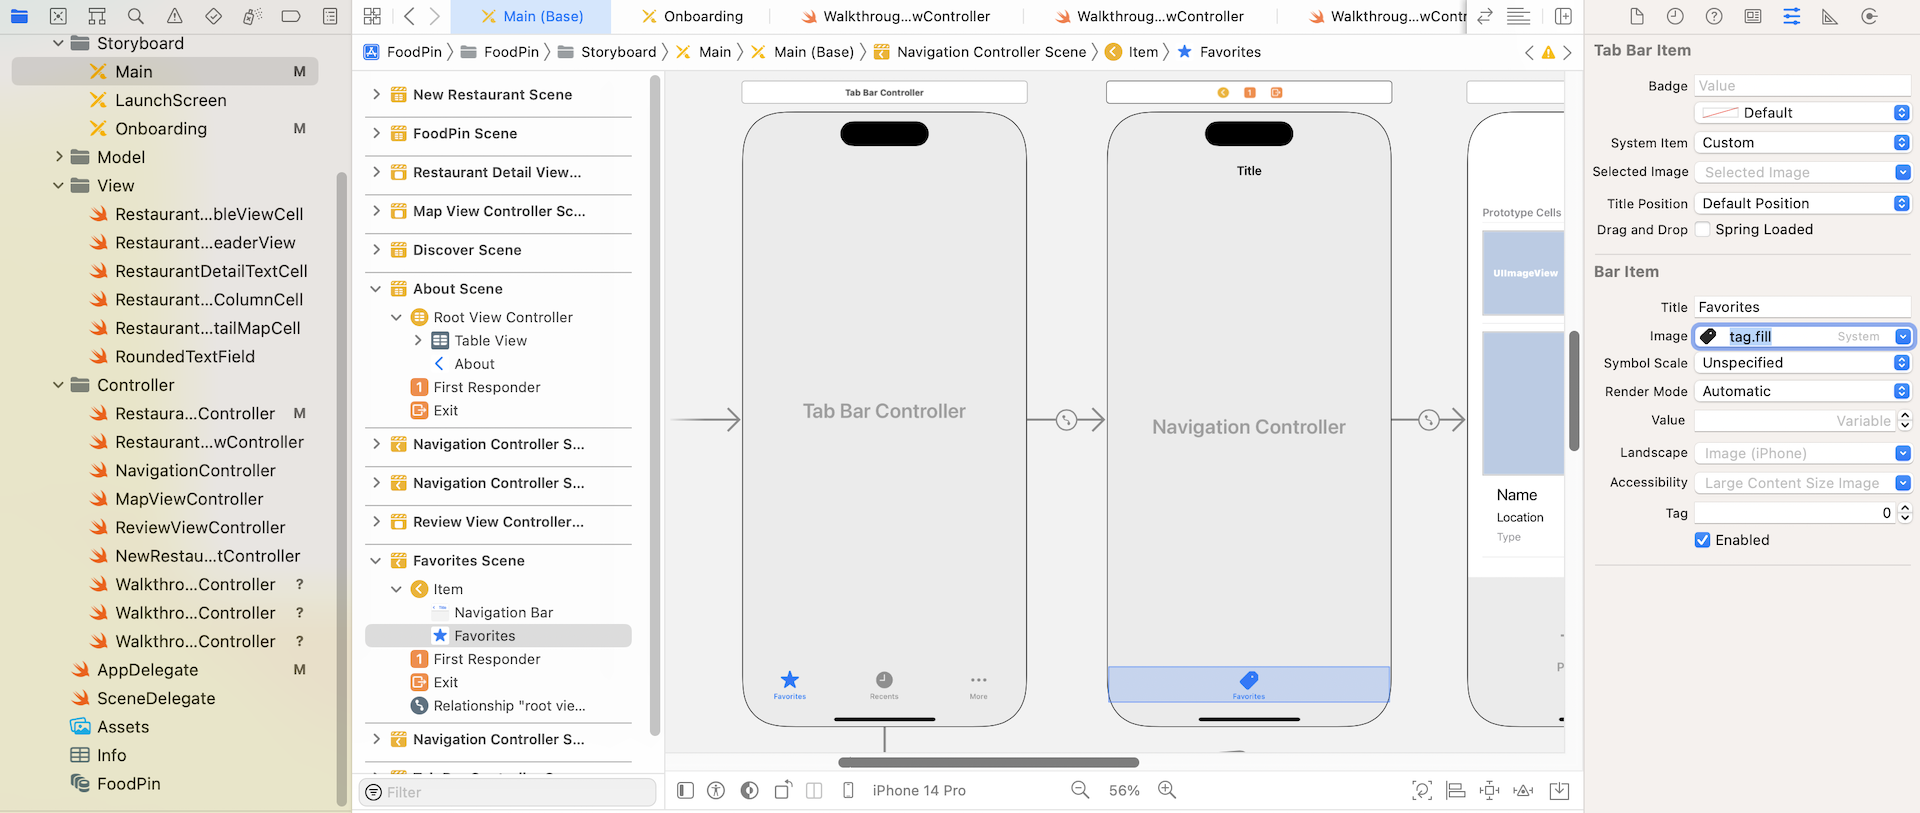
Interface Builder automatically embeds the navigation controller in a tab bar controller. Easy, right? You can then click the tab item of the navigation controller and change its properties in the Attribute inspector. You can use your own images to create a custom tab item. For simplicity, we just use the system items. Change the System Item option to Favorites. The tab bar item should be updated like the one shown in figure 22-4.
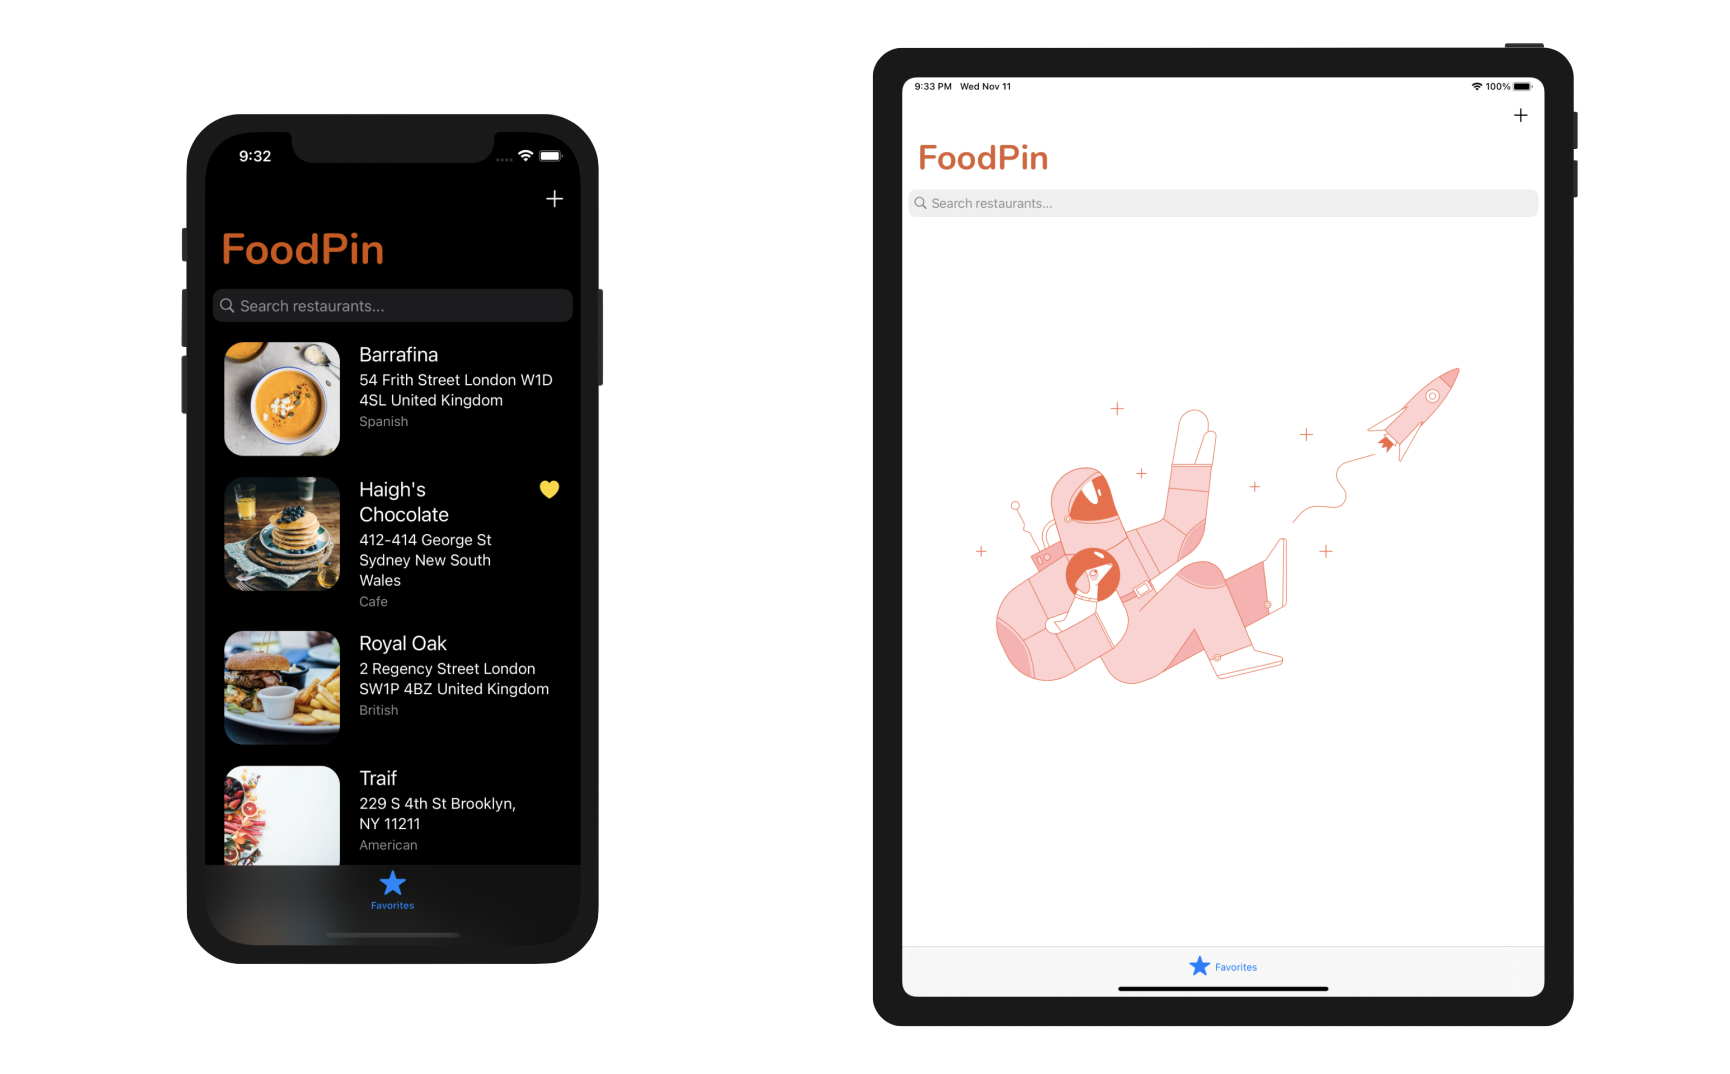
It's now ready to test the app. Hit the Run button and see how it looks. The app now has a tab bar with the Favorites tab. What's great is that you do not need to define any auto layout constraint for the tab bar. It works out of the box. Try to test the app on iPhone and iPad. The tab bar still works well.
Hide Tab Bar When Pushed
Everything we implemented in the earlier chapters is now put right inside a tab bar controller. If you select a restaurant, the app navigates to the detailed view and the tab bar is still there. You may want to hide the tab bar in the detailed view or any other views along the navigation hierarchy. iOS provides a simple way to hide a tab bar when a view controller is pushed on a navigation controller.
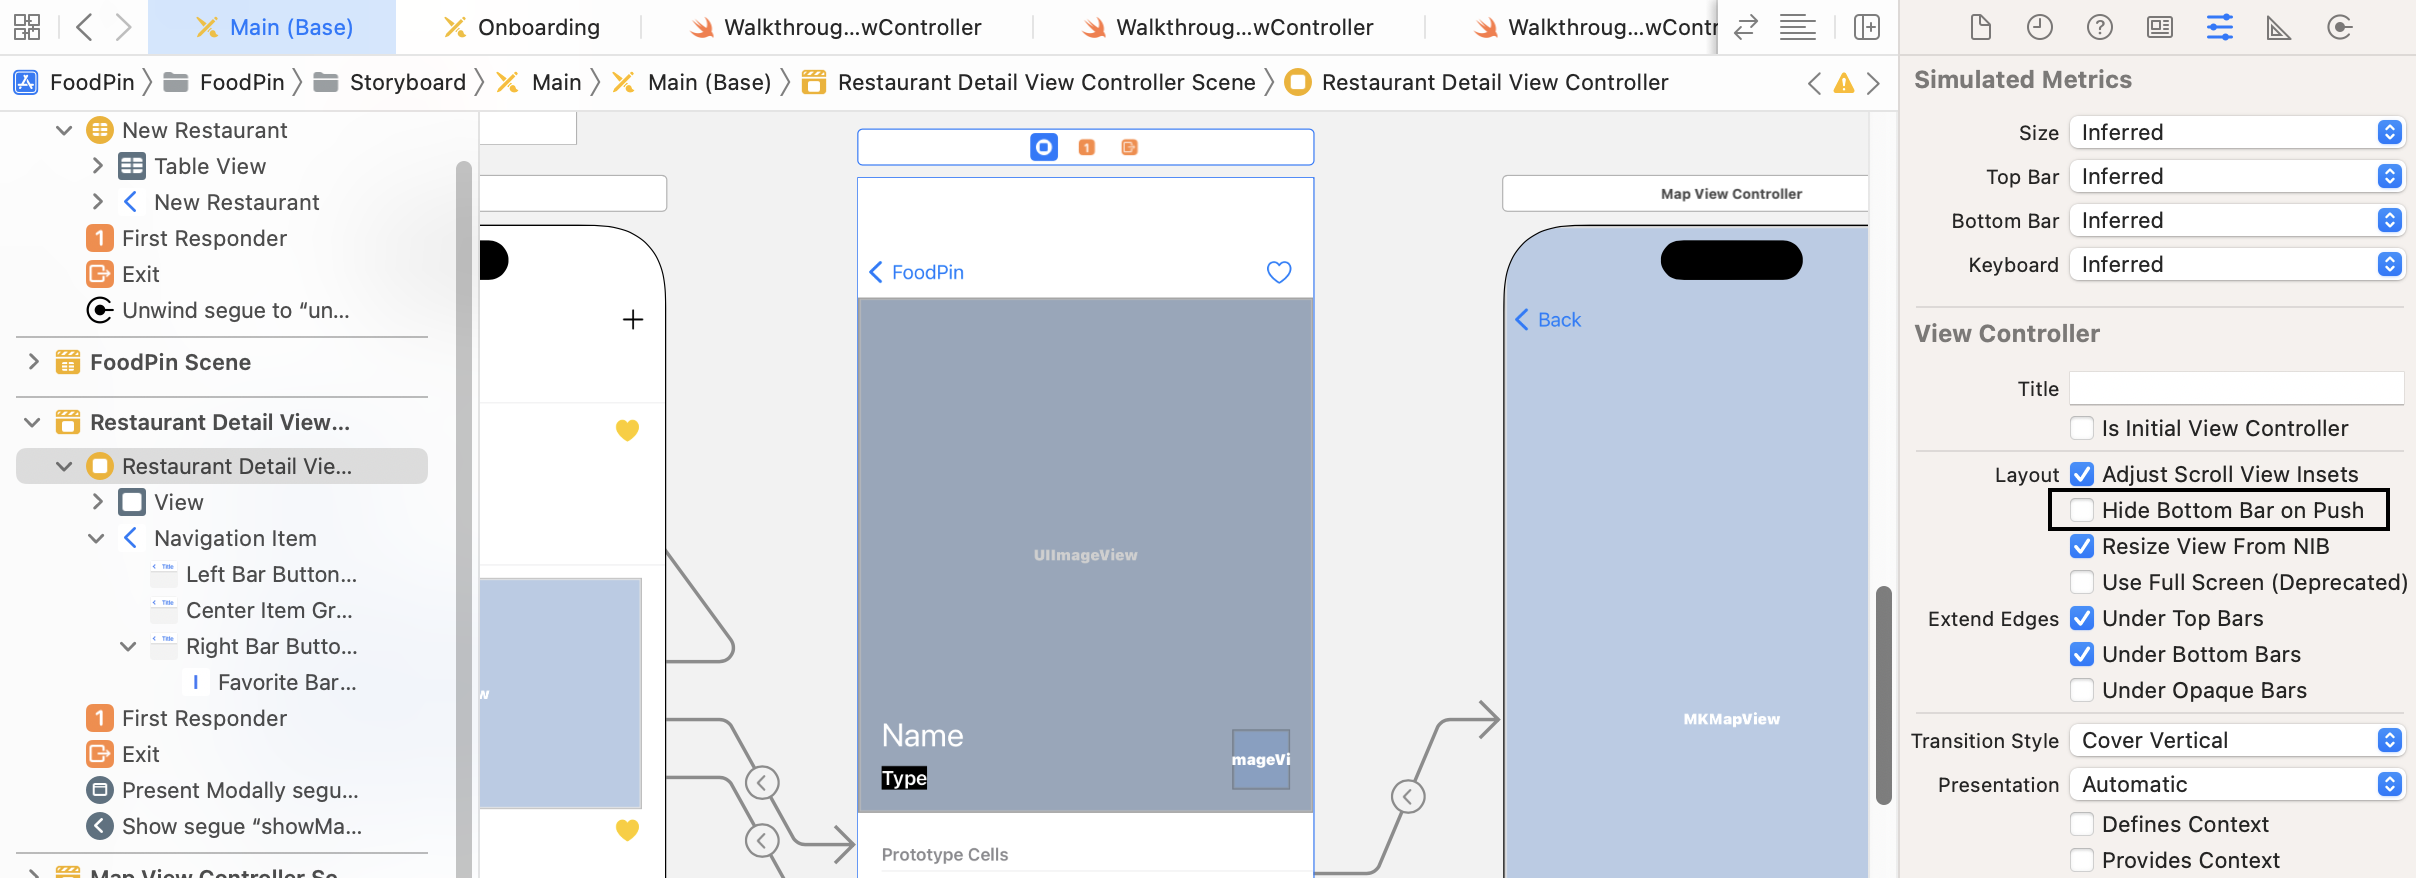
For example, to hide the tab bar in the detail view, you can select the detail view controller in storyboard and enable the Hide Bottom Bar on Push option in the Attribute inspector. The tab bar will be hidden when the detail view appears.
Alternatively, if you want to do it in code, you can add the following line of code in the prepare(for:) method of the RestaurantTableViewController class:
destinationController.hidesBottomBarWhenPushed = true
Try to test the app again. The tab bar should now disappear when you navigate to the detailed view.
Adding New Tabs
There is no reason why an app needs a tab bar for displaying a single tab item. You use a tab bar interface to organize your app into distinct modes of operation. Each tab opens a specific feature. Apparently, there are at least two tab items in an app if you use a tab bar. In our FoodPin app, we're going to create two more tab items: Discover and About.
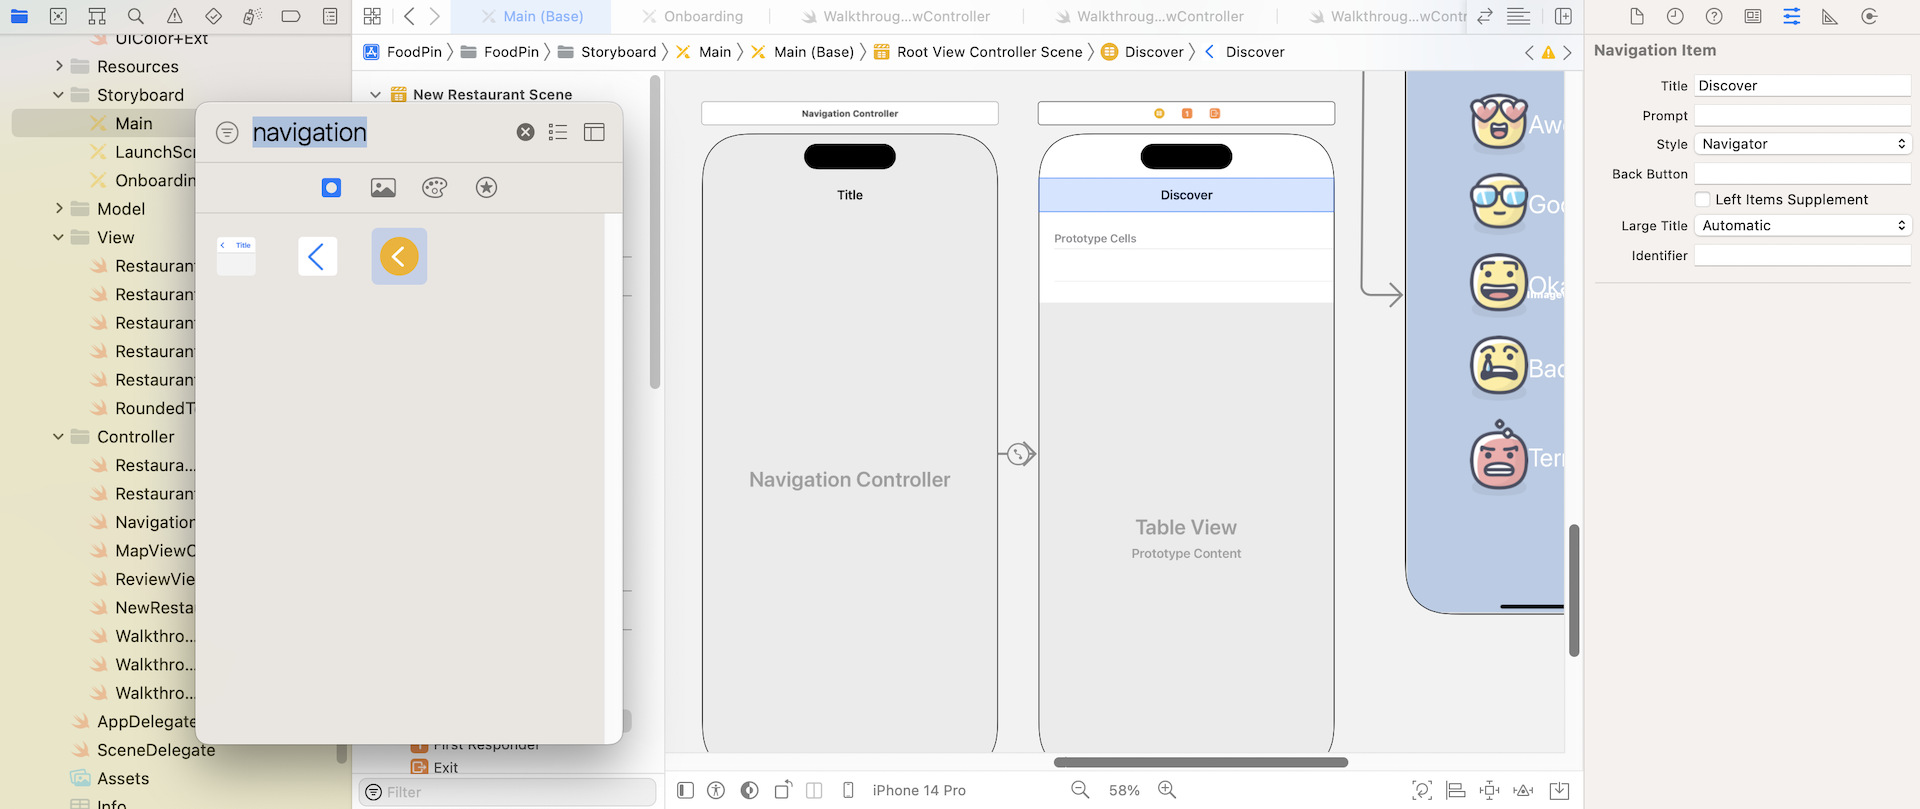
In the Main storyboard, open the Object library and drag a Navigation Controller object into the storyboard. The default navigation controller is associated with a table view controller. Simply change the title of the navigation bar to Discover. Meanwhile, keep everything unchanged. We will deal with the implementation of this tab in later chapters.
Next, we want to make this set of controllers to be a part of the tab bar controller. All you have to do is establish a relationship between the new navigation controller and the existing tab bar controller. Press and hold the control key, drag from the tab bar controller to the new navigation controller. Release both buttons, and select the View Controllers option under Relationship Segue. This tells Xcode that the new navigation controller is a part of the tab bar controller.

As soon as the relationship is established, the tab bar controller automatically adds a new tab and associates it with the new navigation controller. Select the tab bar item of the navigation controller and change the tab bar item to Recent in the Attributes inspector. If you can't wait to test the app, run the project again. You should now see the new Recents tab.
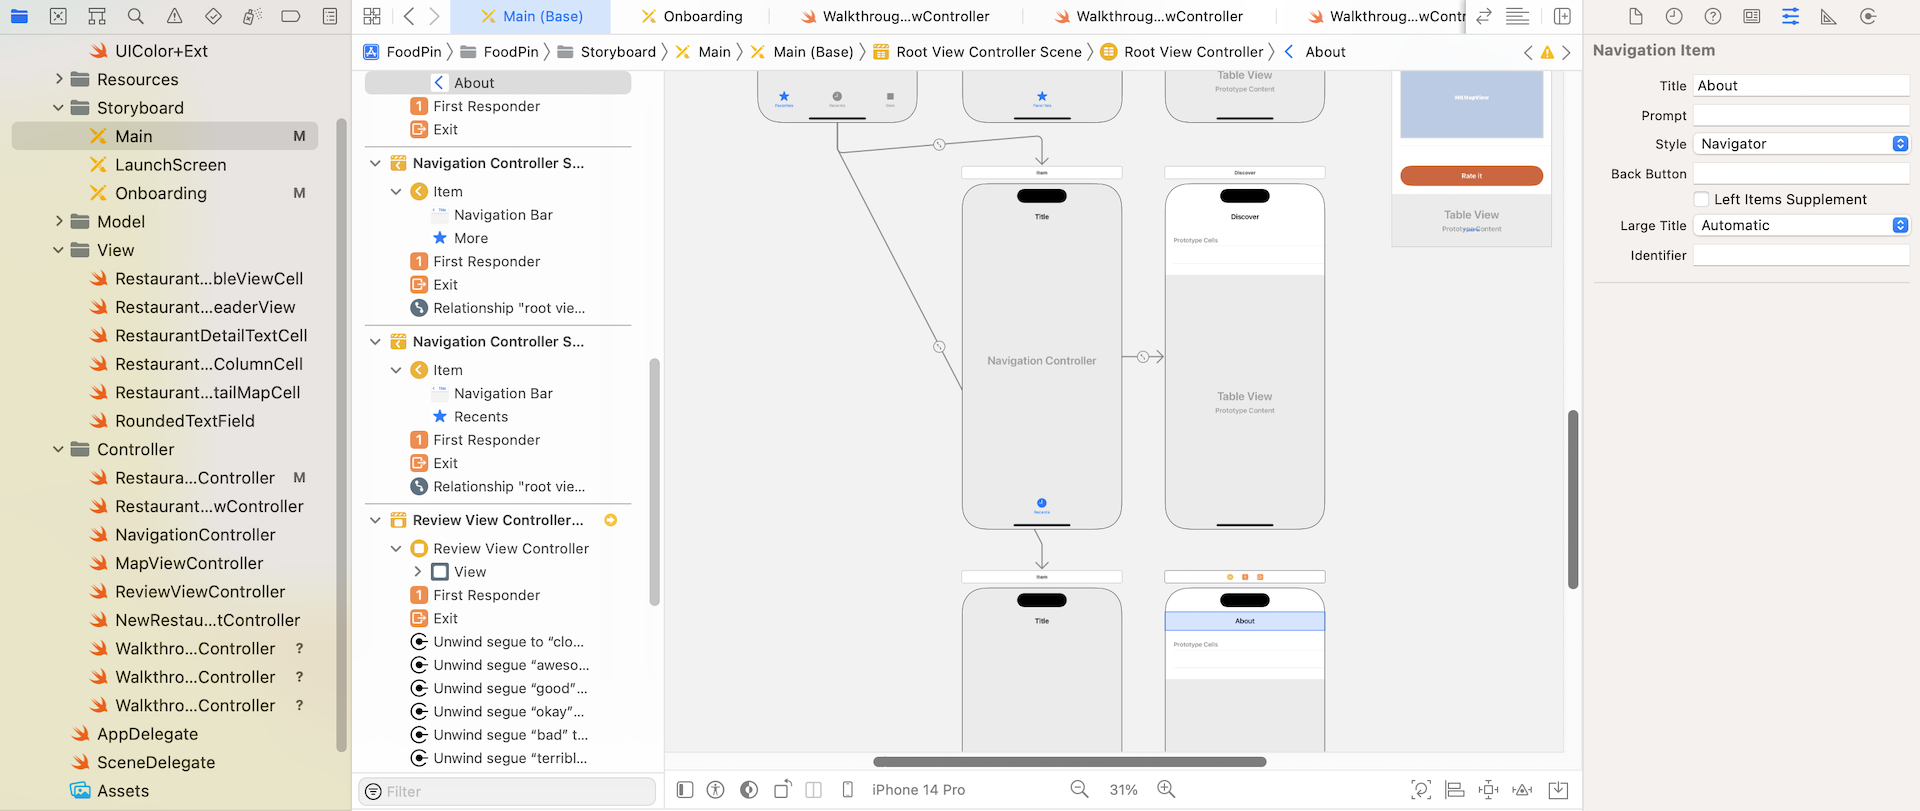
Quick note: For the sake of simplicity, we just use the system item. You may wonder how to use your own title and image for the tab item. No worries. I will show you in later sections of the chapter.Repeat the same procedures to create another tab for About. Drag another navigation controller and name the title of the table view controller to About. Then establish a relationship with the tab bar controller. This will add another new tab in the tab bar controller. Change the tab bar item of the new navigation controller to the system item More. The connections in your storyboard for the two new controllers should be similar to that in figure 22-9.
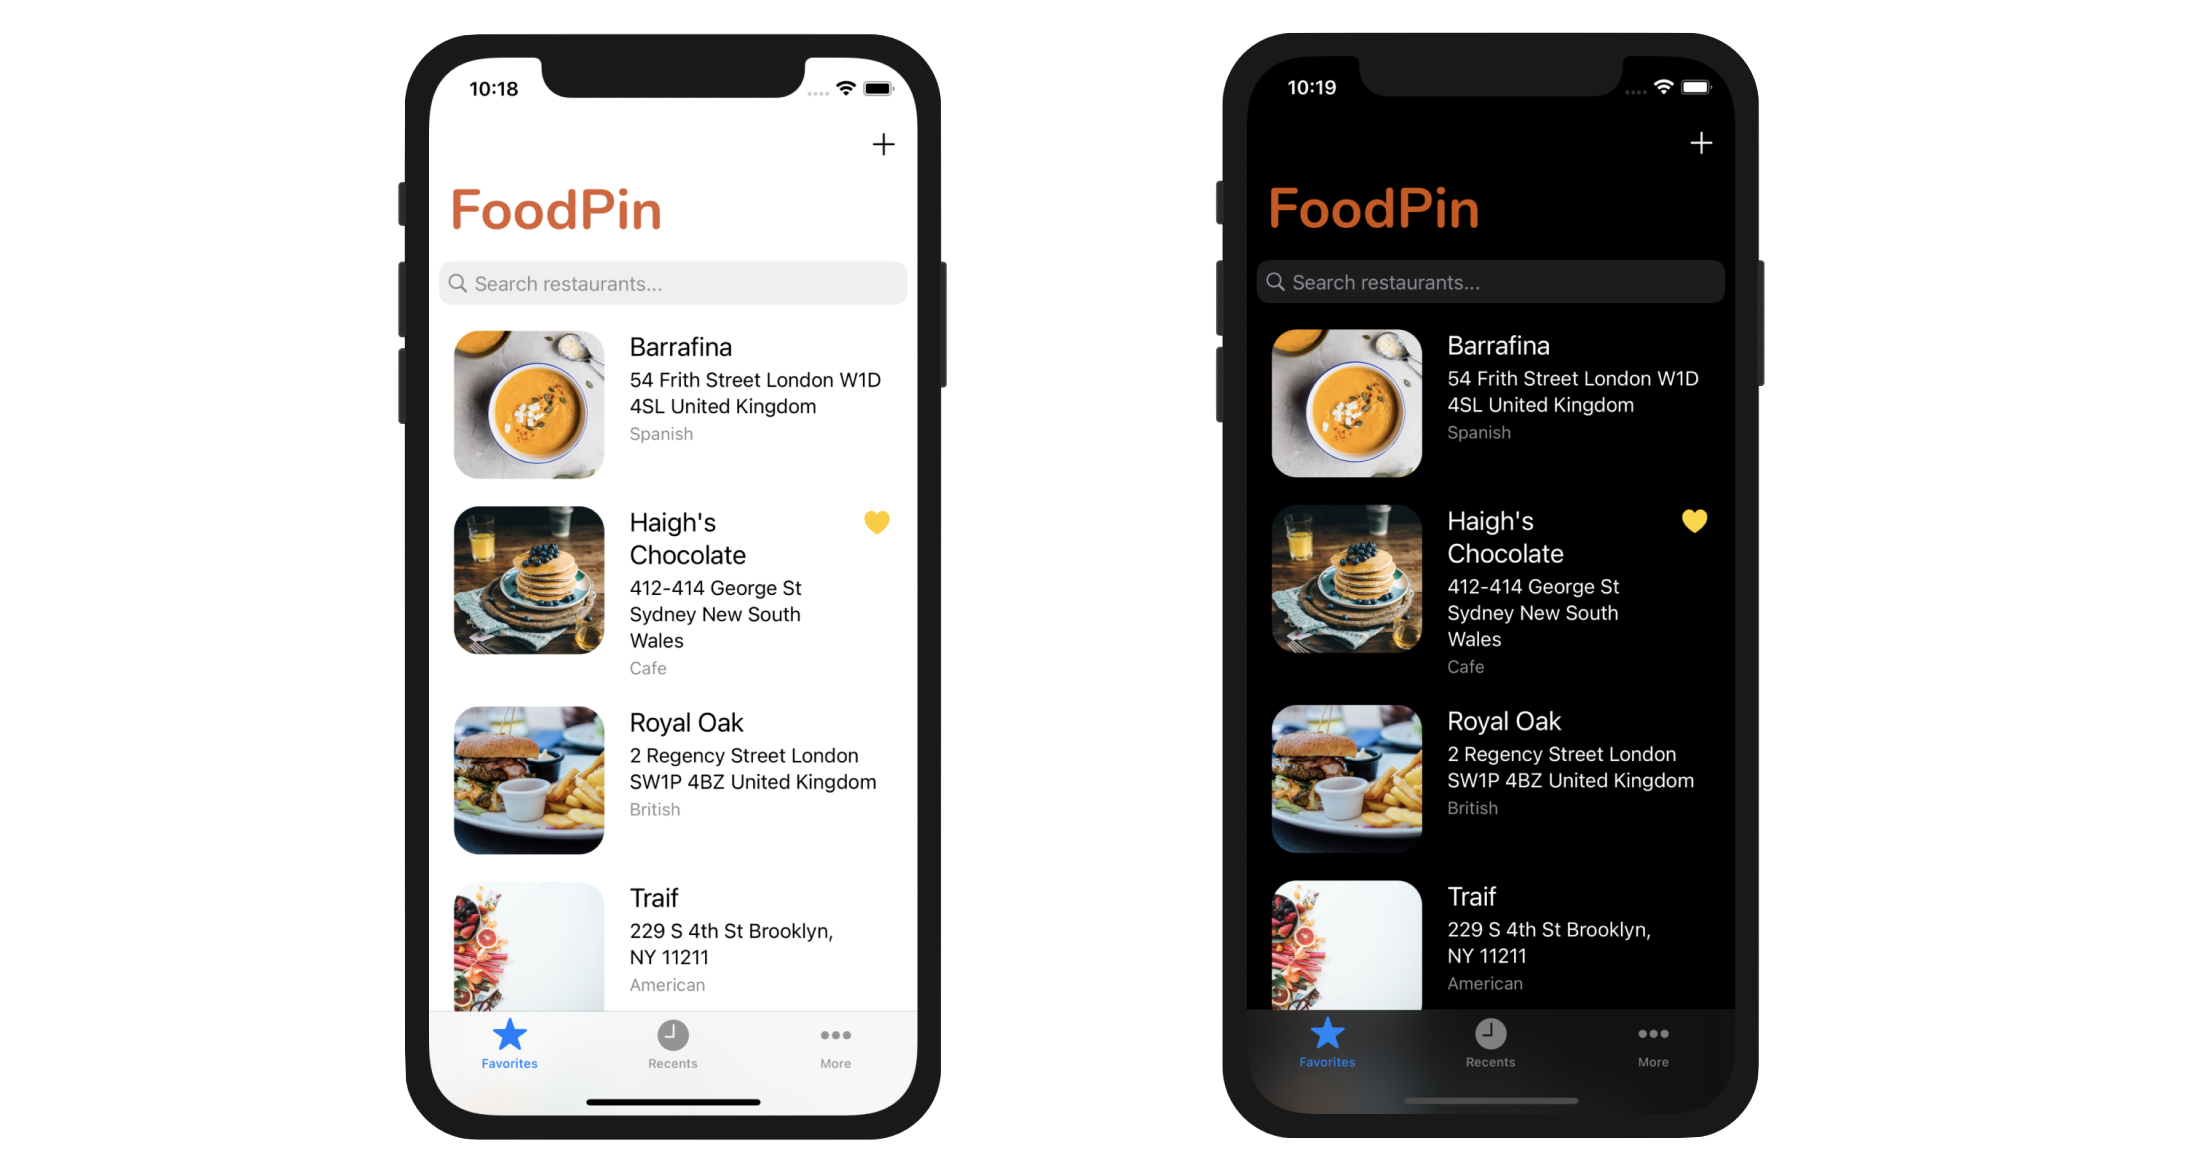
Now run the project to have a quick test. The FoodPin app should display a tab bar with three tab items - Favorites, Recent, and More. You're allowed to switch between tabs, though the Discover and About screens are blank.
Customizing the Appearance of the Tab Bar
Up till now, we used some built-in tab items such as Recents and More. Similar to the navigator bar, you can customize the tab bar's appearance by using an appearance class. Starting from iOS 13, Apple introduced a new class named UITabBarAppearance for customizing the appearance of a tab bar. The usage of UITabBarAppearance is very similar to UINavigationBarAppearance. You first create an instance of UITabBarAppearance and configure its properties (e.g. background color). Then you assign the appearance object to the standard appearance of the tab bar. Here is the code:
let tabBarAppearance = UITabBarAppearance()
tabBarAppearance.configureWithDefaultBackground()
tabBarAppearance.backgroundColor = .darkGray
UITabBar.appearance().standardAppearance = tabBarAppearance
If you want to configure the tab bar with transparent background, you can replace the method call .configureWithDefaultBackground with .configureWithTransparentBackground like this:
tabBarAppearance.configureWithTransparentBackground()
To change the tint color of the tab bar item, you can set the tintColor property of the appearance API:
UITabBar.appearance().tintColor = UIColor.systemRed
For example, you can insert the following code snippet in the application(_:didFinishLaunchingWithOptions:) method of the AppDelegate class to customize the tab bar:
let tabBarAppearance = UITabBarAppearance()
tabBarAppearance.configureWithOpaqueBackground()

UITabBar.appearance().tintColor = UIColor(named: "NavigationBarTitle")
UITabBar.appearance().standardAppearance = tabBarAppearance
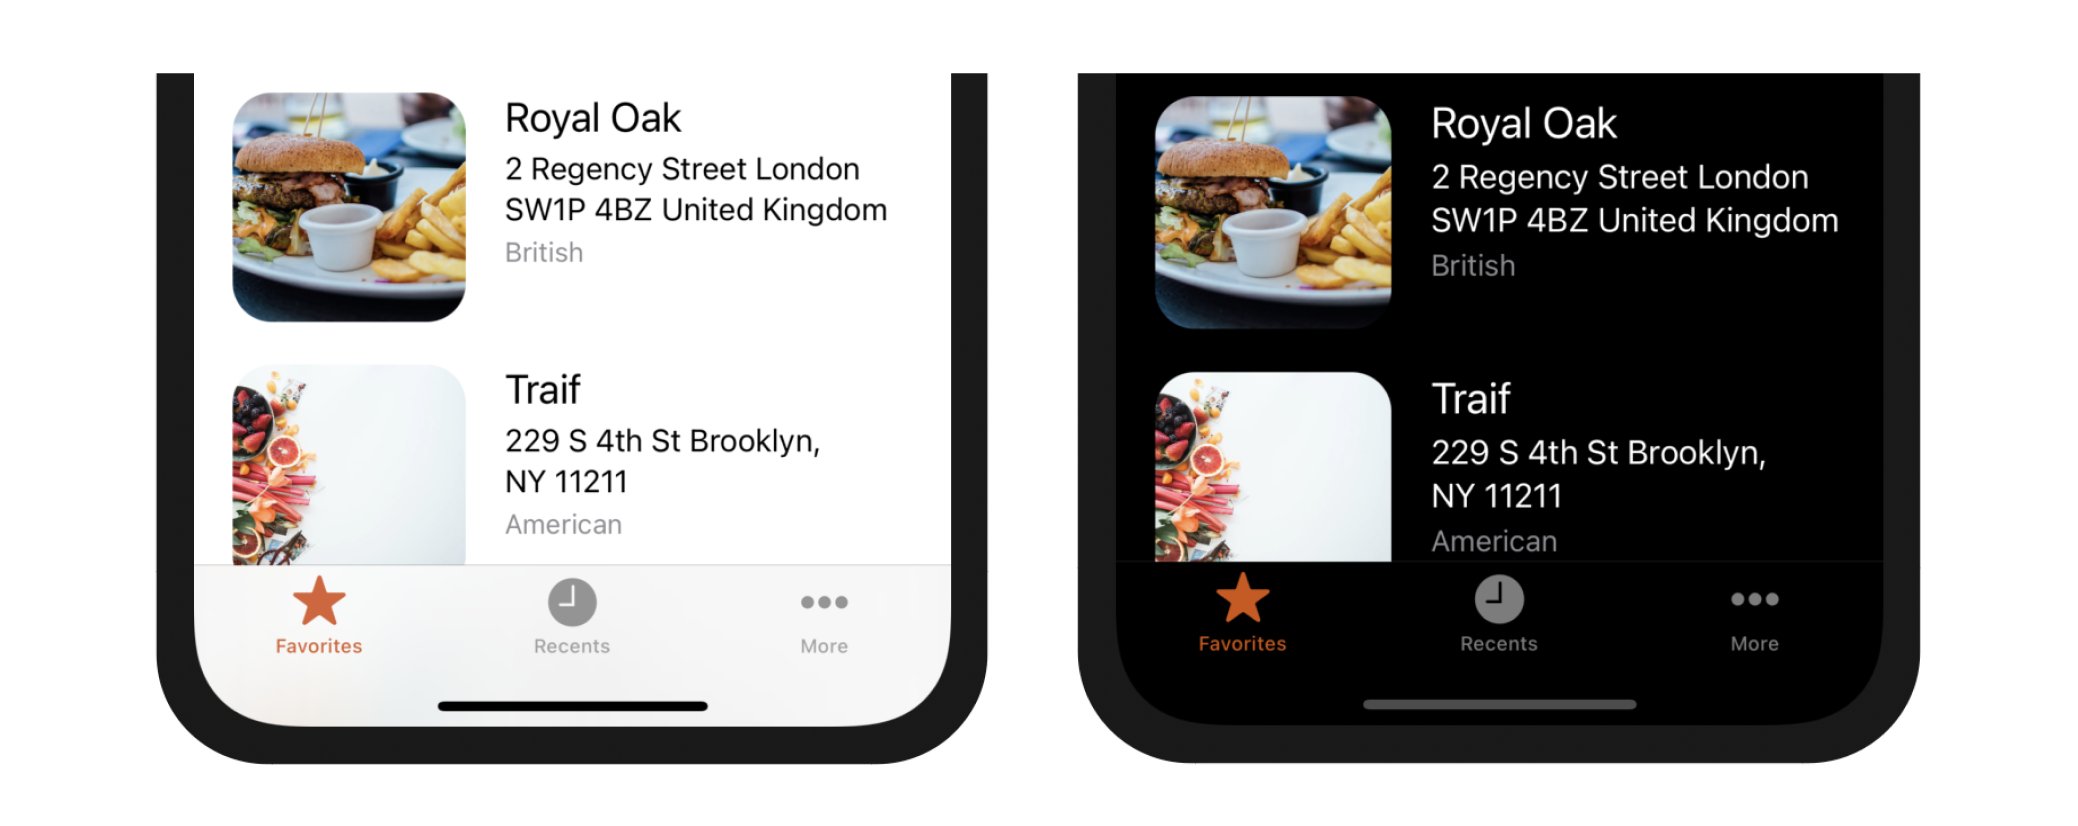
Run the project again. You should see a tab bar with a different tint color in both light and dark modes.
You can refer to the official documentation of UITabBarAppearance to learn more about the customization properties (https://developer.apple.com/documentation/uikit/uitabbarappearance).
Changing the Tab Bar Item Image
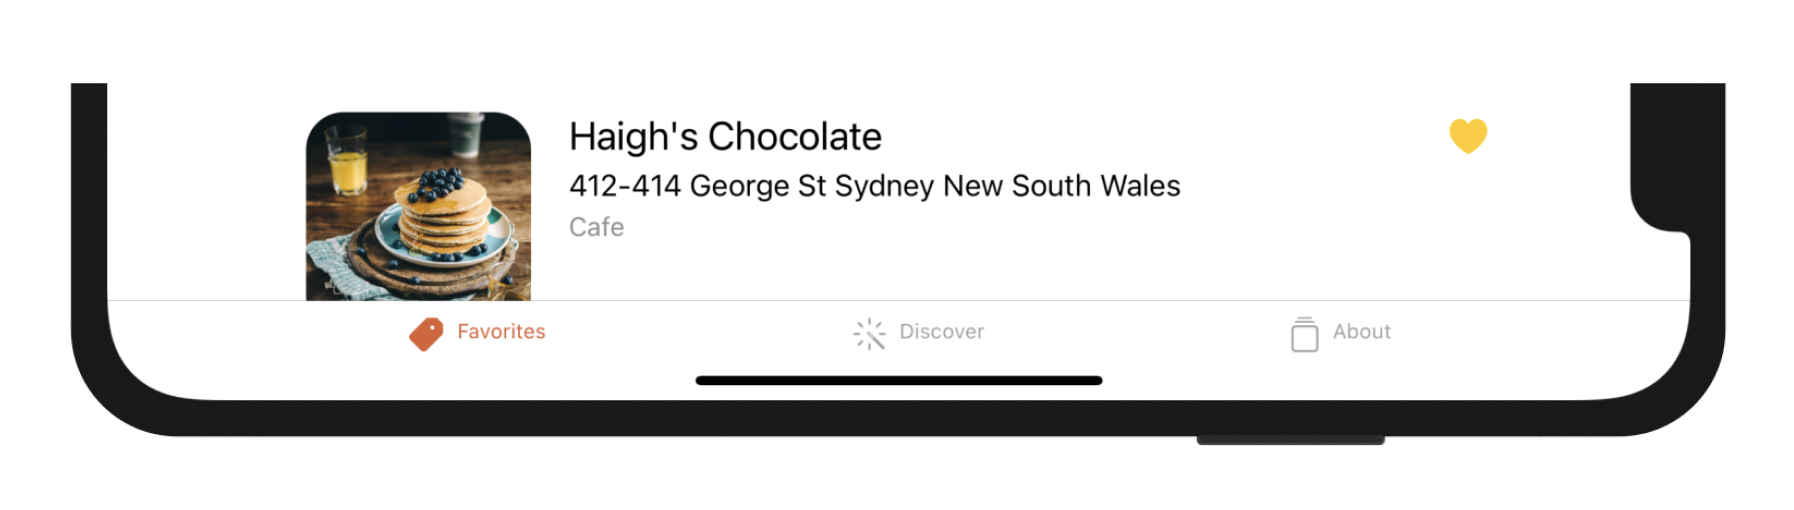
Instead of using the system item, you're allowed to use your own image and title for the tab bar item. To change the tab bar item, select the item in the storyboard. In the Attribute inspector, change the System Item Option to Custom and set the Title/Image to your own values. For the Favorite tab, set its title to Favorites and its image to tag.fill, which is a built-in image from SF Symbols. For the Recent tab, set the title to Discover and image to wand.and.rays. For the More tab, change the title to About and image to square.stack.
If you test the app again, the tab bar should look like that in figure 22-13.
Storyboard References
Storyboards is great for you to layout the app's UI visually. One complaint is that storyboards are less manageable as your project grows. In the previous chapter, you manually create a separate storyboard to organize the onboarding UI. Now I am going to show you another way to better manage your storyboards.
Xcode provides a feature called storyboard references to make storyboards more manageable. You can easily move certain UI components from one storyboard over to another.
Let's use the FoodPin project as an example to see how storyboard references work. The app now has three tabs: Favorites, Discover and About. Each of these tabs is implemented with its own UI navigation controller. The view controllers under each tab are mostly independent of the rest of the scenes in the storyboard.
Suppose that you're working on the project with two other members. Each team member is responsible for one of the tabs. It makes sense to pull each tab out to its own storyboard.
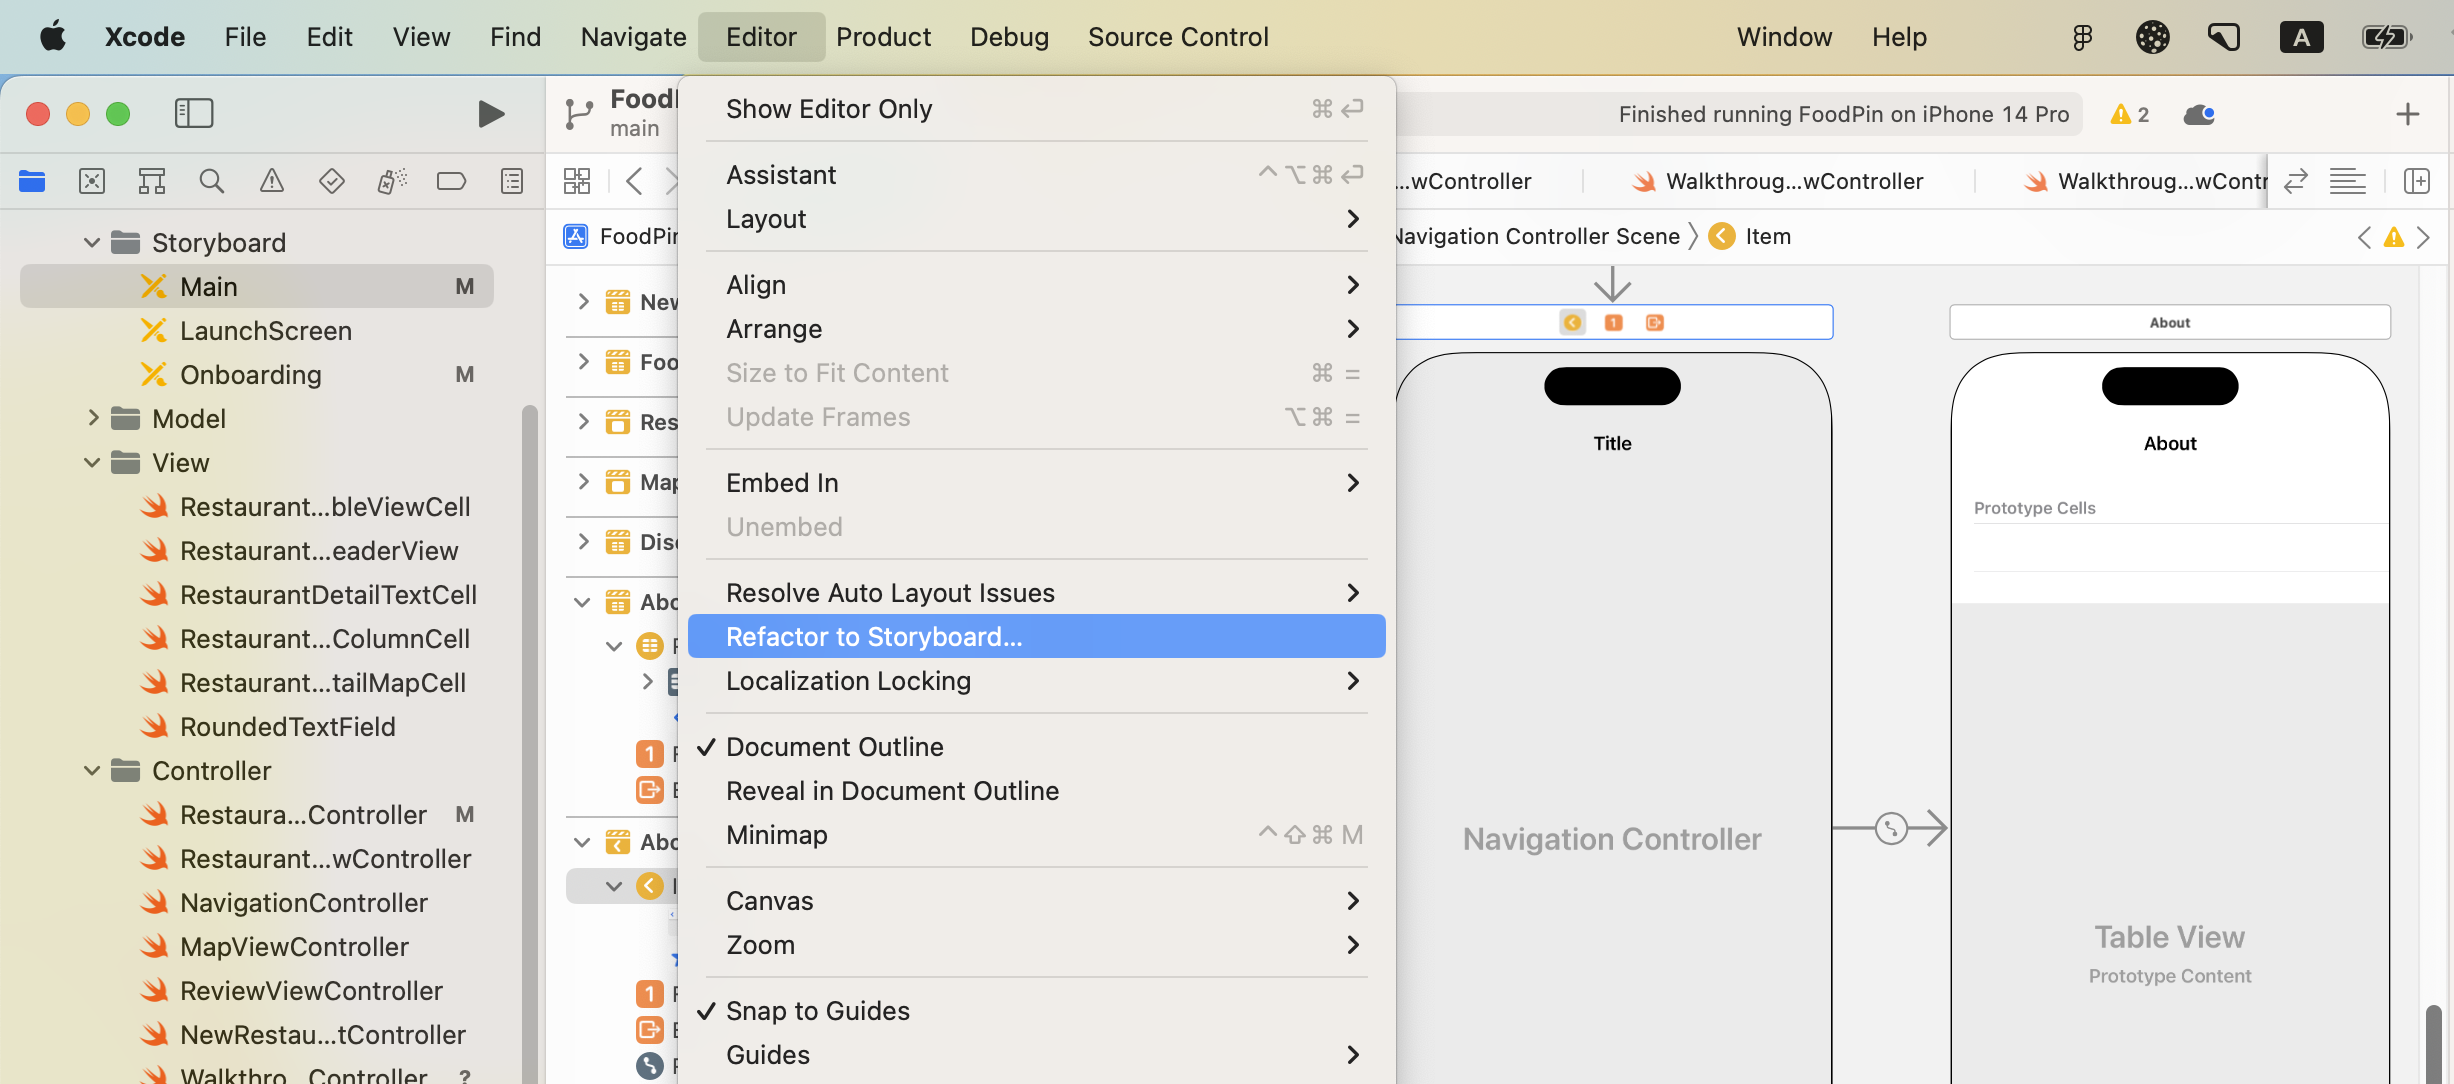
To do that, go to the Main storyboard and select those two controllers that belong the About tab. Then go up to the editor menu and choose Refactor to Storyboard….
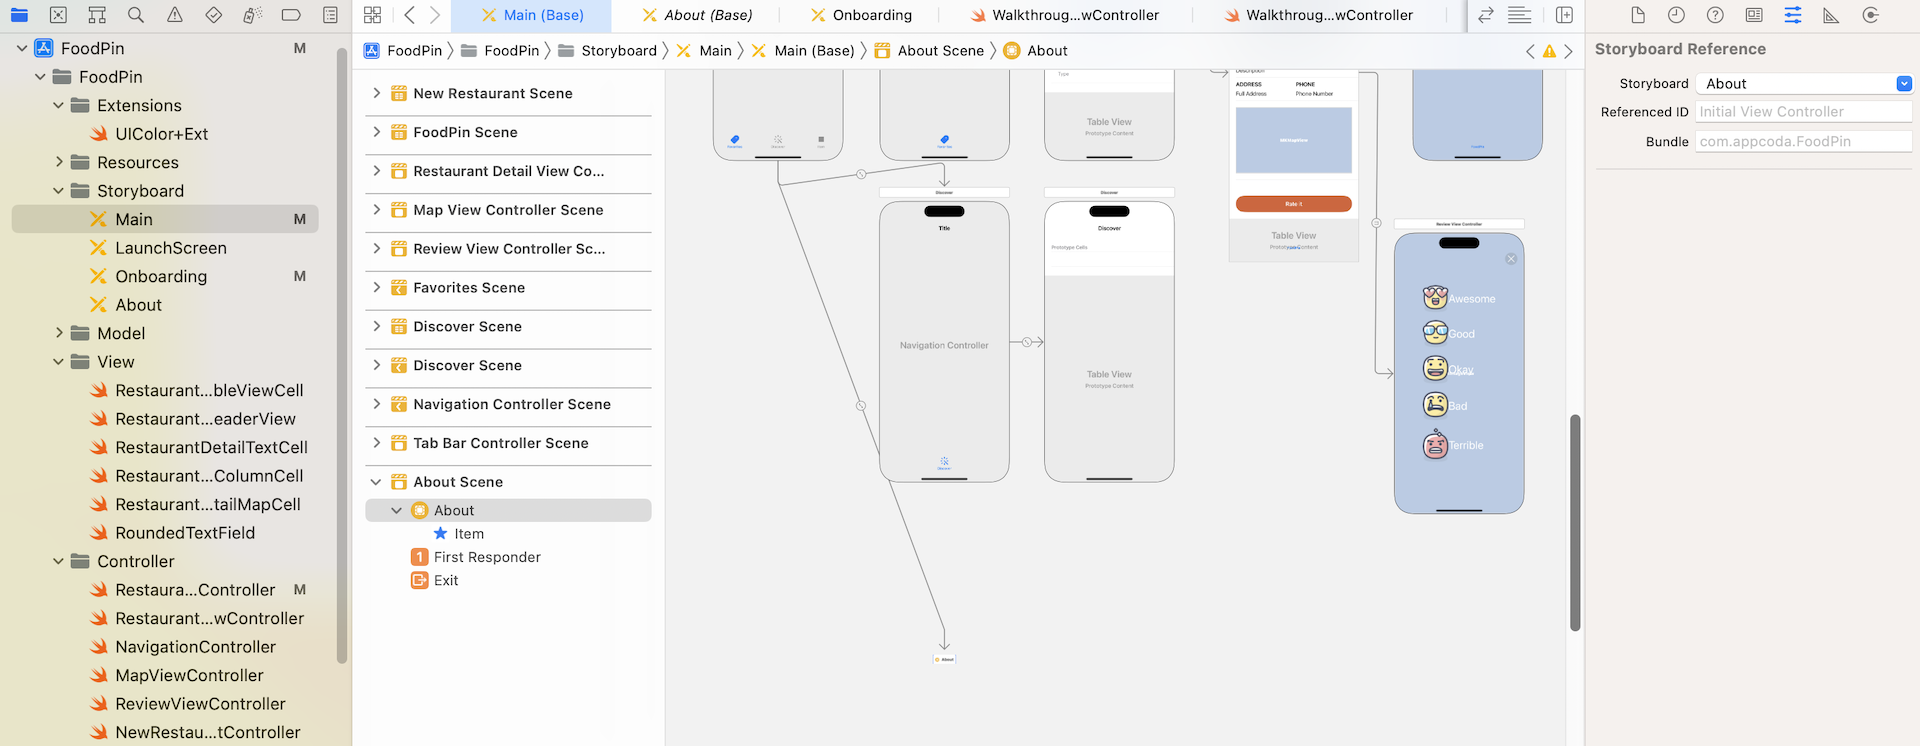
When prompted, give the new storyboard a name. Let's name it About.storyboard. Once you confirm the change, Xcode pulls out the selected view controllers, and place them in the About.storyboard file. In Main.storyboard, it shows a storyboard reference. If you double-click the storyboard reference, Xcode will take you to the corresponding storyboard and show you the view controllers that the main storyboard is referencing.
Repeat the same procedures to refactor the Discover tab, and name the new storyboard Discover.storyboard.
Summary
By now you should know how to create a tab bar controller and add new tab bar items. Interface Builder makes it very easy to embed any view controllers in a tab bar controller. Tab bars provide users a quick access to different features of your app.
We also went over a feature of Xcode called storyboard references. As your storyboard becomes more complex, you can break down a storyboard into multiple pieces to stay organized. This feature is especially useful for teams. If you're reluctant to use storyboards, it is time to think again and adopt storyboards in your app projects.
For reference, you can download the complete Xcode project from http://www.appcoda.com/resources/swift57/FoodPinTabbar.zip.