- Made by AppCoda
- Contact us / Support
- Tweet this book
- Preface
- 1. The Development Tools, the Learning Approach, and the App Idea
- 2. Your First Taste of Swift with Playgrounds
- 3. Hello World! Build Your First App in Swift
- 4. Hello World App Explained
- 5. Introduction to Auto Layout
- 6. Designing UI Using Stack Views
- 7. Introduction to Prototyping
- 8. Creating a Simple Table-based App
- 9. Customize Table Views Using Prototype Cell, Diffable Data Source and Dark Mode
- 10. Displaying Alerts with UIAlertController and Handling Table View Selection
- 11. Object Oriented Programming, Project Organization and Code Documentation
- 12. Table Row Deletion, Custom Action Button and MVC
- 13. Introduction to Navigation Controller and Segue
- 14. Detail View Enhancement and Navigation Bar Customization
- 15. Navigation Bar Customization, Extensions and Dynamic Type
- 16. Working with Maps
- 17. Basic Animations, Visual Effects and Unwind Segues
- 18. Working with Static Table Views, Camera and NSLayoutConstraint
- 19. Working with Core Data
- 20. Search Bar and UISearchController
- 21. Building Walkthrough Screens with UIPageViewController and Container Views
- 22. Exploring Tab Bar Controller and Storyboard References
- 23. Getting Started with WKWebView and SFSafariViewController
- 24. Exploring CloudKit
- 25. Localizing Your App to Reach More Users
- 26. Deploying and Testing Your App on a Real iOS Device
- 27. Beta Testing with TestFlight and CloudKit Production Deployment
- 28. Submit Your App to App Store
- 29. Adopting 3D Touch, Haptic Touch and Context Menus
- 30. Developing User Notifications in iOS
- 31. Appendix - Swift Basics
- Published with GitBook
Chapter 27
Beta Testing with TestFlight and CloudKit Production Deployment

If you are not embarrassed by the first version of your product, you've launched too late.
- Reid Hoffman, LinkedIn
Now that you have completed the testing of your app on a real device, what's next? Submit your app directly to App Store and make it available for download? Yes, you can if your app is a simple one. If you're developing a high-quality app, don't rush to get your app out, as I suggest you beta test your app before the actual release.
A beta test is a step in the cycle of a software product release. I know you have tested your app using the built-in simulator and on your own device. Interestingly, you may not be able to uncover some of the bugs, even though you're the app creator. By going through beta tests, you would be amazed at the number of flaws discovered at this stage. Beta testing is generally opened to a select number of users. They may be your potential app users, your blog readers, your Facebook followers, your colleagues, friends or even family members. The whole point of beta testing is to let a small group of real people get their hands on your app, test it, and provide feedback. You want your beta tester to discover as many bugs as possible in this stage so that you can fix them before rolling out your app to the public.
You may be wondering how can you conduct a beta test for your app, how beta testers run your app before it's available on App Store and how testers report bugs?
In iOS 8, Apple released a new tool called TestFlight to streamline the beta testing. You may have heard of TestFlight before. It has been around for several years as an independent mobile platform for mobile app testing. In February 2014, Apple acquired TestFlight's parent company, Burstly. Now TestFlight is integrated into App Store Connect (previously known as iTunes Connect) and iOS that allows you to invite beta testers using just their email addresses.
TestFlight makes a distinction between beta testers and internal users. Conceptually, both can be your testers at the beta testing stage. However, TestFlight refers internal users as members of your development team who have been assigned the Technical or Admin role in App Store Connect. You're allowed to invite up to 100 internal users to test your app. A beta tester, on the other hand, is considered as an external user outside your team and company. You can invite up to 10,000 users to beta test your app.
If you are going to let external users test your app, the app must be approved by Apple before you can send out the invitation This restriction doesn't apply to internal users. Your internal users can begin beta testing once you upload your app to App Store Connect.
Similar to CloudKit, TestFlight is not available for free. You have to enroll in the Apple Developer Program before you can access TestFlight.
In this chapter, I will walk you through the beta test process using TestFlight. In general, we will go through the tasks below to distribute an app for beta testing:
- Create an app record on App Store Connect.
- Update the build string.
- Archive and validate your app.
- Upload your app to App Store Connect.
- Manage beta testing in App Store Connect.
Creating an App Record on App Store Connect
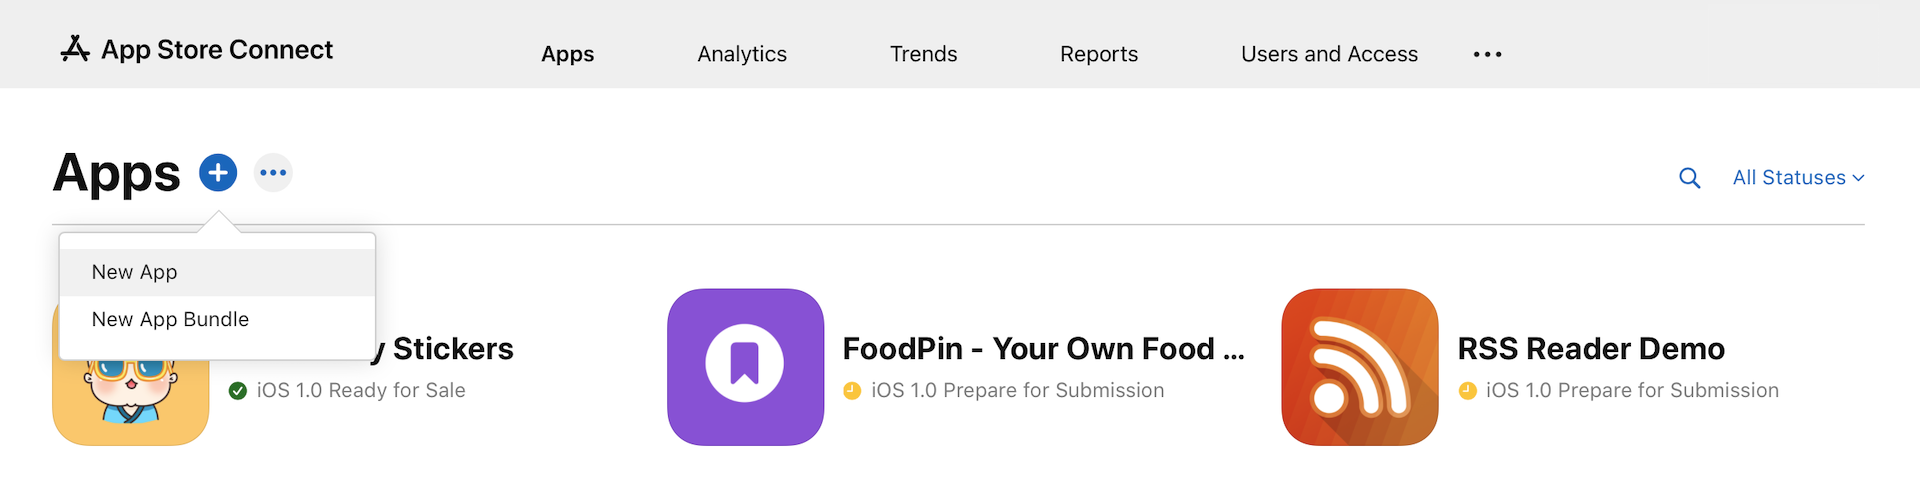
Firstly, you need an app record on iTunes Connect before you can upload an app. iTunes Connect is a web-based application for iOS developers to manage their apps sold on App Store. If you have enrolled in the iOS Developer Program, you can access App Store Connect at https://appstoreconnect.apple.com. Once signed into iTunes Connect, select My Apps and the + icon to create a new iOS app.

You'll be prompted to complete the following information:
- Platform - choose app platform, which is iOS.
- App name - your app name appears on App Store. It shouldn't exceed 30 characters.
- Primary language - the primary language of your app such as English.
- Bundle ID - the bundle ID that was created in the previous chapter.
- SKU - stands for Stock Keeping Unit. It can be anything you like. For example, your app name is "Awesome Food App". You can use "awesome_food_app" as the SKU. You can use letters, numbers, hyphens, periods and underscores except for space.
- Full access - choose full access unless you want to limit a particular users to see this app in App Store Connect.
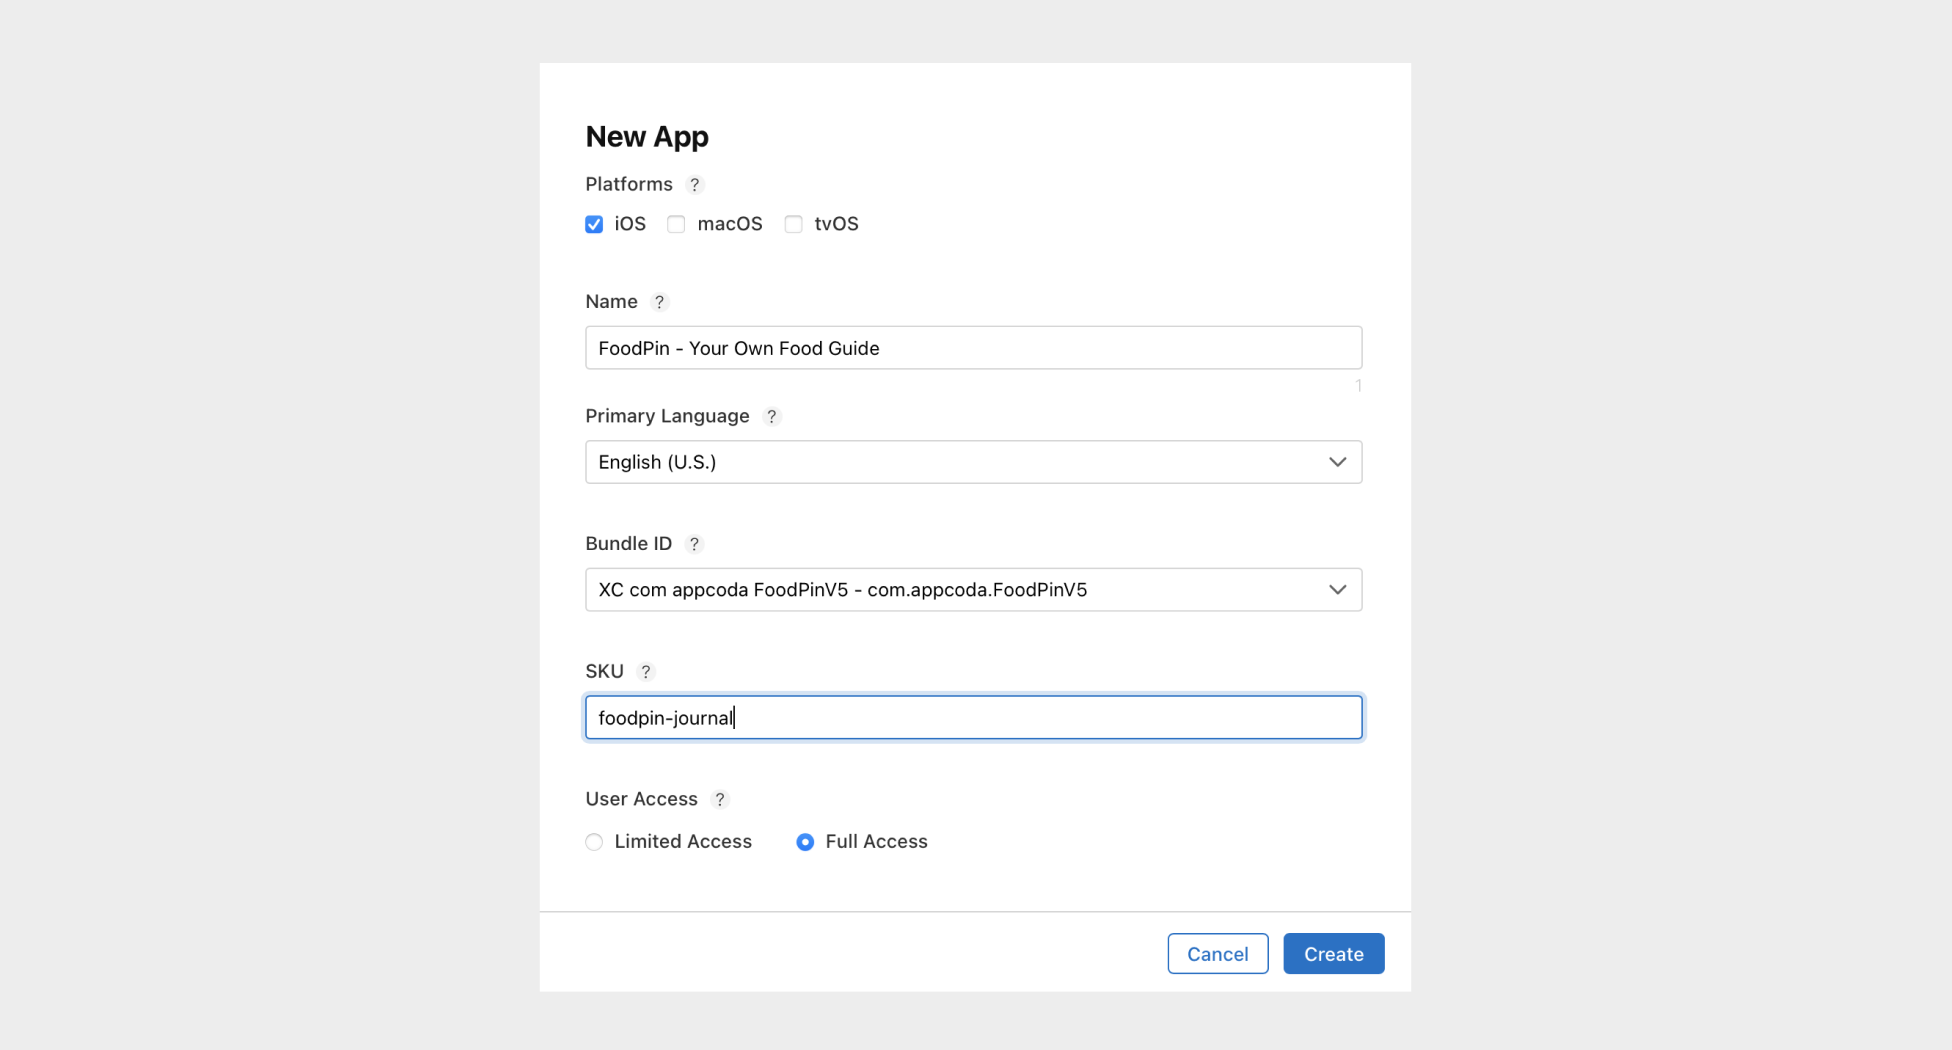
Once you click the Create button, you'll proceed to another screen to fill in the details of your app.
App Information
First, click the App Information in the side menu. For this section, it displays the app details that you have just filled in. Other than the name of your app, you can supply a subtitle which further describes your app.
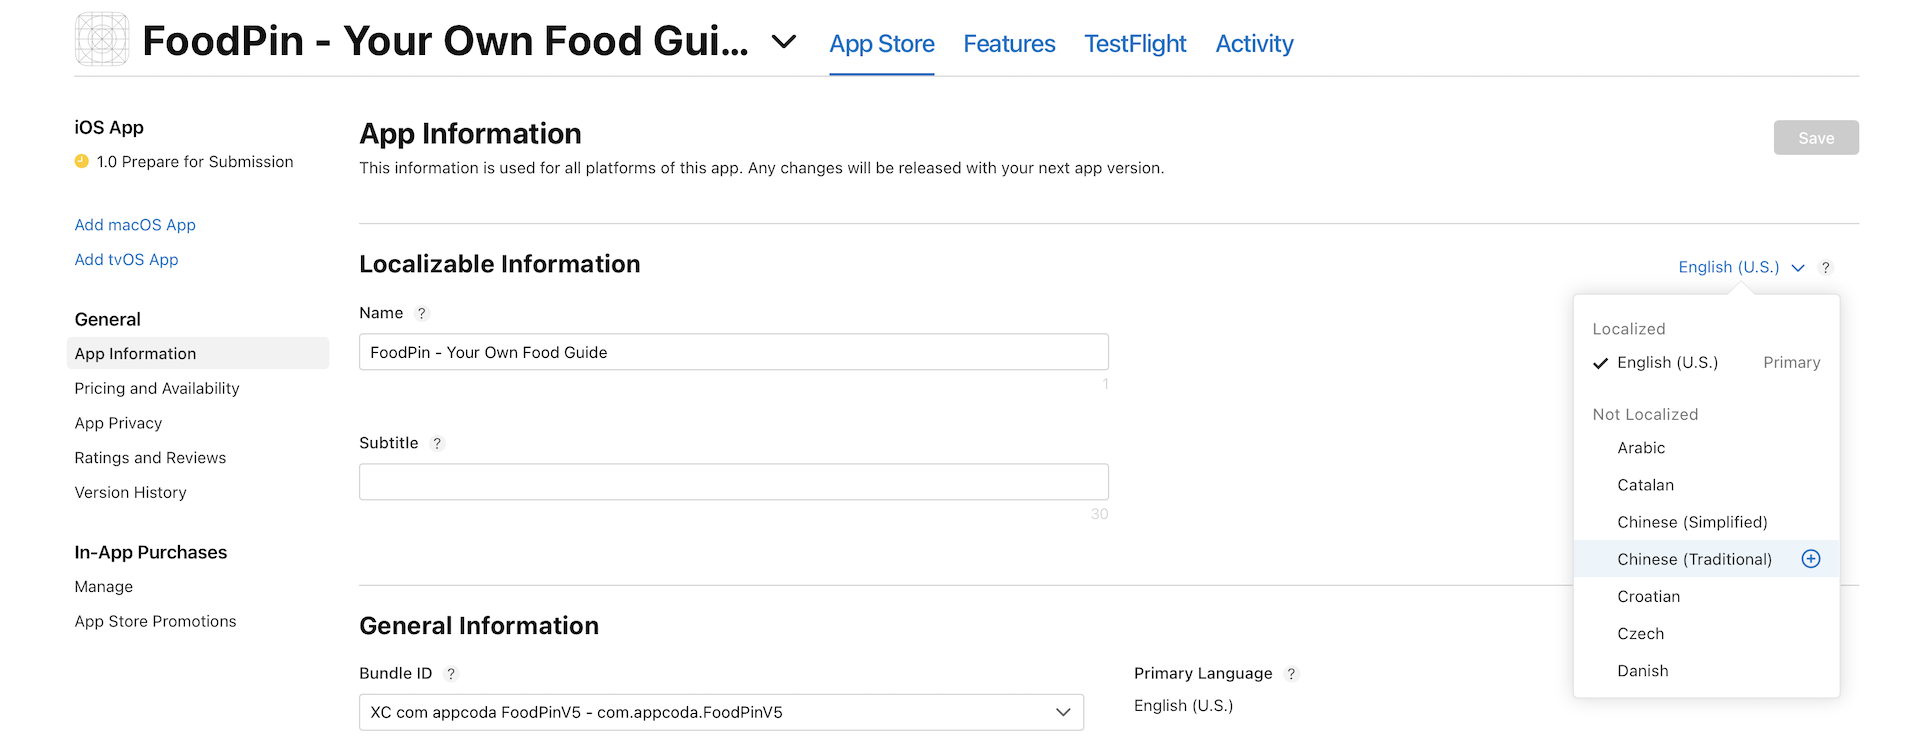
Optionally, you can provide the app information in other languages. Simply click the English (U.S.) button to choose another language. There is one option you have to set - choose your app's primary category. This is the category your app will be listed on the app store. Pick the category that best fits the app. For example, you can choose the Food & Drink category for the FoodPin app.
Pricing and Availability
In the sidebar menu, you should also see the Pricing and Availability section. This is where you set the price of your app. By default, your app will be made available globally. In case you want to limit it to certain countries, you can click the Edit button under the Availability section, and choose your preferred countries. Remember to save the changes before you go to the next section.
Starting with macOS Big Sur, compatible iPhone and iPad apps can be made available on Apple silicon Macs. By default, your iOS apps will be made available to macOS users. If you do not want Apple silicon Mac users to download your app, uncheck the Make this app available checkbox.
App Privacy
Starting October 3, 2018, it is required to have a privacy policy for all apps and app updates in order to be submitted for distribution on the App Store or through TestFlight external testing. Choose App Privacy in the sidebar menu and fill in your privacy policy URL. Also, click the Get Started button to declare if your app will collect any data from users.
Prepare for Submission
Other than the basic information, you will need to provide additional information such as screenshots, app description, app icon, contact information, etc.
Choose the Prepare for Submission option in the sidebar menu to get started.
1. App Preview and Screenshots
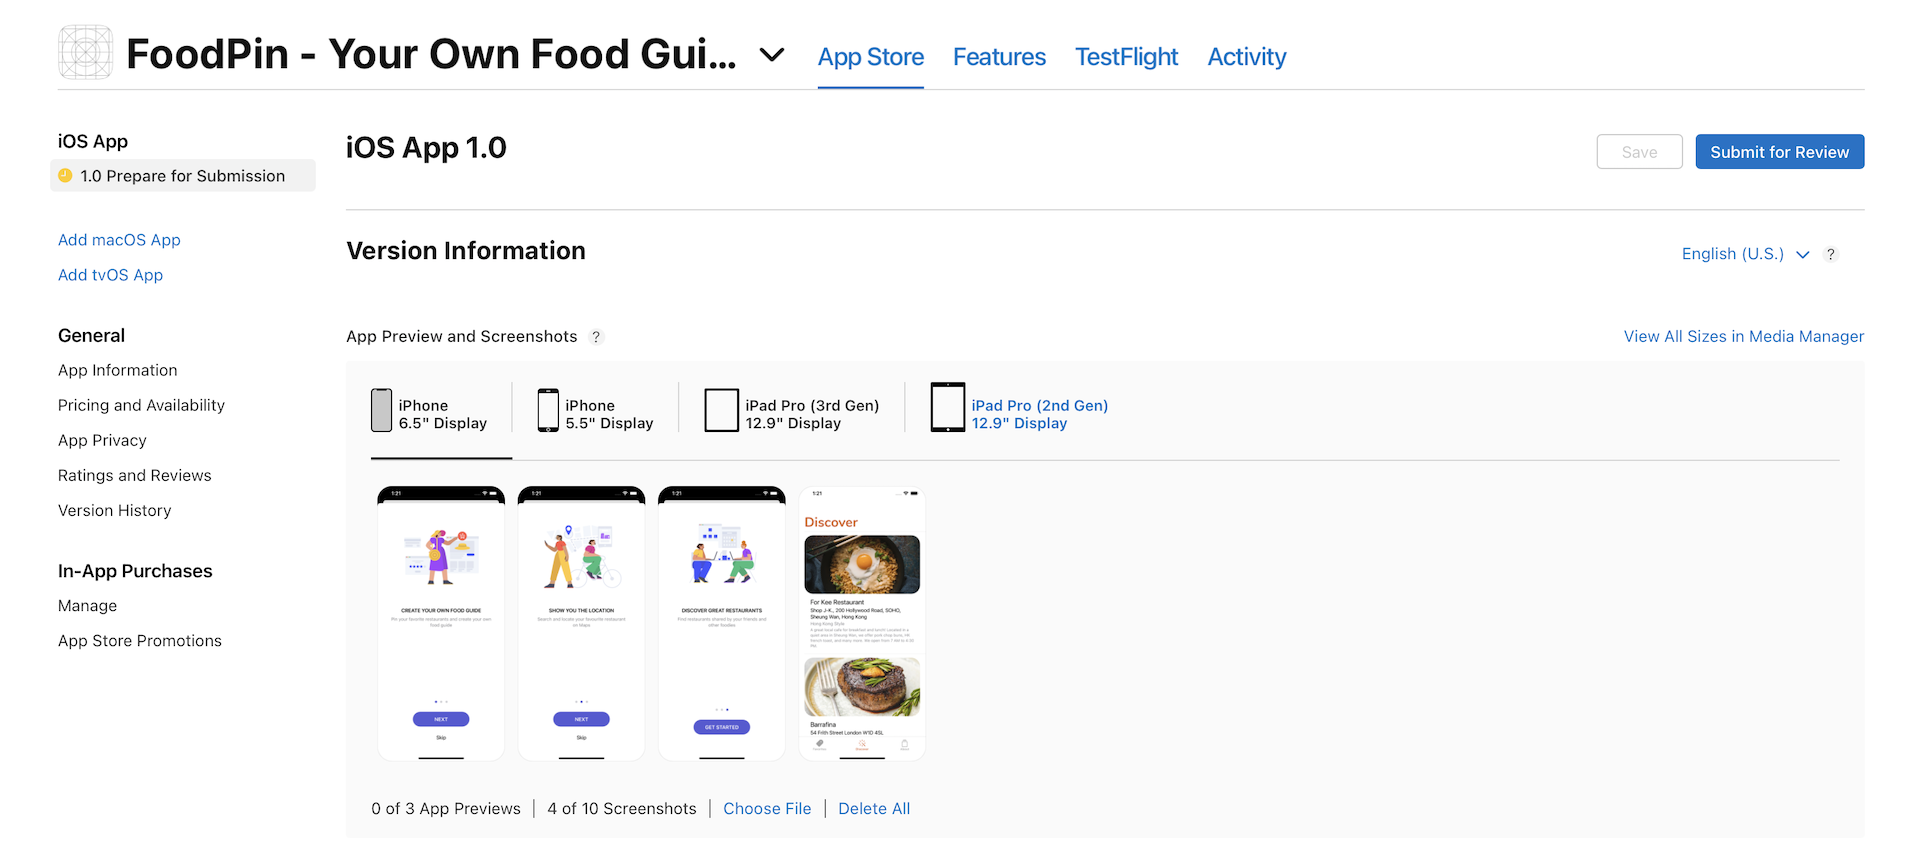
These are the preview screens for your app. For the screenshots, you need to provide at least one screenshot for 6.5-inch devices. Optionally, you can upload the screenshots for iPhone 5.5" display. If your app supports iPad, you will also need to provide the screenshots for iPad.
To add the screenshots, you can click Choose File or simply drag the file to the box. Optionally, you can incorporate app preview videos.
Note: You can further refer to Apple's App Connect Developer guide for details (https://developer.apple.com/support/app-store-connect/)
2. App Description and URL
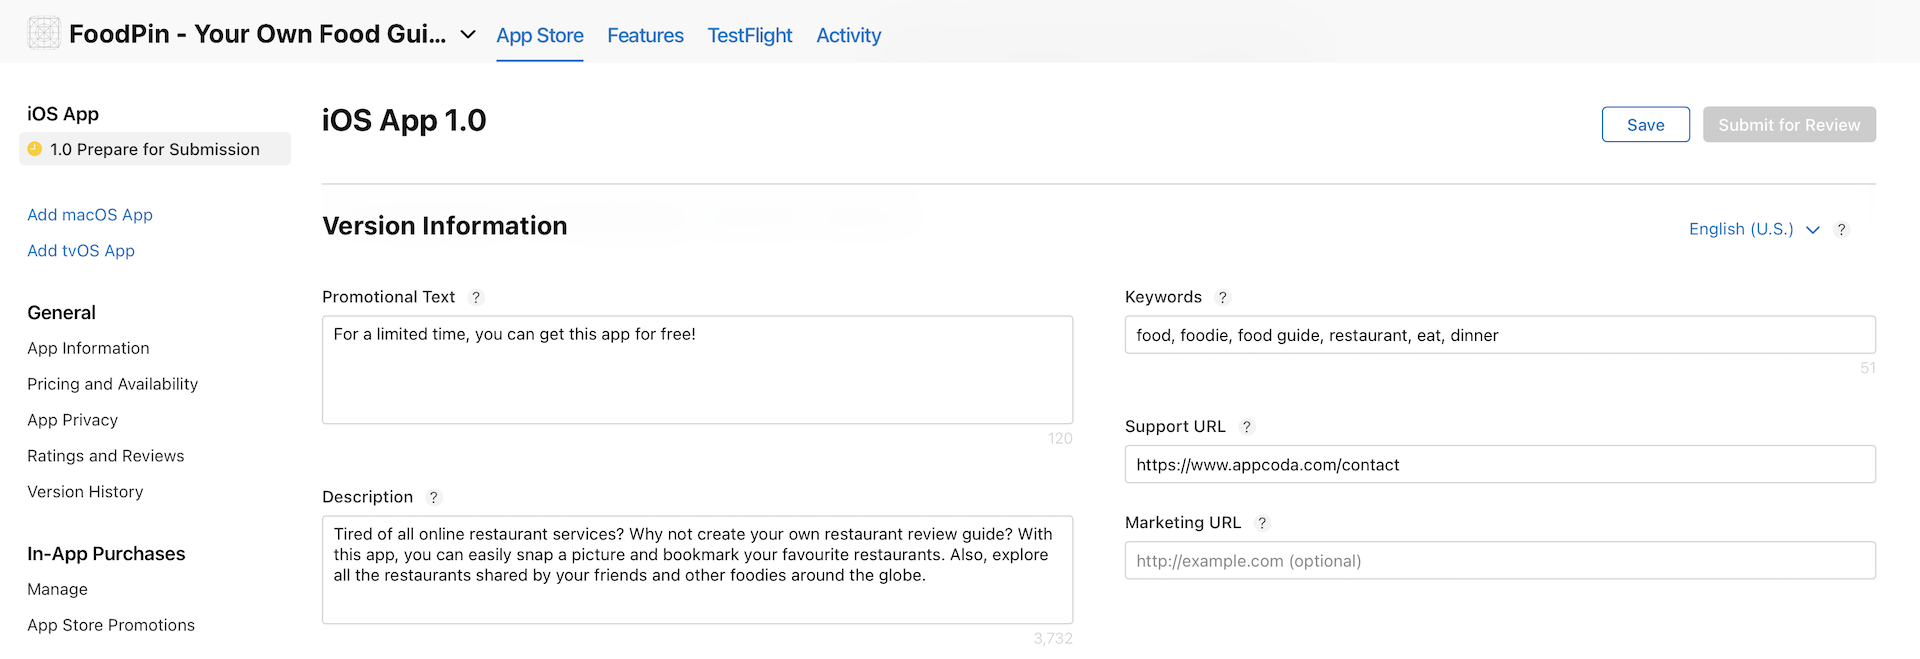
Next, fill in your app description and promotional text. Promotional Text is a new feature of the revamped App Store. Prior to iOS 11, whenever you need to update the description of your app, you will need to go through Apple's review process. Now, you are free to modify the promotional text anytime you want. The promotional text appears at the top of the description and is up to 170 characters long. You may use this field to share any news about your app. Say, your app is on sale. Use this field to inform your potential users.
Keywords are used to describe the nature of your app. You should enter at least one keyword in the Keywords field. If you have more than one keyword, separate them by commas. For example, "food,restaurant,recipe". Keywords are referenced by App Store for app search. It's one of the most important elements impacting your app download. You may have heard of App Store Optimization (ASO). Keyword optimization is a part of ASO. I will not go into keyword optimization here. If you want to learn more about keyword optimization, you can refer to this article (https://neilpatel.com/blog/app-store-optimization/) or just google ASO.
The support URL is mandatory. You can fill in the URL of your website or blog. If you don't have one, register a website at wordpress.com.
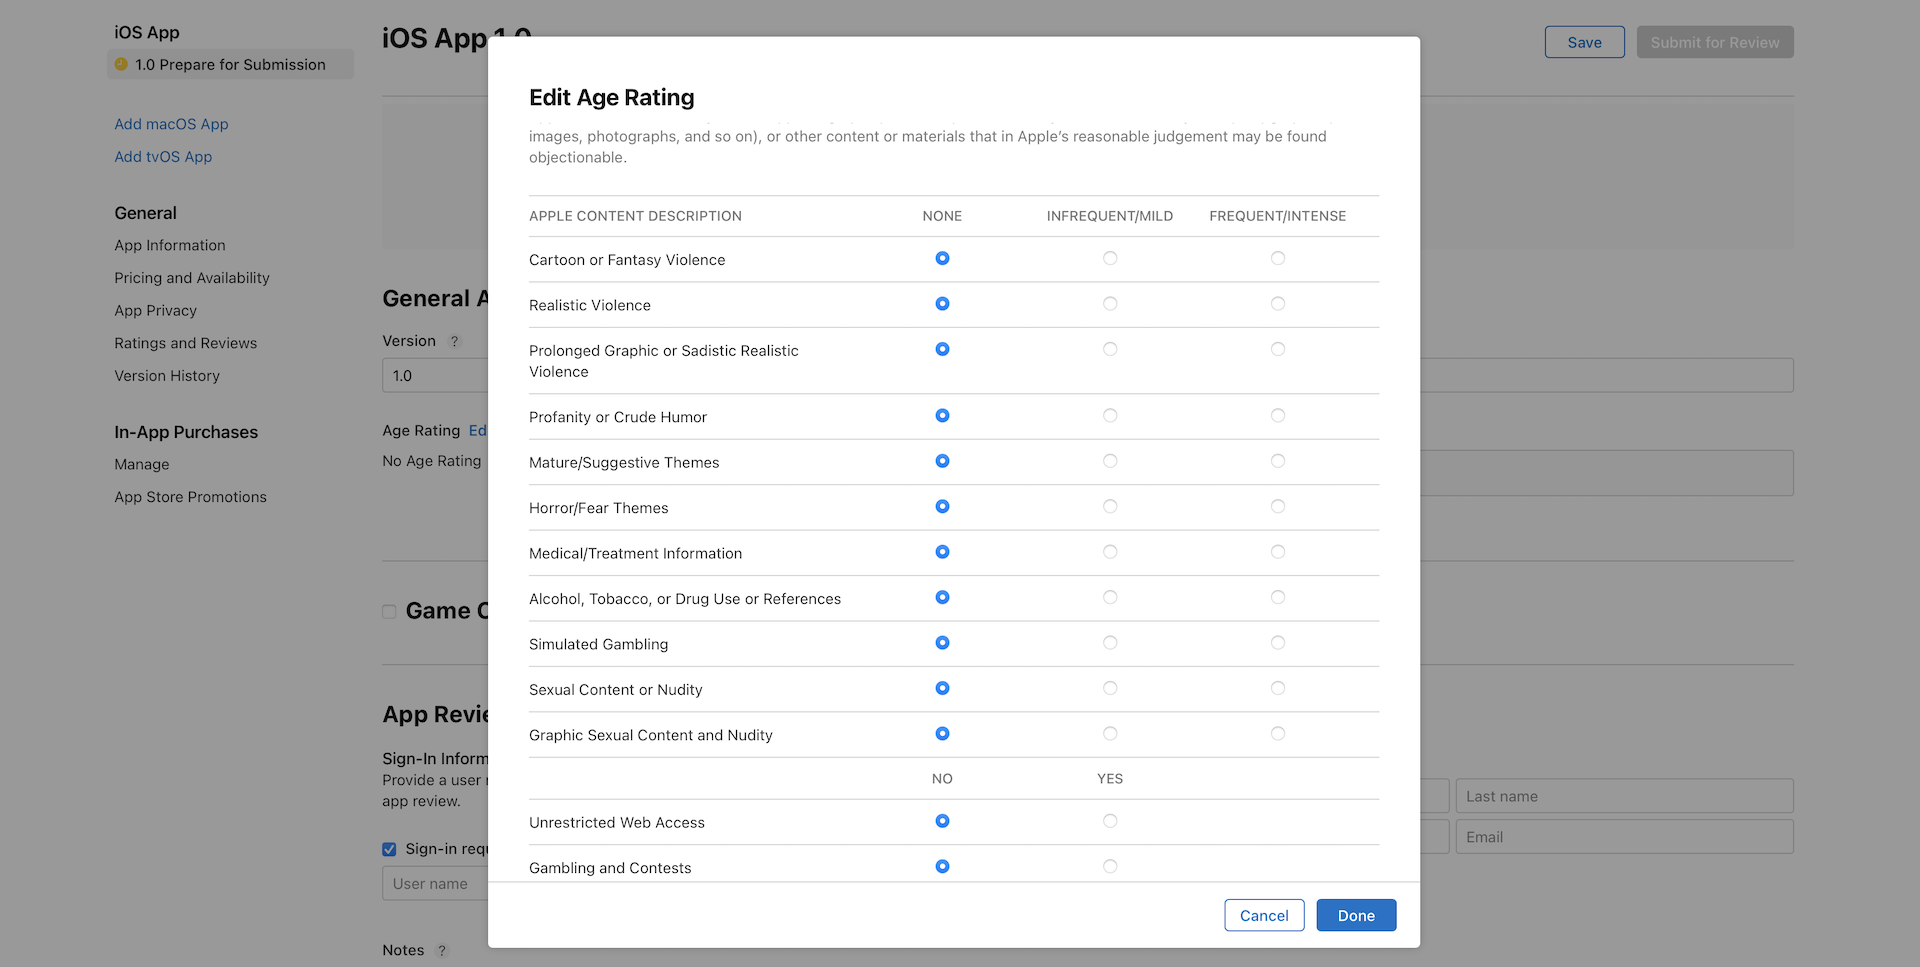
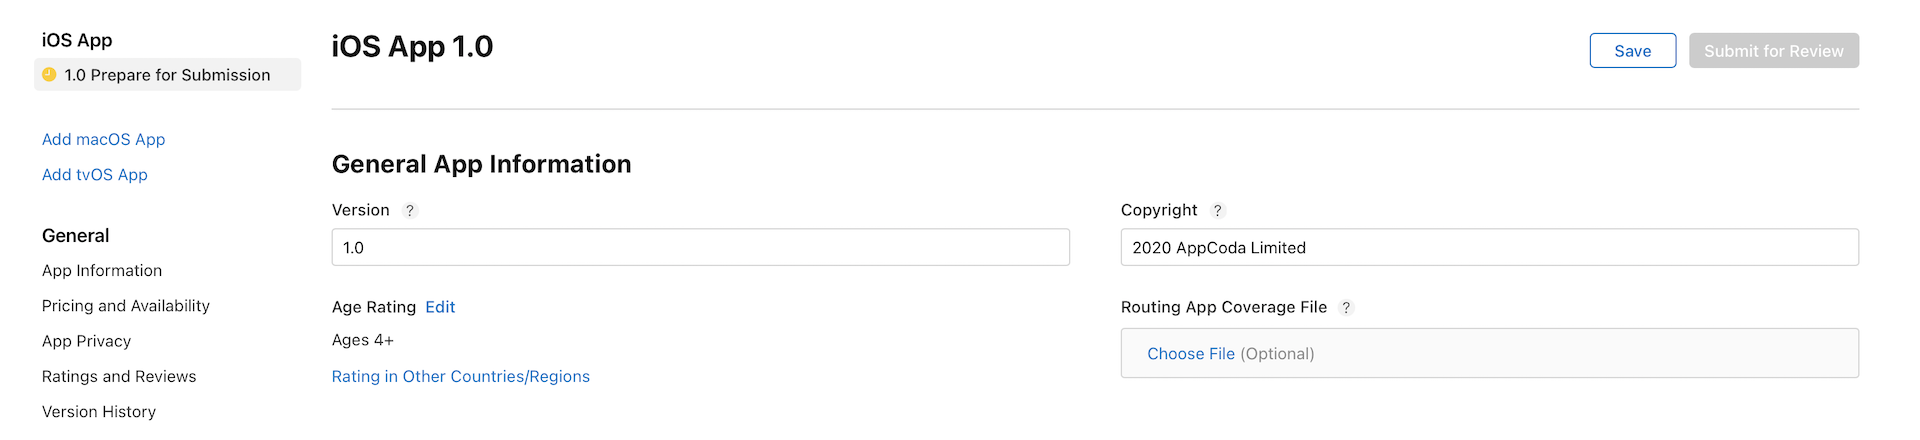
3. General App Information
You can skip the Build section and go straight to the General App Information section. This section is all about the general information of your app. You need to give a rating for your app. Just click the Edit button next to Rating and complete the form. App Store Connect generates a rating for your app based on your answers.
For the copyright field, you can just fill in your name or company preceded by the year the rights were obtained (e.g. 2020 AppCoda Limited).
4. App Review Information
Simply fill in your contact information in this section. The demo account field is optional. It is for those apps that require a login. For apps that do not require sign-in, uncheck the Sign-in required checkbox.
5. Version Release
You're allowed to release your app automatically or manually right once it has been approved by App Review. Just set it to Automatically release this version. Finally, click the Save button at the top right corner to save the changes.
If you didn't leave out any required information, the Submit for Review button should be enabled. That means your app record was successfully created on App Store Connect.
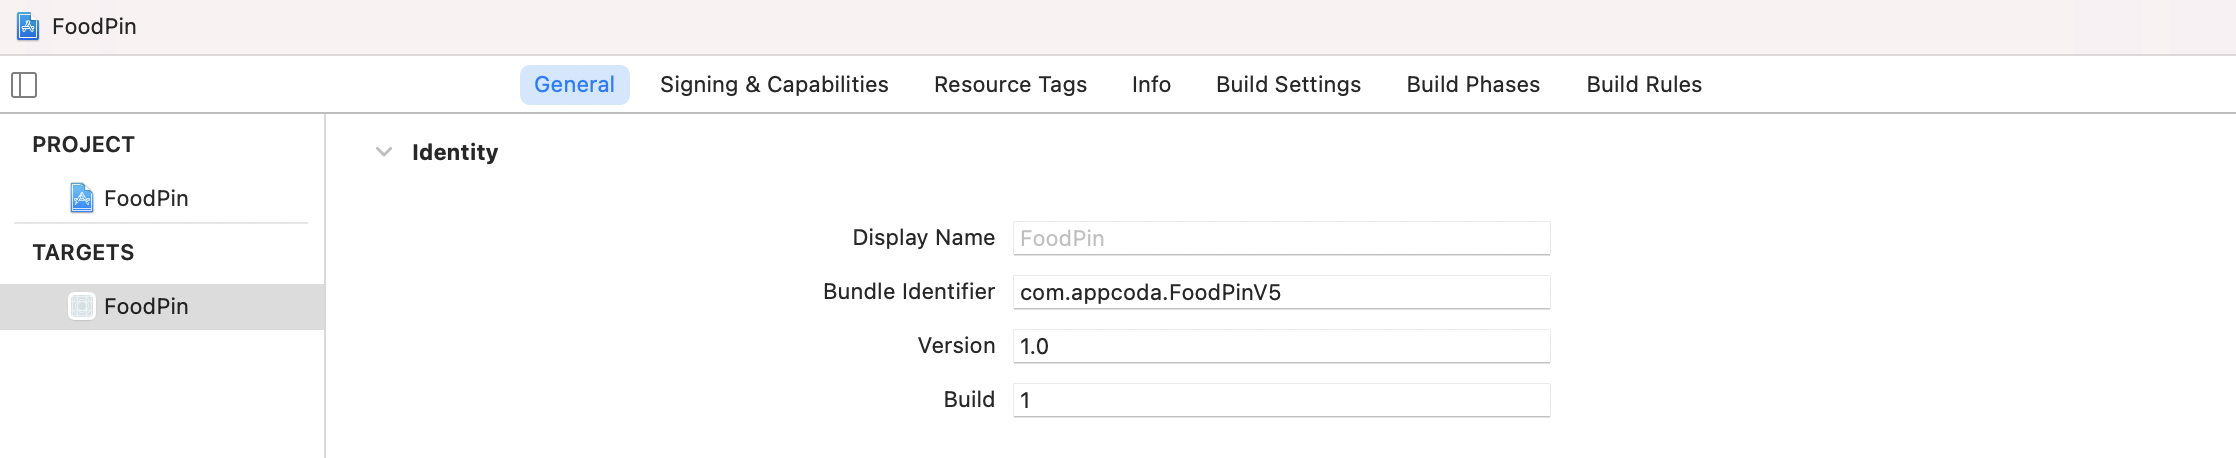
Update Your Build String
Now go back to Xcode. We're going to build the app and upload to App Store Connect. Before that, review your project and make sure the version number matches what you entered in App Store Connect. In the project navigator, select the project and the target to display the project editor. Under the General tab, review the version field under the Identity section. As this is the first build, set the Build field to 1.
Prepare Your App Icon and Launch Image
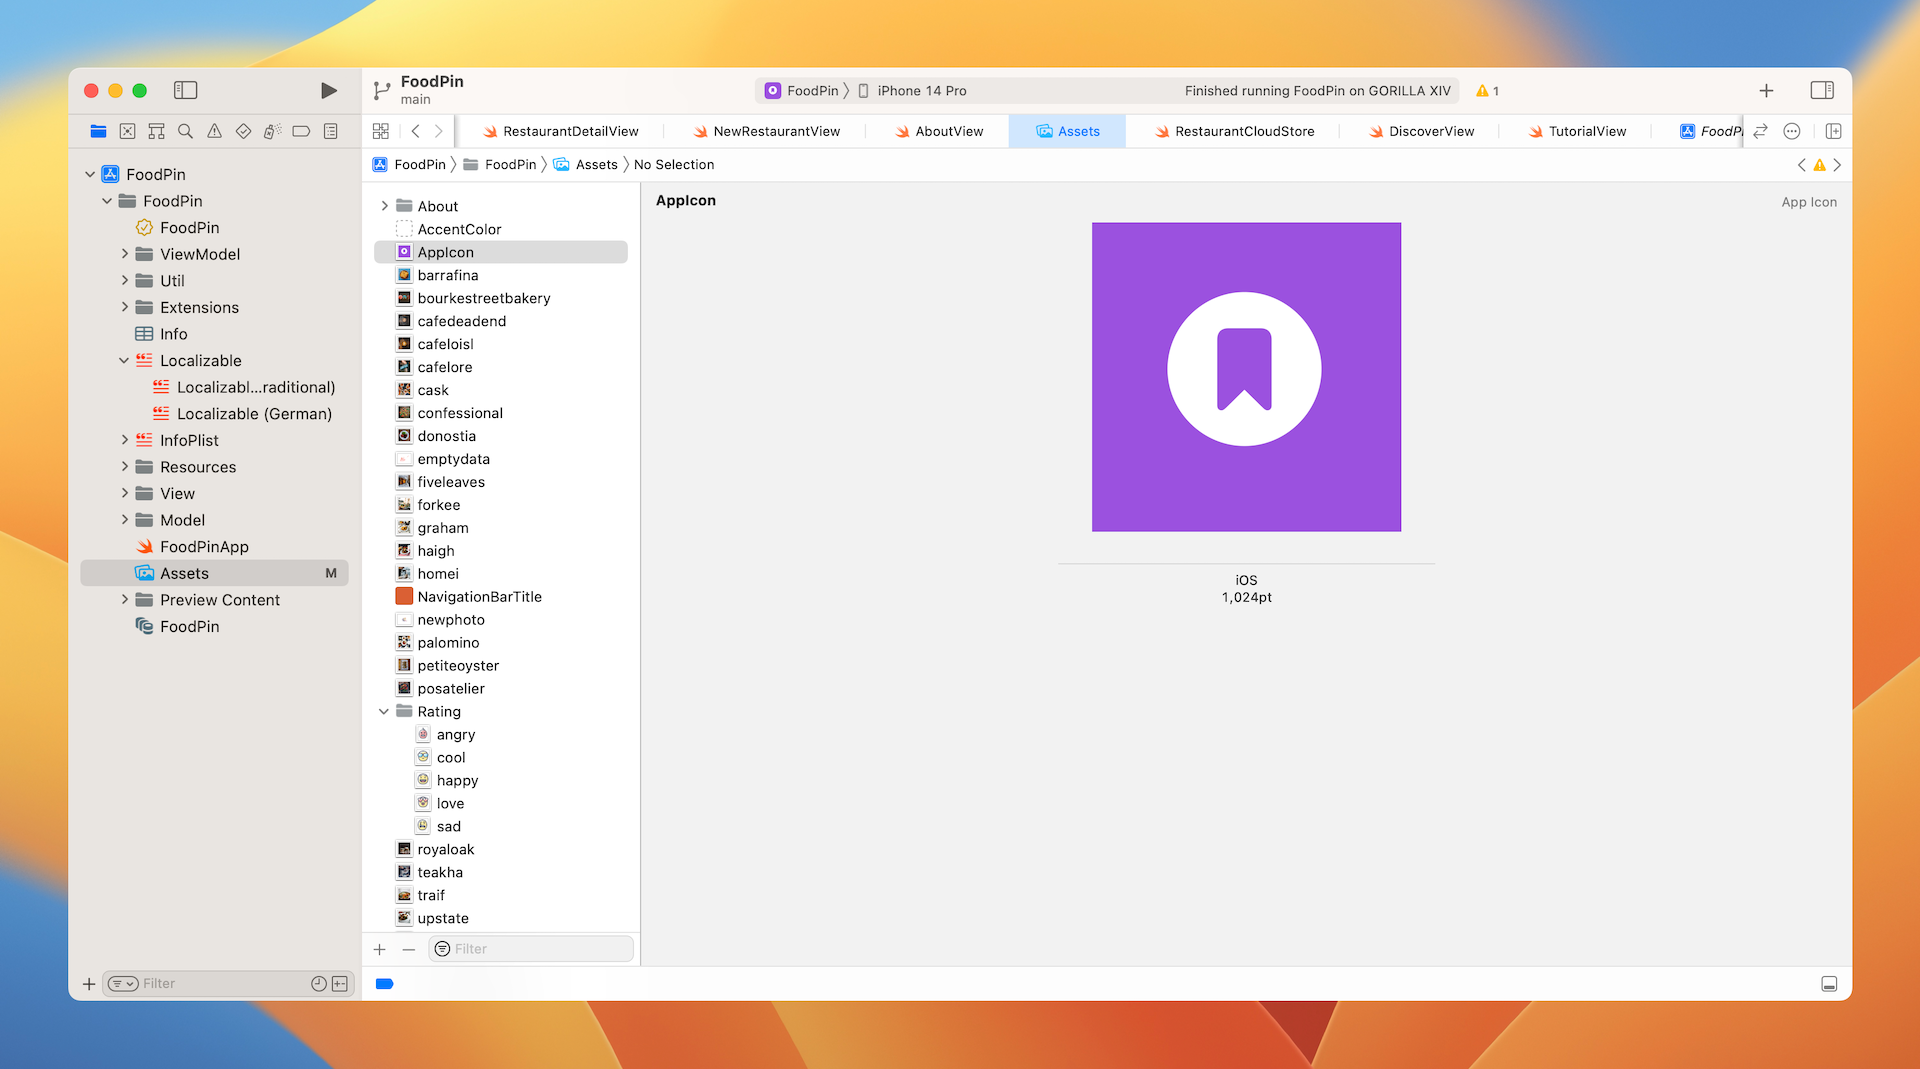
Before submitting your app, make sure you include the app icon and launch screen. The app icon is managed by the asset catalog. You should find the AppIcon set in Assets.xcassets.
Xcode 14 has made an improvement for developers to bundle the app icon. Prior to Xcode 14, you have to provide various sizes of app icons to fit for different devices. Now it's just required to include an app icon in 1024x1024 pixels. Xcode will then handle the rest of icon generations.
You may use design tools like Sketch and Figma to design app icons. Once created, you can drag and drop it into the asset catalog.
We have briefly mentioned the launch screen at the very beginning of the book. Xcode allows developers to use a storyboard or Interface Builder file to design a launch screen. In the FoodPin project, you should have a LaunchScreen.storyboard file, which is set as the default launch screen file in the project editor.
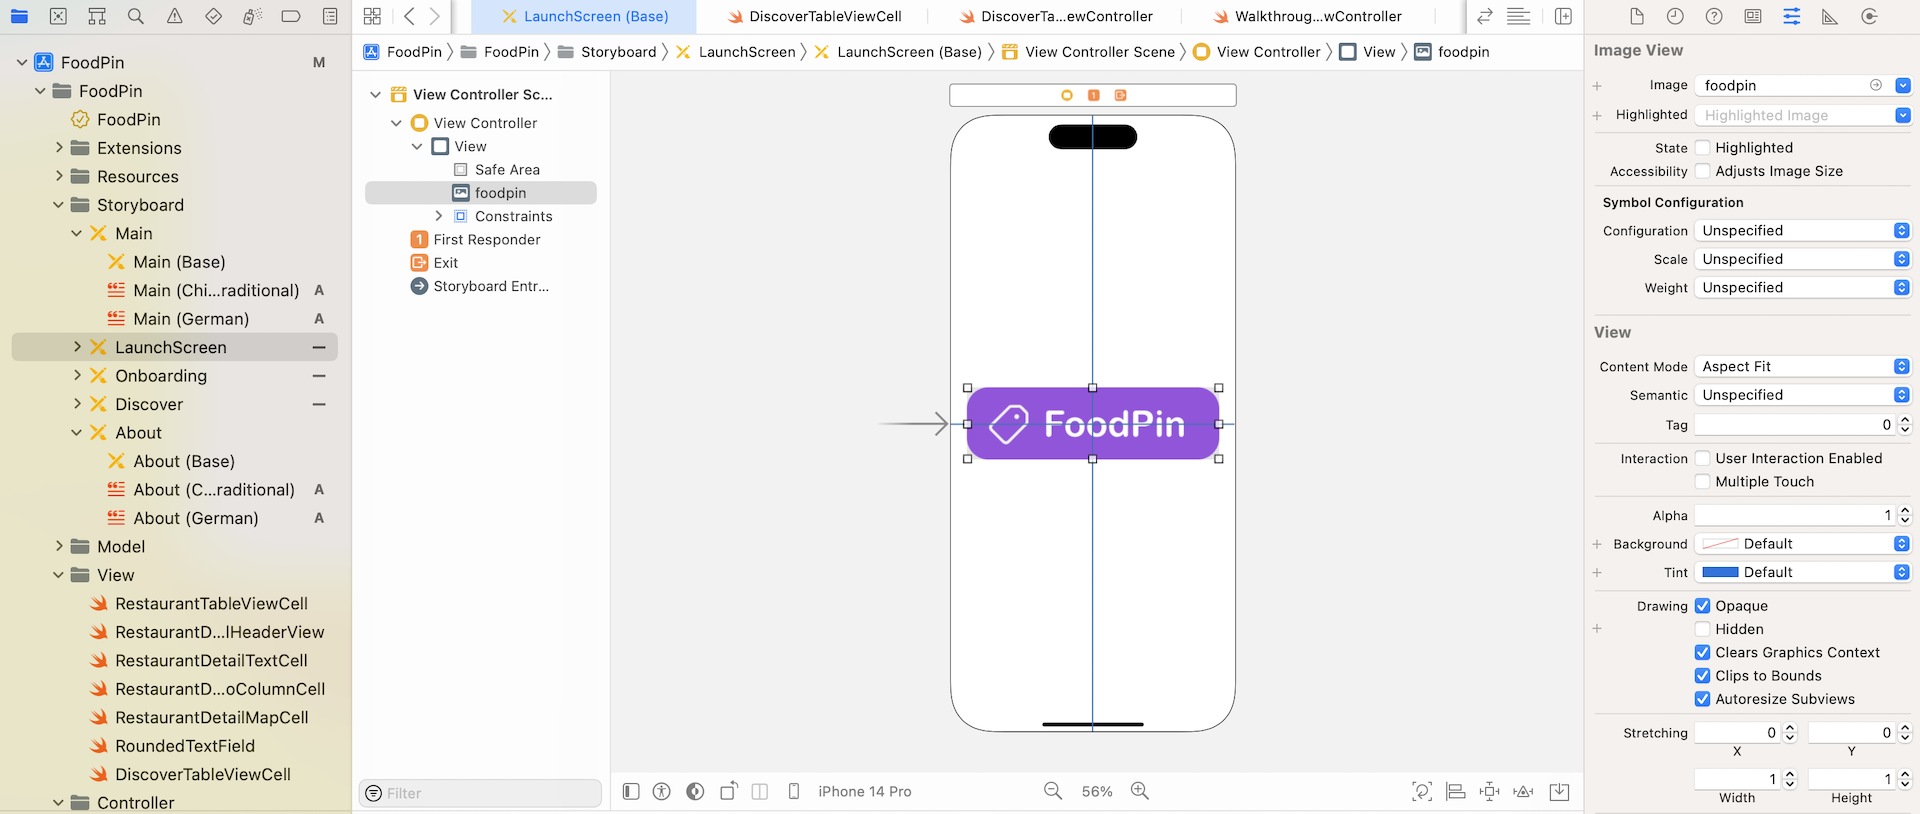
Quick tip: If you do not have a launch screen, you can right-click the FoodPin folder (or your project folder) and select "New File...". Just use the Launch Screen template under User Interface to create one.In the
LaunchScreen.storyboard file, you will find an empty view controller. When the app is launched, this view controller will be loaded as the startup screen. You're free to design its interface just like what you did for other view controllers. For reference, you can refer to Apple's Human Interface Guideline about the best practice of a launch screen. Figure 27-10 displays a sample launch screen design.
Archiving and Validating Your App
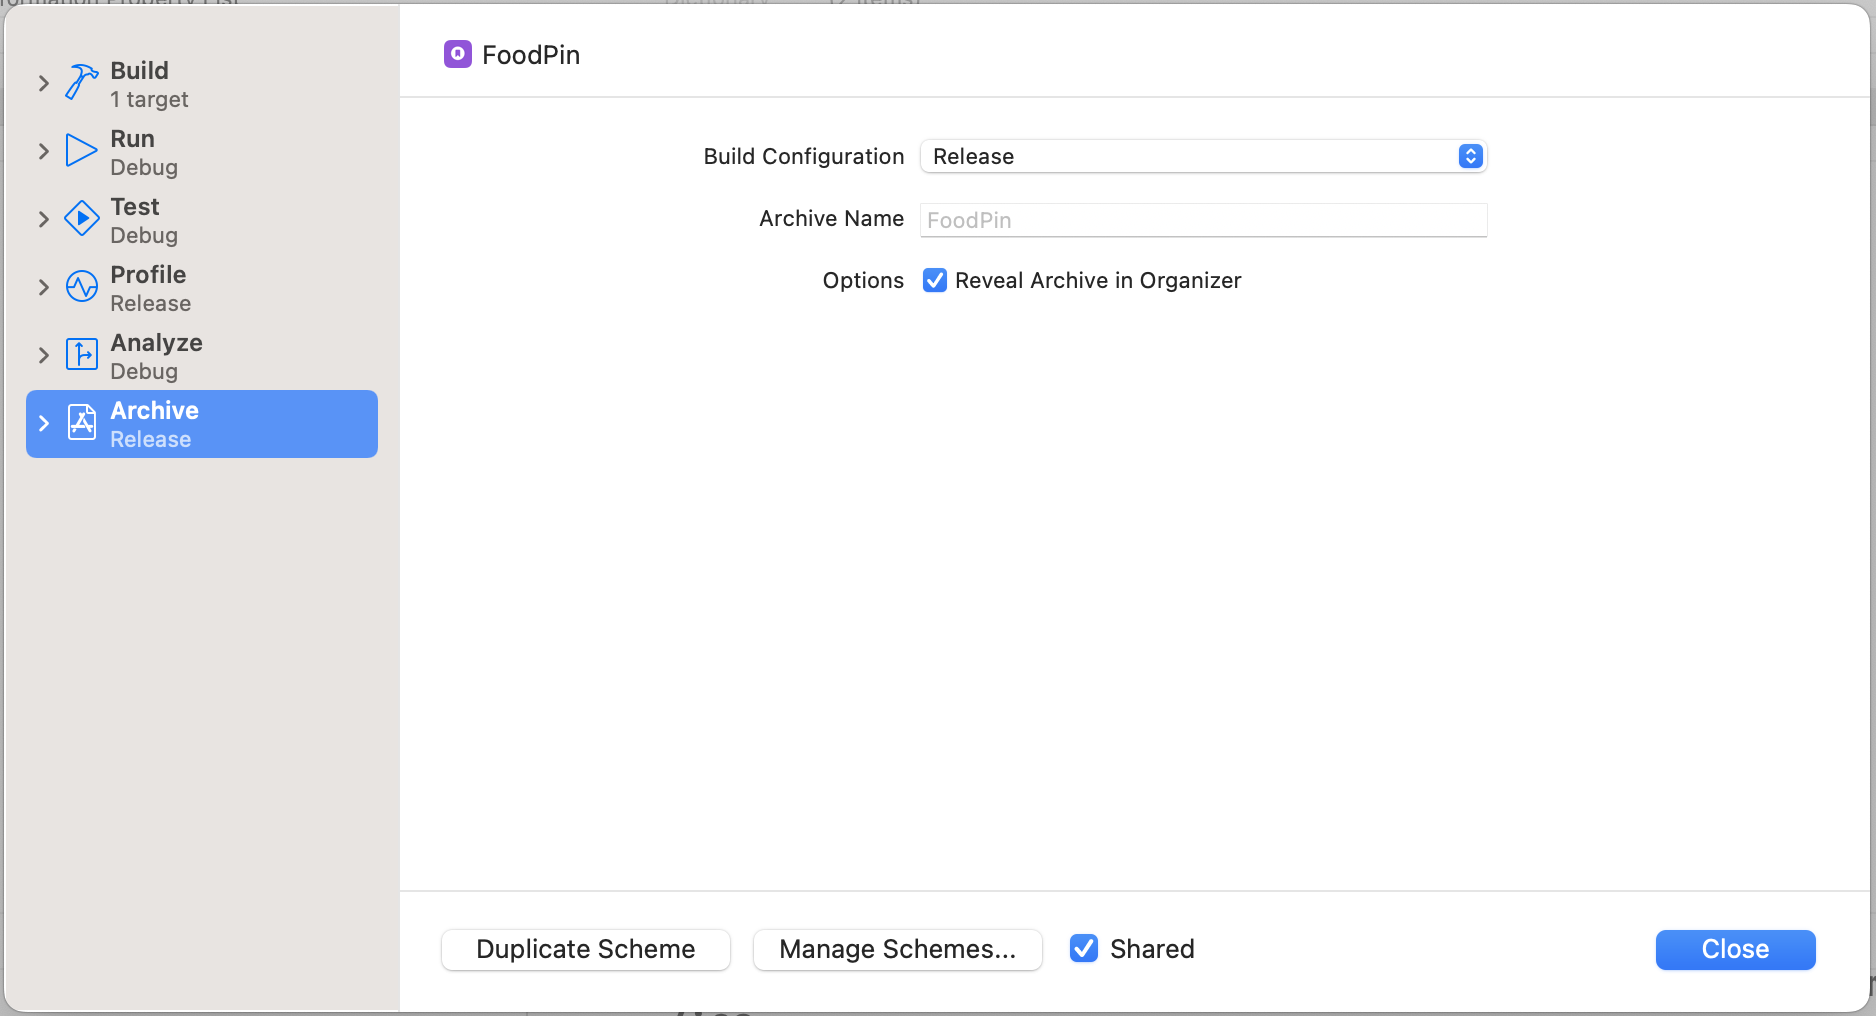
Before uploading an app to App Store Connect, you will need to create an app archive. First, review the Archive scheme settings and ensure the build configuration sets to Release (instead of Debug). Go up to the Xcode menu. Choose Product > Scheme > Edit Scheme. Select Archive scheme and review the Build Configuration setting. The option should be set to Release.
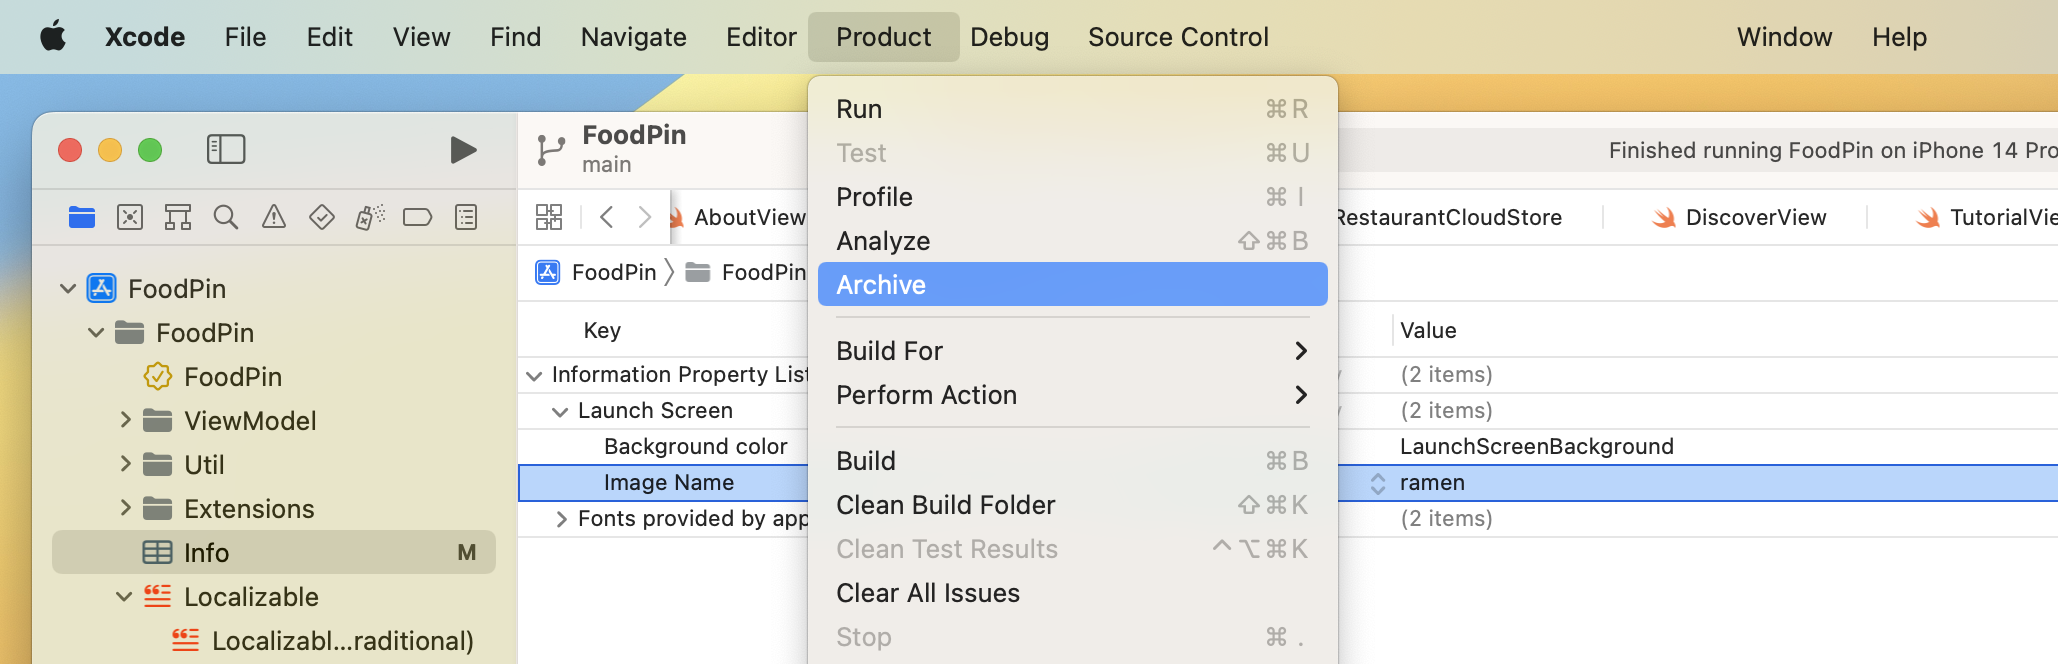
Now you're ready to archive your app. The Archive feature is disabled if you're using a simulator. Therefore, you need to select Any iOS Device or your device name (if you have connected a device to your Mac) from the Scheme pop-up menu. Then go up to the Xcode menu and choose Product > Archive.
After archiving, your archive will appear in the Organizer. It's ready to upload to App Store Connect. But it's best to go through the validation process to see if there are any issues. Just click the Validate App button to begin the validation process.

You will be prompted to choose the App Store distribution option. Just accept the default setting and proceed. In the next screen, choose Automatically manage signing to let Xcode sign the distribution release for you. Now click Validate to proceed. In case you are asked to generate an Apple Distribution certificate, please tick the checkbox. It's a required procedure for distributing an app on the App Store.
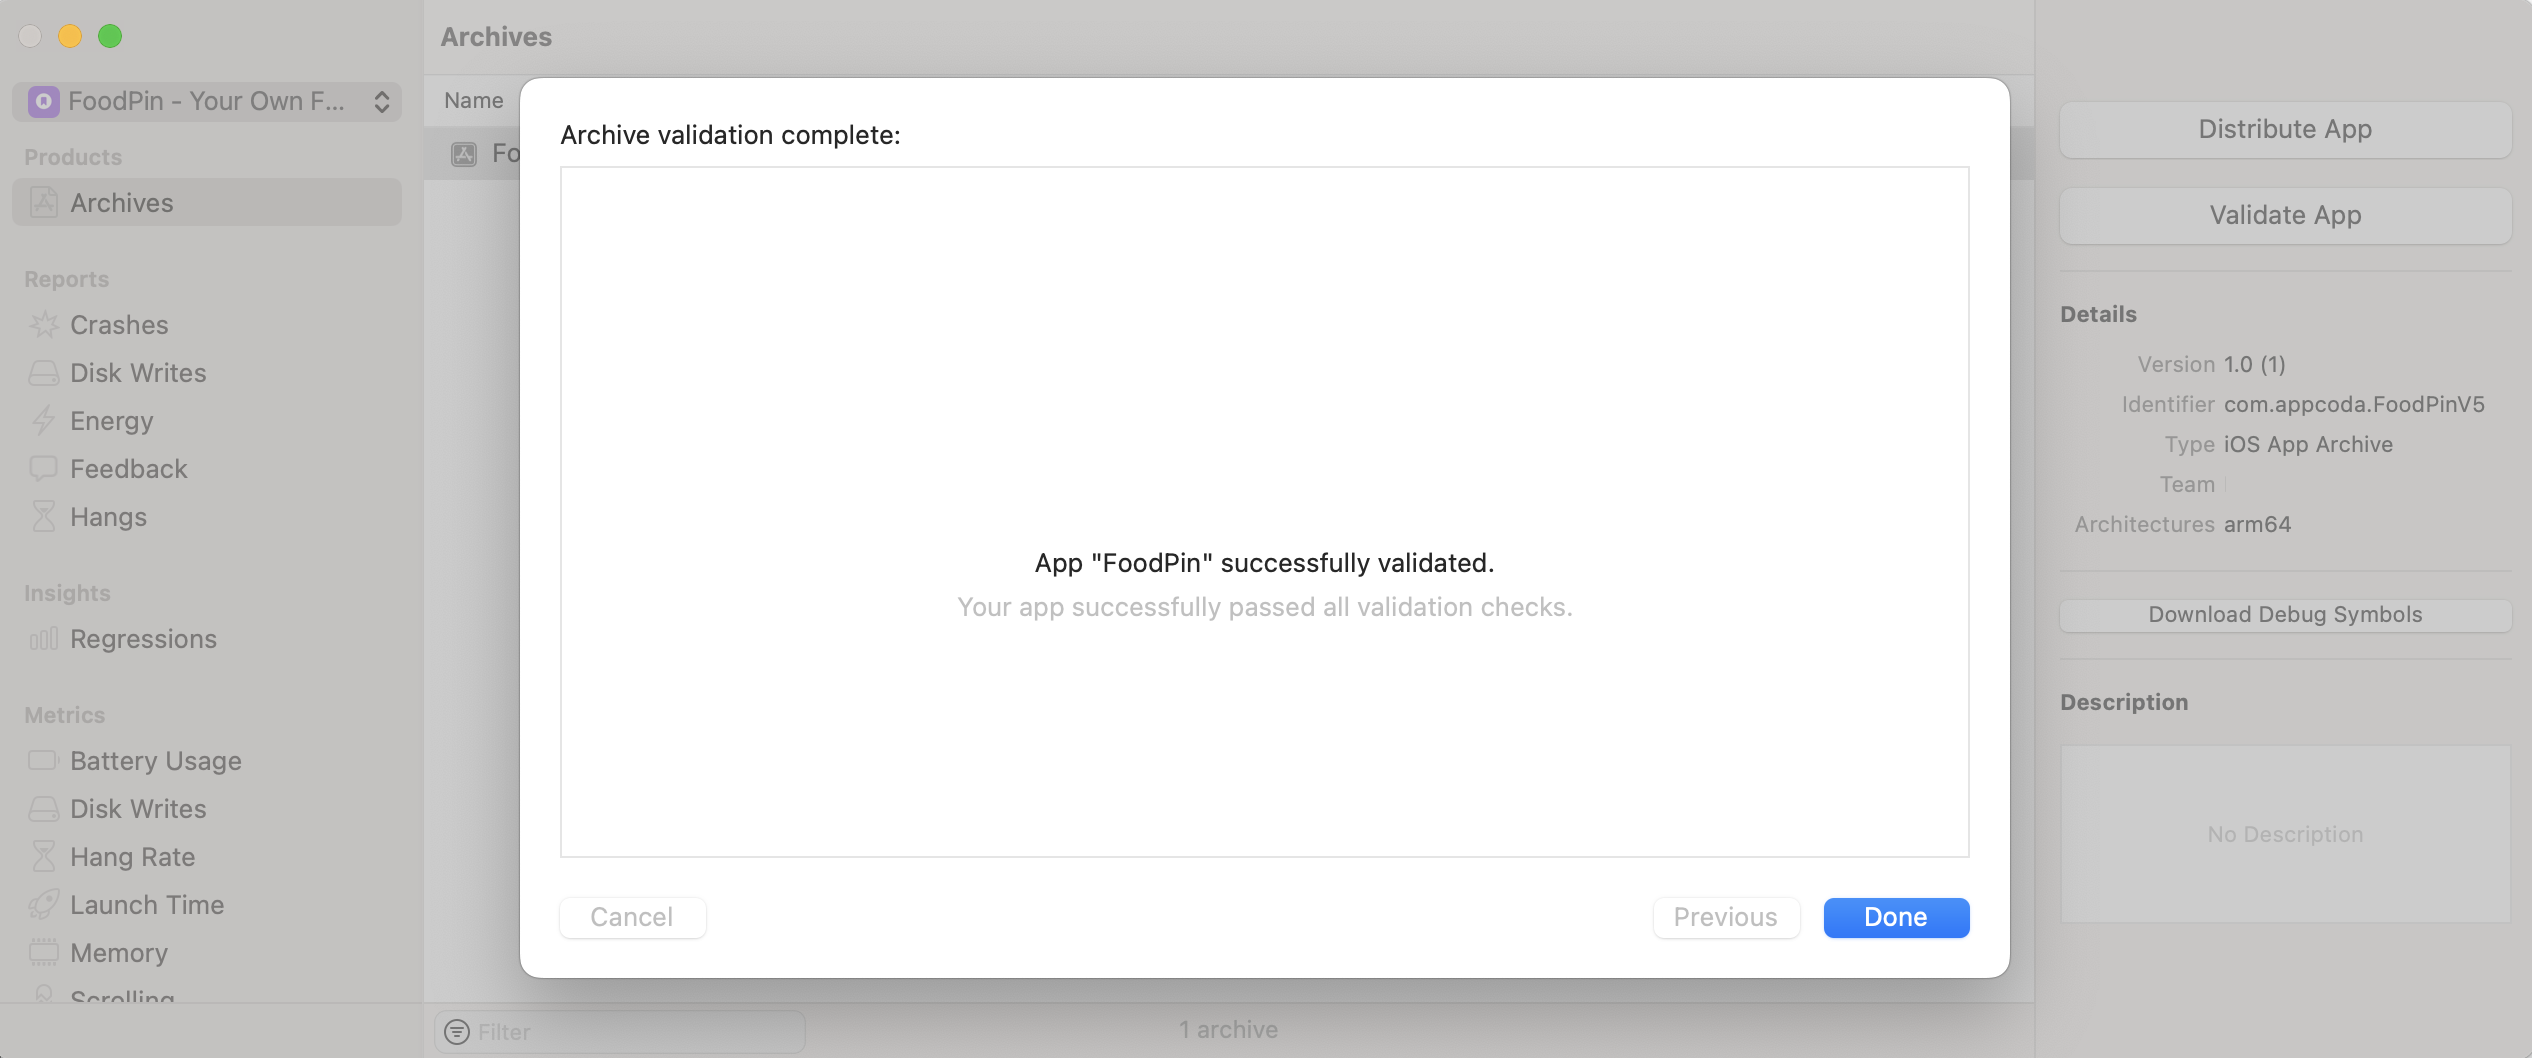
If your app fulfills all the requirements, you should see the message "Your app successfully passed all the validation checks."
Upload Your App to App Store Connect
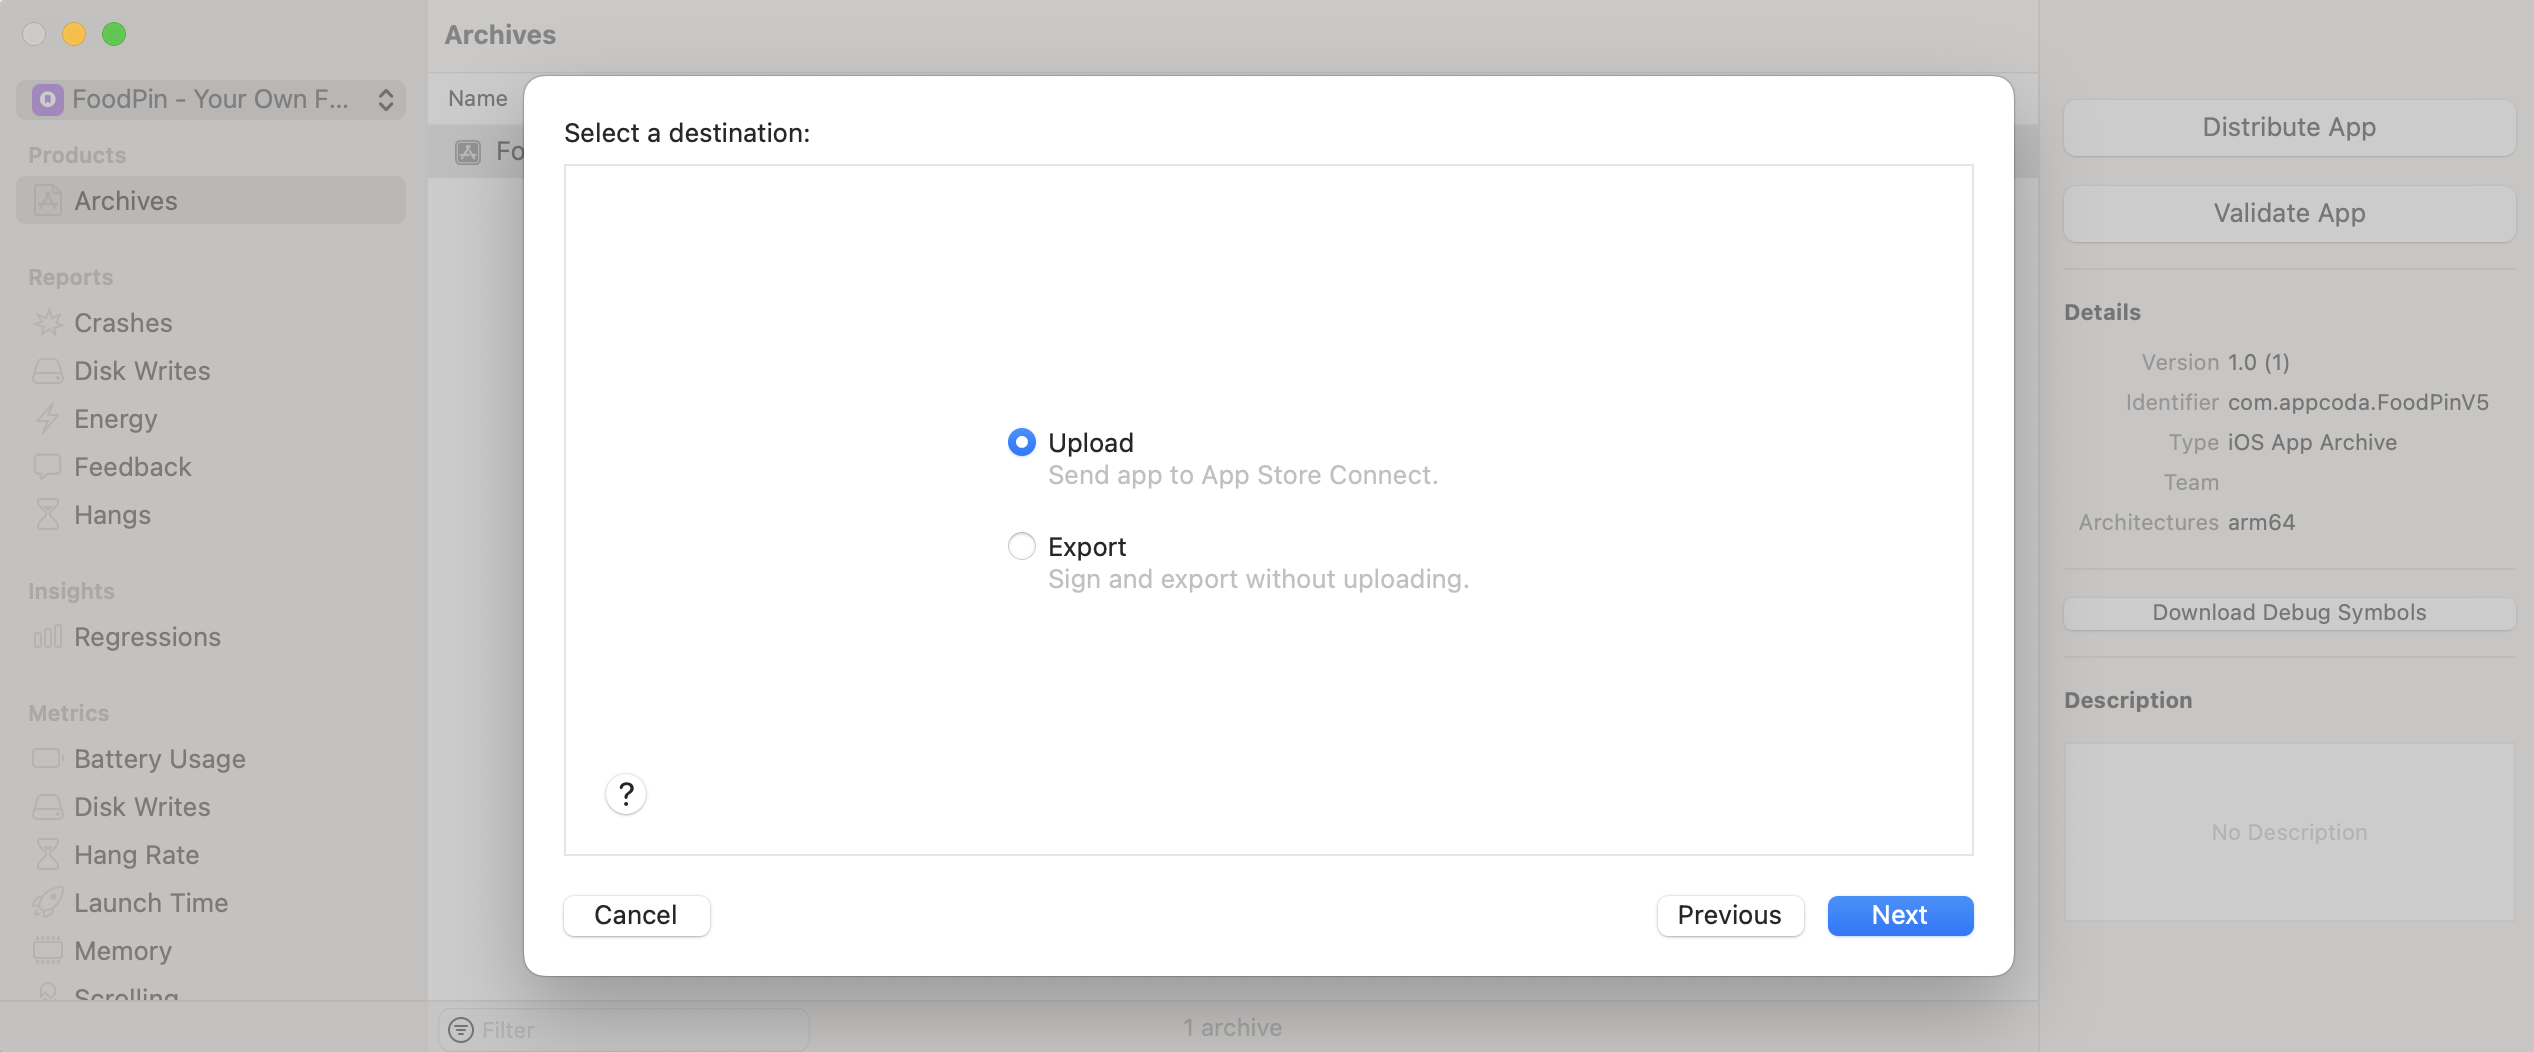
If the validation is successful, you can click the Distribute App button to upload the archive to App Store Connect. Since we want to upload to the App Store, choose App Store Connect when you are asked for the distribution method. Again, simply accept the default settings of the App Store Distribution options and then select the Automatically manage signing option.
Now click the Upload button to start uploading your app archive to App Store Connect. The whole process will take several minutes before you see the "Upload Success" message.
Manage Internal Testing
Now that you have uploaded your build to App Store Connect, let's see how you can roll out your app for internal testing.
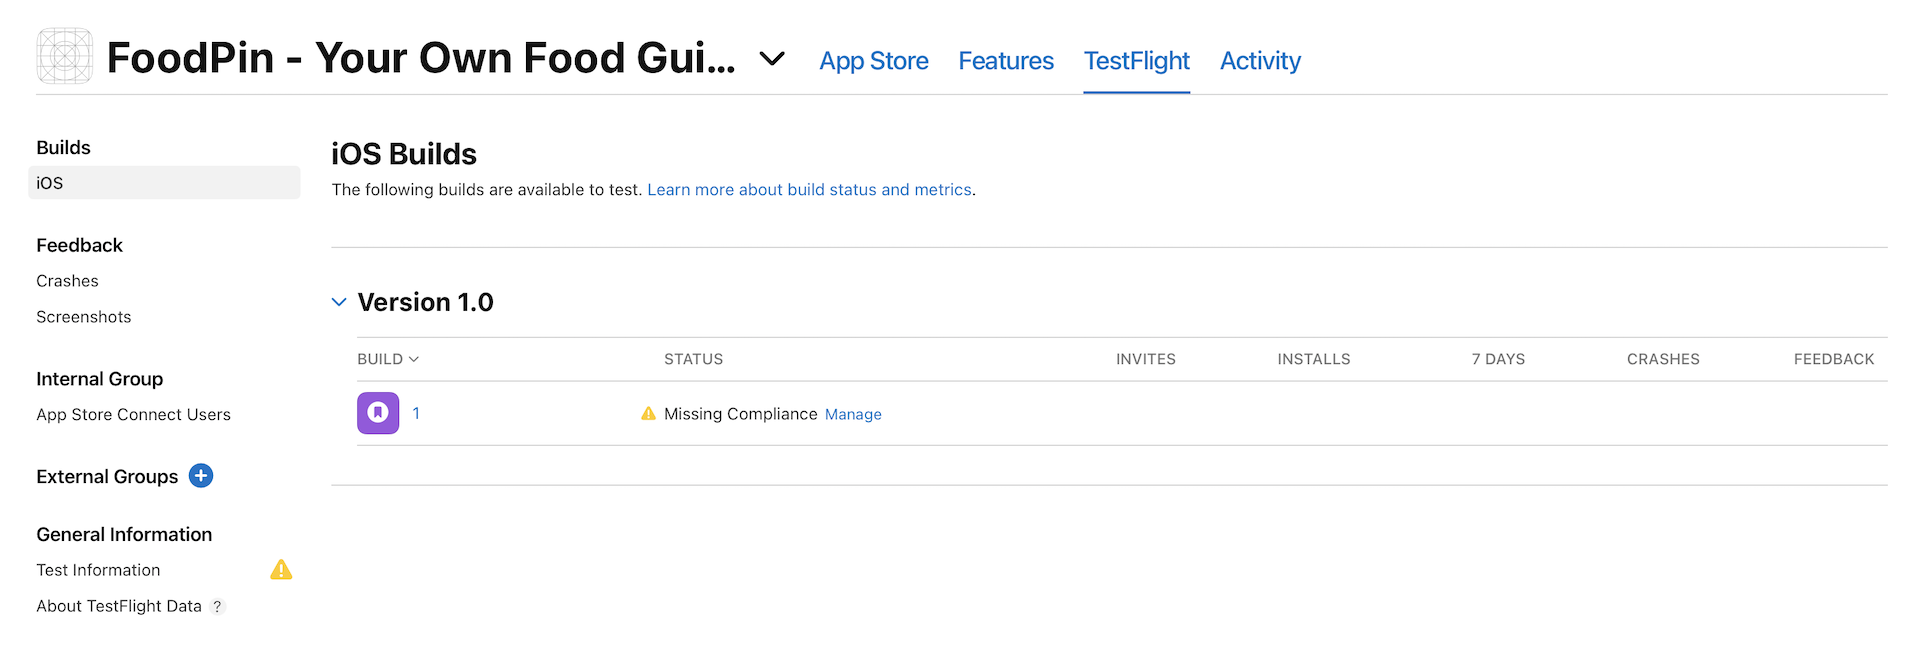
Go back to https://appstoreconnect.apple.com. Select My Apps and then your app. In the menu, choose TestFlight. It will take App Store Connect some time to process the build you just uploaded. If you don't see anything in TestFlight, go to Activity to check the status. It is very likely App Store Connect is still processing your build. Meanwhile, just wait and take a short break.
Assuming your build is ready for testing, it should appear in TestFlight. You first need to click the Manage button to provide the export compliance information.
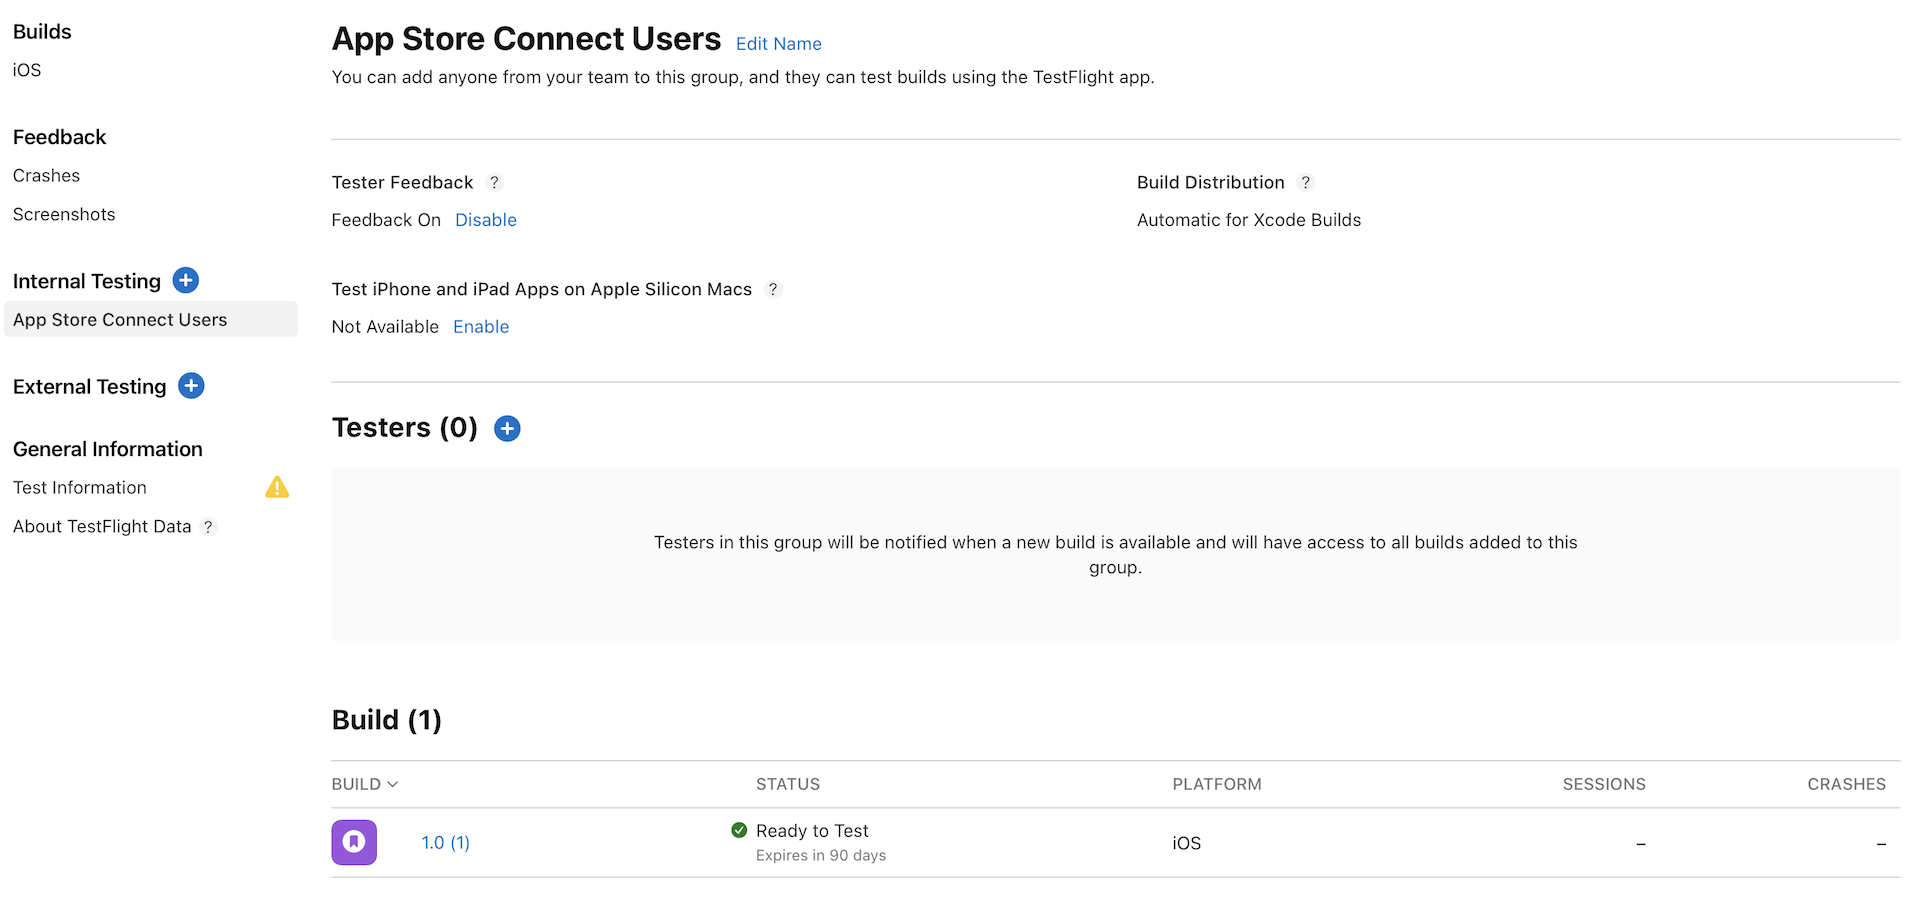
Before notifying your internal users to test the app, you have to fill in your test information including feedback email, privacy policy, marketing URL, and license agreement in TestFlight. Click Test Information and fill in the required information. Your testers can send feedback to the feedback email address. So make sure you enter the correct information.
Once you fill in the required information, select App Store Connect Users from the side menu. Click the + button next to Testers and choose the testers. Then click Add to confirm.
That's it. TestFlight will automatically inform the testers by email.
Note: Internal users refer to those who are part of your iTunes Connect team with the Admin, Legal, or Technical role. If you want to add more users or change their roles, select iTunes Connect > Users and Roles, and then click + to add the user. Alternatively, you can add individual testers directly.When a tester receives the email notification, he/she needs to click the View in TestFlight button. iOS automatically opens the link in Safari. The tester just follows the instructions to install the TestFlight app, and then use the redeem code to download the app.
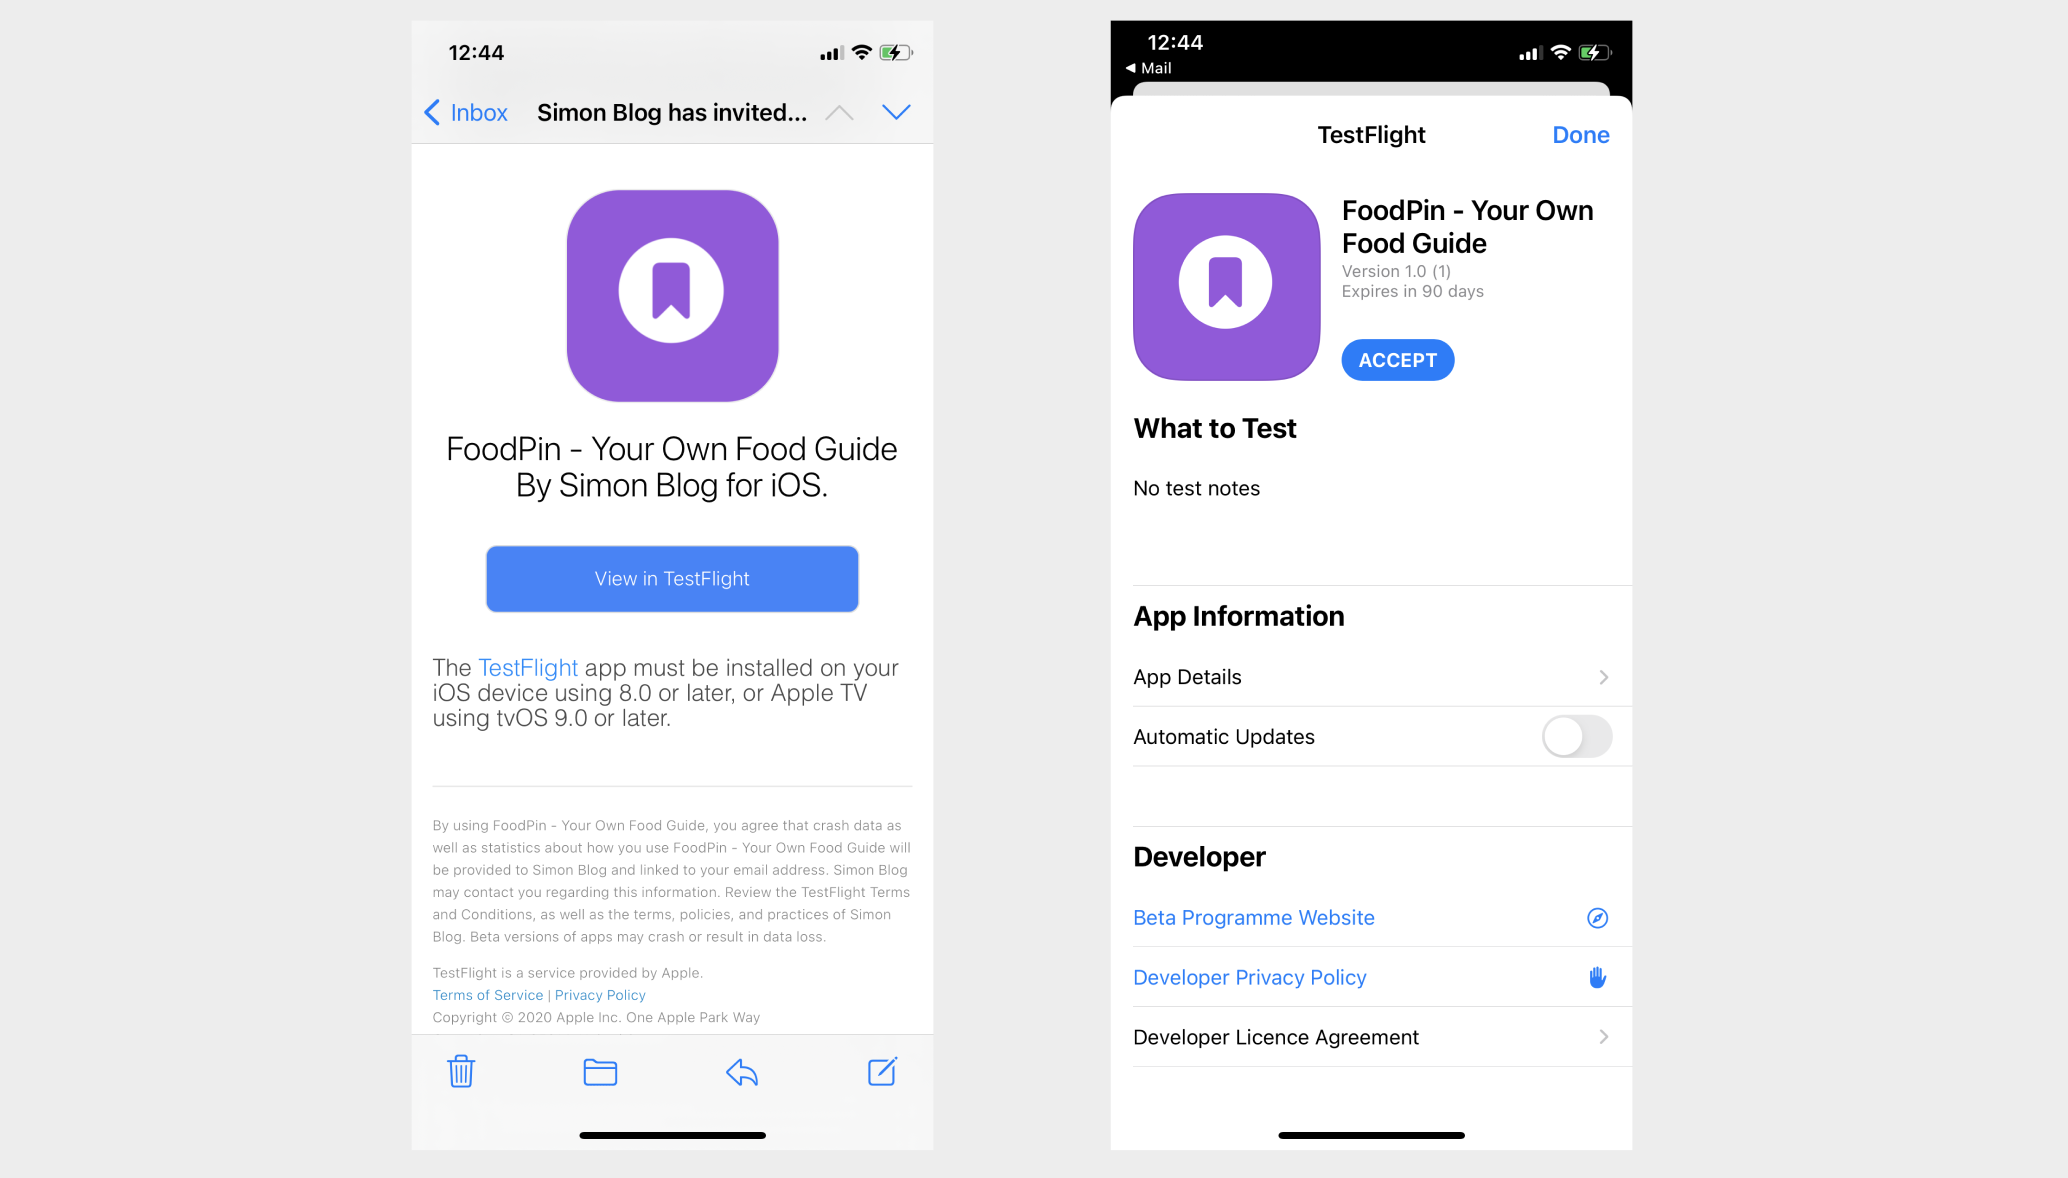
The beta version of your app expires in 90 days. For any future update of your beta app, your internal testers will always get the most recent build you uploaded.
Manage Beta Testing with External Users
You're allowed to invite up to 25 internal users for testing. Once your app lives up to the expectation of your users, you can invite more users to test out your app. TestFlight lets you invite up to 10,000 external users for beta testing. All you need is an email address of each of the testers so that you can send them an invite.
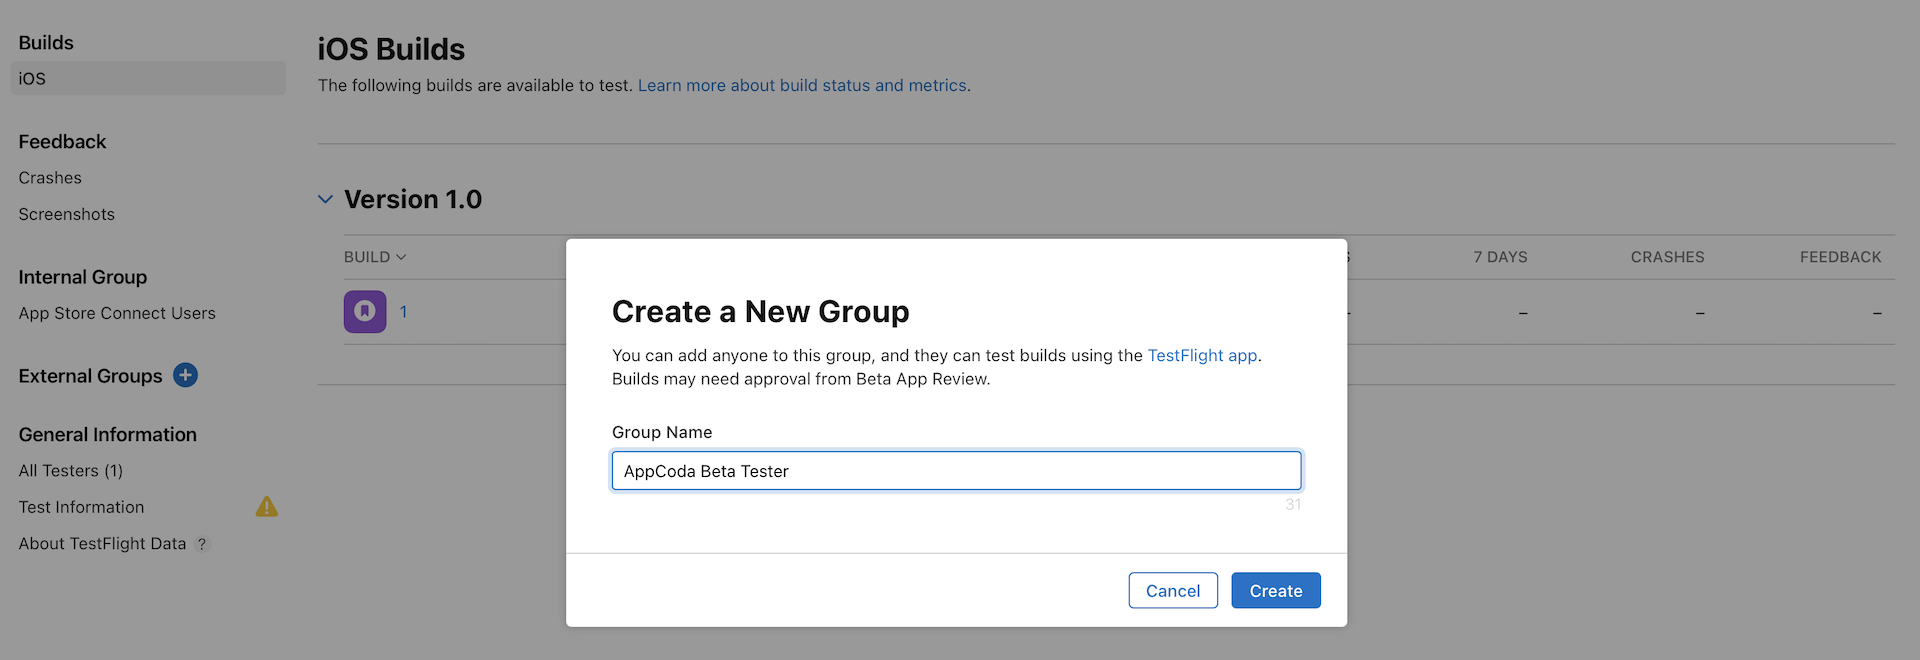
To add the external testers, click Add External Testers in the side menu. You are allowed to create multiple groups to organize your testers. When prompted, enter the name of your group and then hit Create.
Follow the instructions to add the new testers. You can manually fill in their email address or import them by uploading a CSV file.
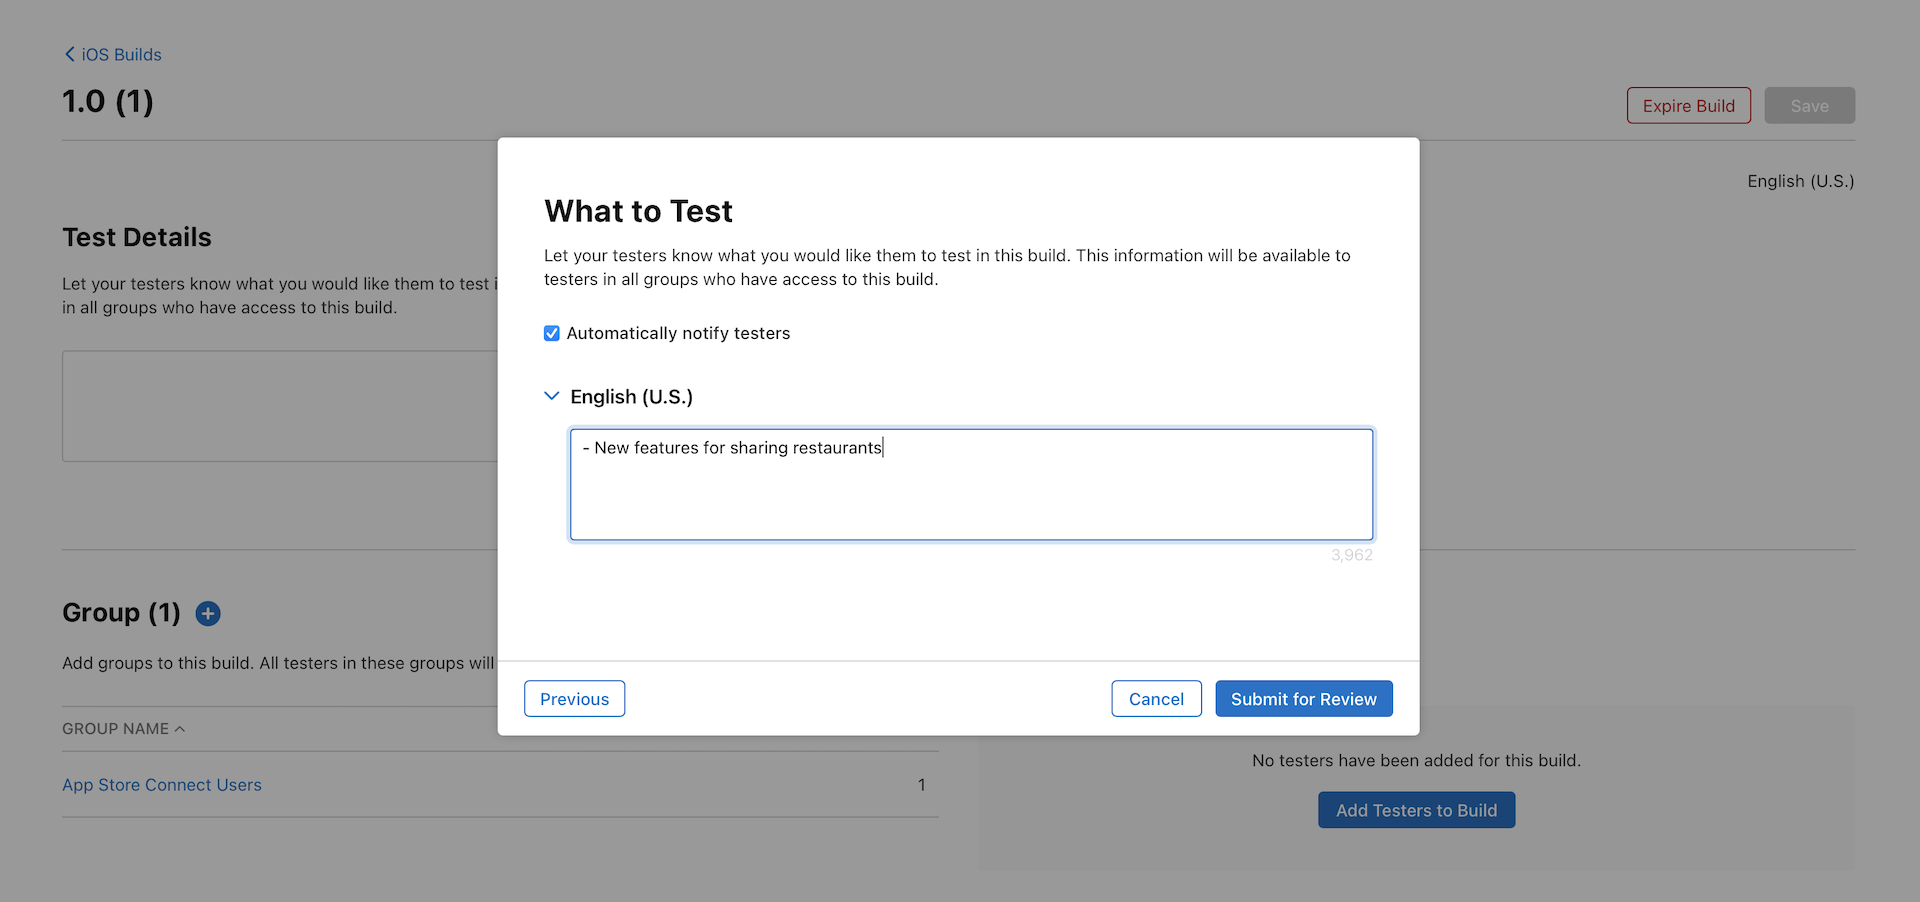
Once you created the group, choose iOS in the side menu and then click the app icon. Next, click the + icon next to Group. In the popover, select the group you just created and proceed. Follow the instructions to enter the test information for your beta testers.
As mentioned earlier, your app must be approved by Apple before you can send out your invitations. So the last step is to hit the Submit for Review button to submit your app for review.
Once your app is submitted for review, the build status will change to Waiting for Beta App Review. Normally it'll take less than two days before your app is approved.
After Apple approves your beta app, the external users will be notified for beta testing.
CloudKit Production Deployment
The FoodPin app utilizes the iCloud database to store public records. Up till now, we only test our app in the development environment of CloudKit. For apps distributed using TestFlight, they are no longer allowed to use the development environment. Therefore, you have to deploy the database configuration of the development environment to production.
To do that, go back to the CloudKit dashboard and choose your container. In the sidebar, you should find the Deploy Schema Changes... button. Click on it to set up the production environment.
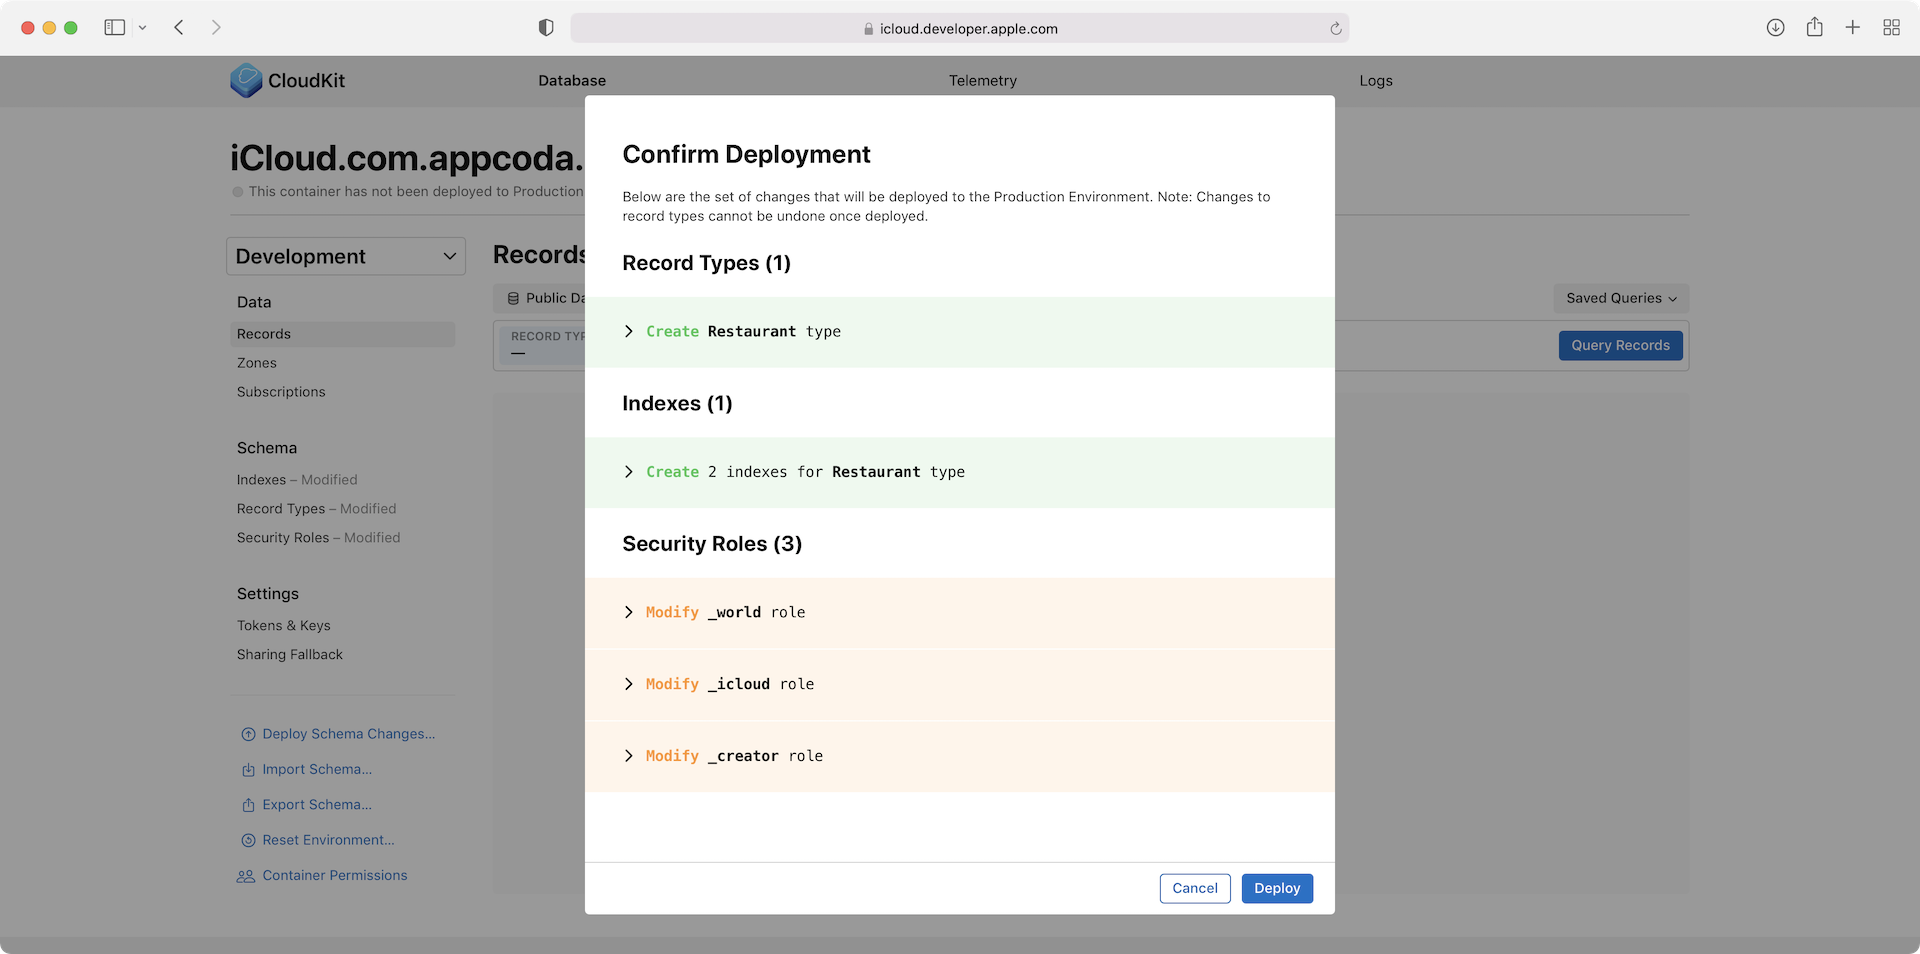
You will be prompted to confirm the deployment. Click Deploy to proceed. Deployment only promotes the schema (e.g. record types) to the production environment. However, it doesn’t copy the records in the development environment to the production environment. So you have to create the production environment with records after the deployment.
Summary
TestFlight provides us with a powerful tool to easily beta test our apps. In this chapter, I have walked you through the basics of TestFlight Beta Testing. If you're building your next app, use the tool to invite your friends and beta users to test out your app before the official release. This is an important step to build a high-quality app.